LiFePO₄ Battery
September - November 2019
Finally, in September 2019, I could afford to buy my new LiFePO₄ Cells, that soon after
arrived from GWL in the Czech Republic.
I bought 4 x 200A Winston Cells with a BMS123 Smart
Ive moved from a Lead Acid (LA) (AGM) battery technology to LiFePO₄ (Lithium Iron Phosphate)
for a number of reasons.
Advantages:
1: I can use up to 80% of my battery capacity (SOC[State of Charge]) compared with only 30 - 50% available with LA.
2: I dont have to charge them to full. Actually a LiFePO₄ is happy sitting at half full.
To prolong its life span, a LA battery must always be fully charged as soon as possible.
3: Charging Amps, up to 100% of a LiFePO₄ batteries capacity, can be used right to end of charging.
Whereas LA can only use a charge that is 10 - 30% of the battery capacity, up to 80% full, then taper off for the last 20% of charge, and this can take hours.
Something not available in winter, is waiting hours while a tiny finishing current dribbles in!
4: LiFePO₄ is lighter and takes up less space.
My LiFePO₄ battery is 31.6 kg, compared to 70 kg for the old AGM
5: LiFePO₄ has a constant discharge Voltage that doesnt drop much over its working curve, generally around 13.3V
6: Im expecting a long life span for my battery (15 years or more) if I look after it and dont charge it way into the knees and keep it cool in the sommer. (another project here to build a cool box using Peltier units to cool, it and keep battery at 20°C to 25°C)
Disadvantages:
1: Needs a BMS to monitor their cell voltages and a system within this that will isolate the battery in the event of Over Voltage and Under Voltage.
The cells must be kept balanced between themselves, actively or manually.
2: All charging must stop at 5°C and below.
3: Cost!!
During winter Im using a higher charge finishing Voltage than I will in sommer as I get so much more sunshine hours and sun intensity than in winter. At the moment, winter is set to 13.8V
In sommer Ill probably go to 13.6V or lower depending on usage.
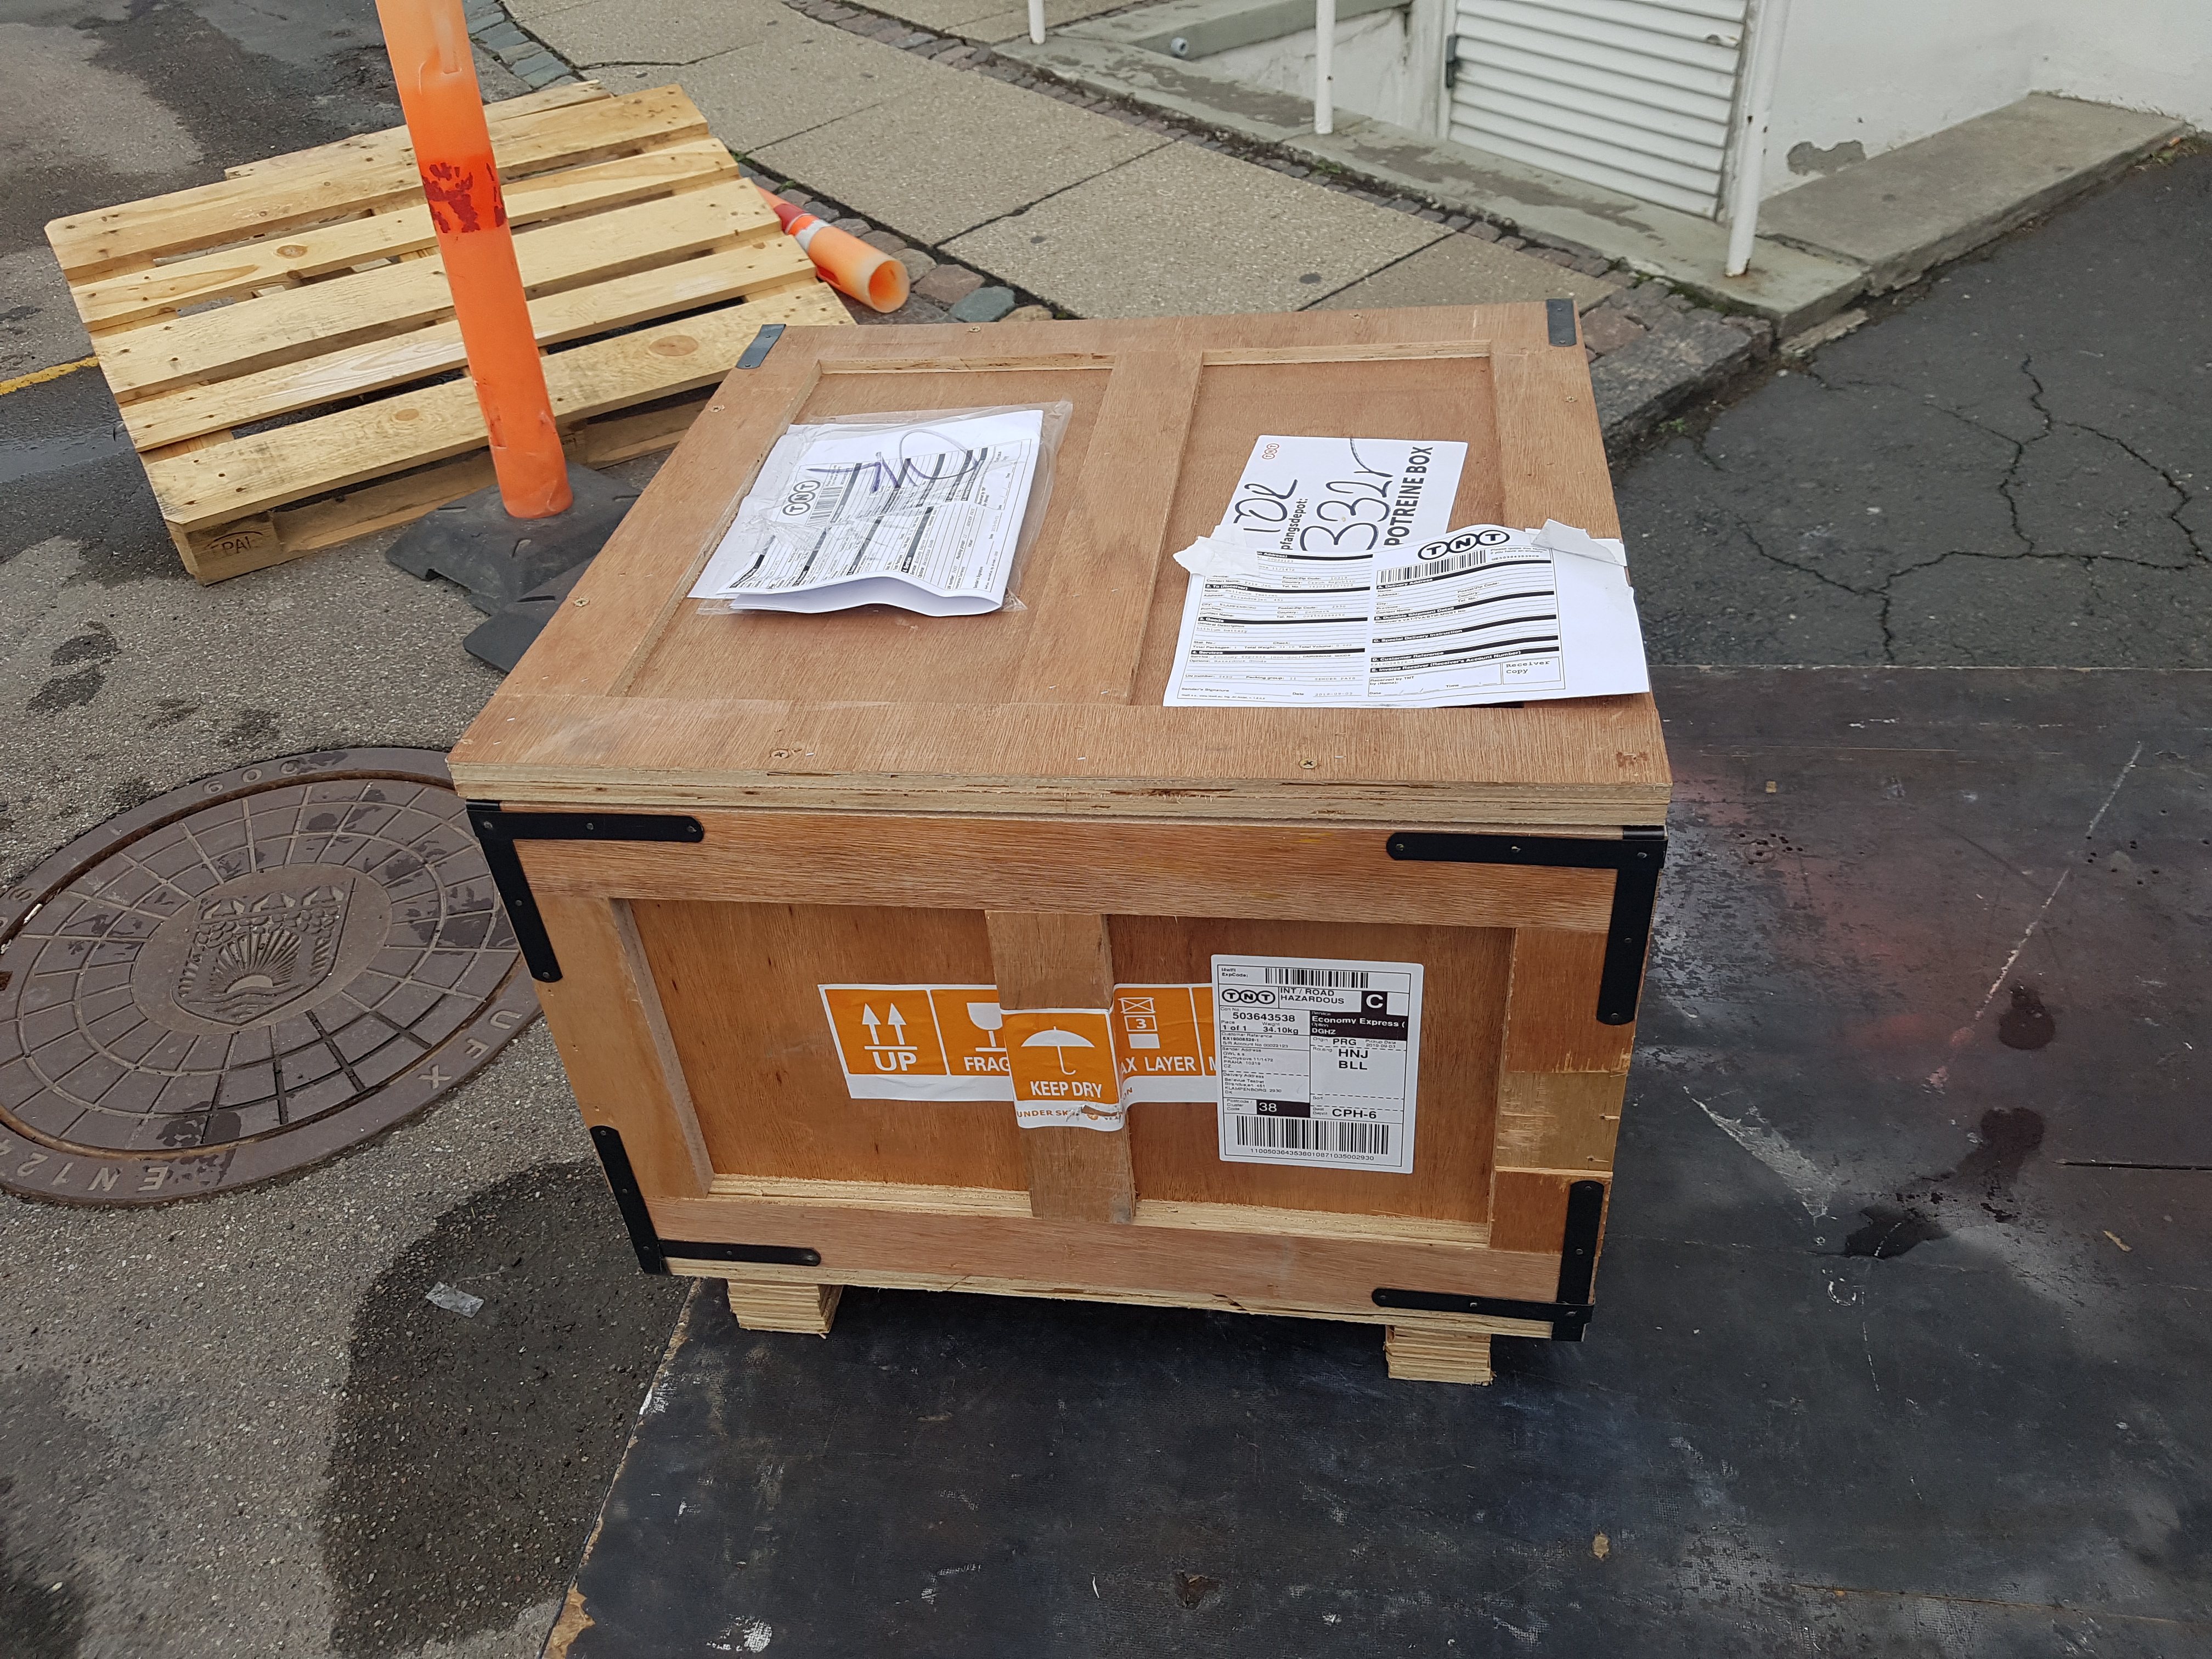
Yay my crate of Cells has arrived ?
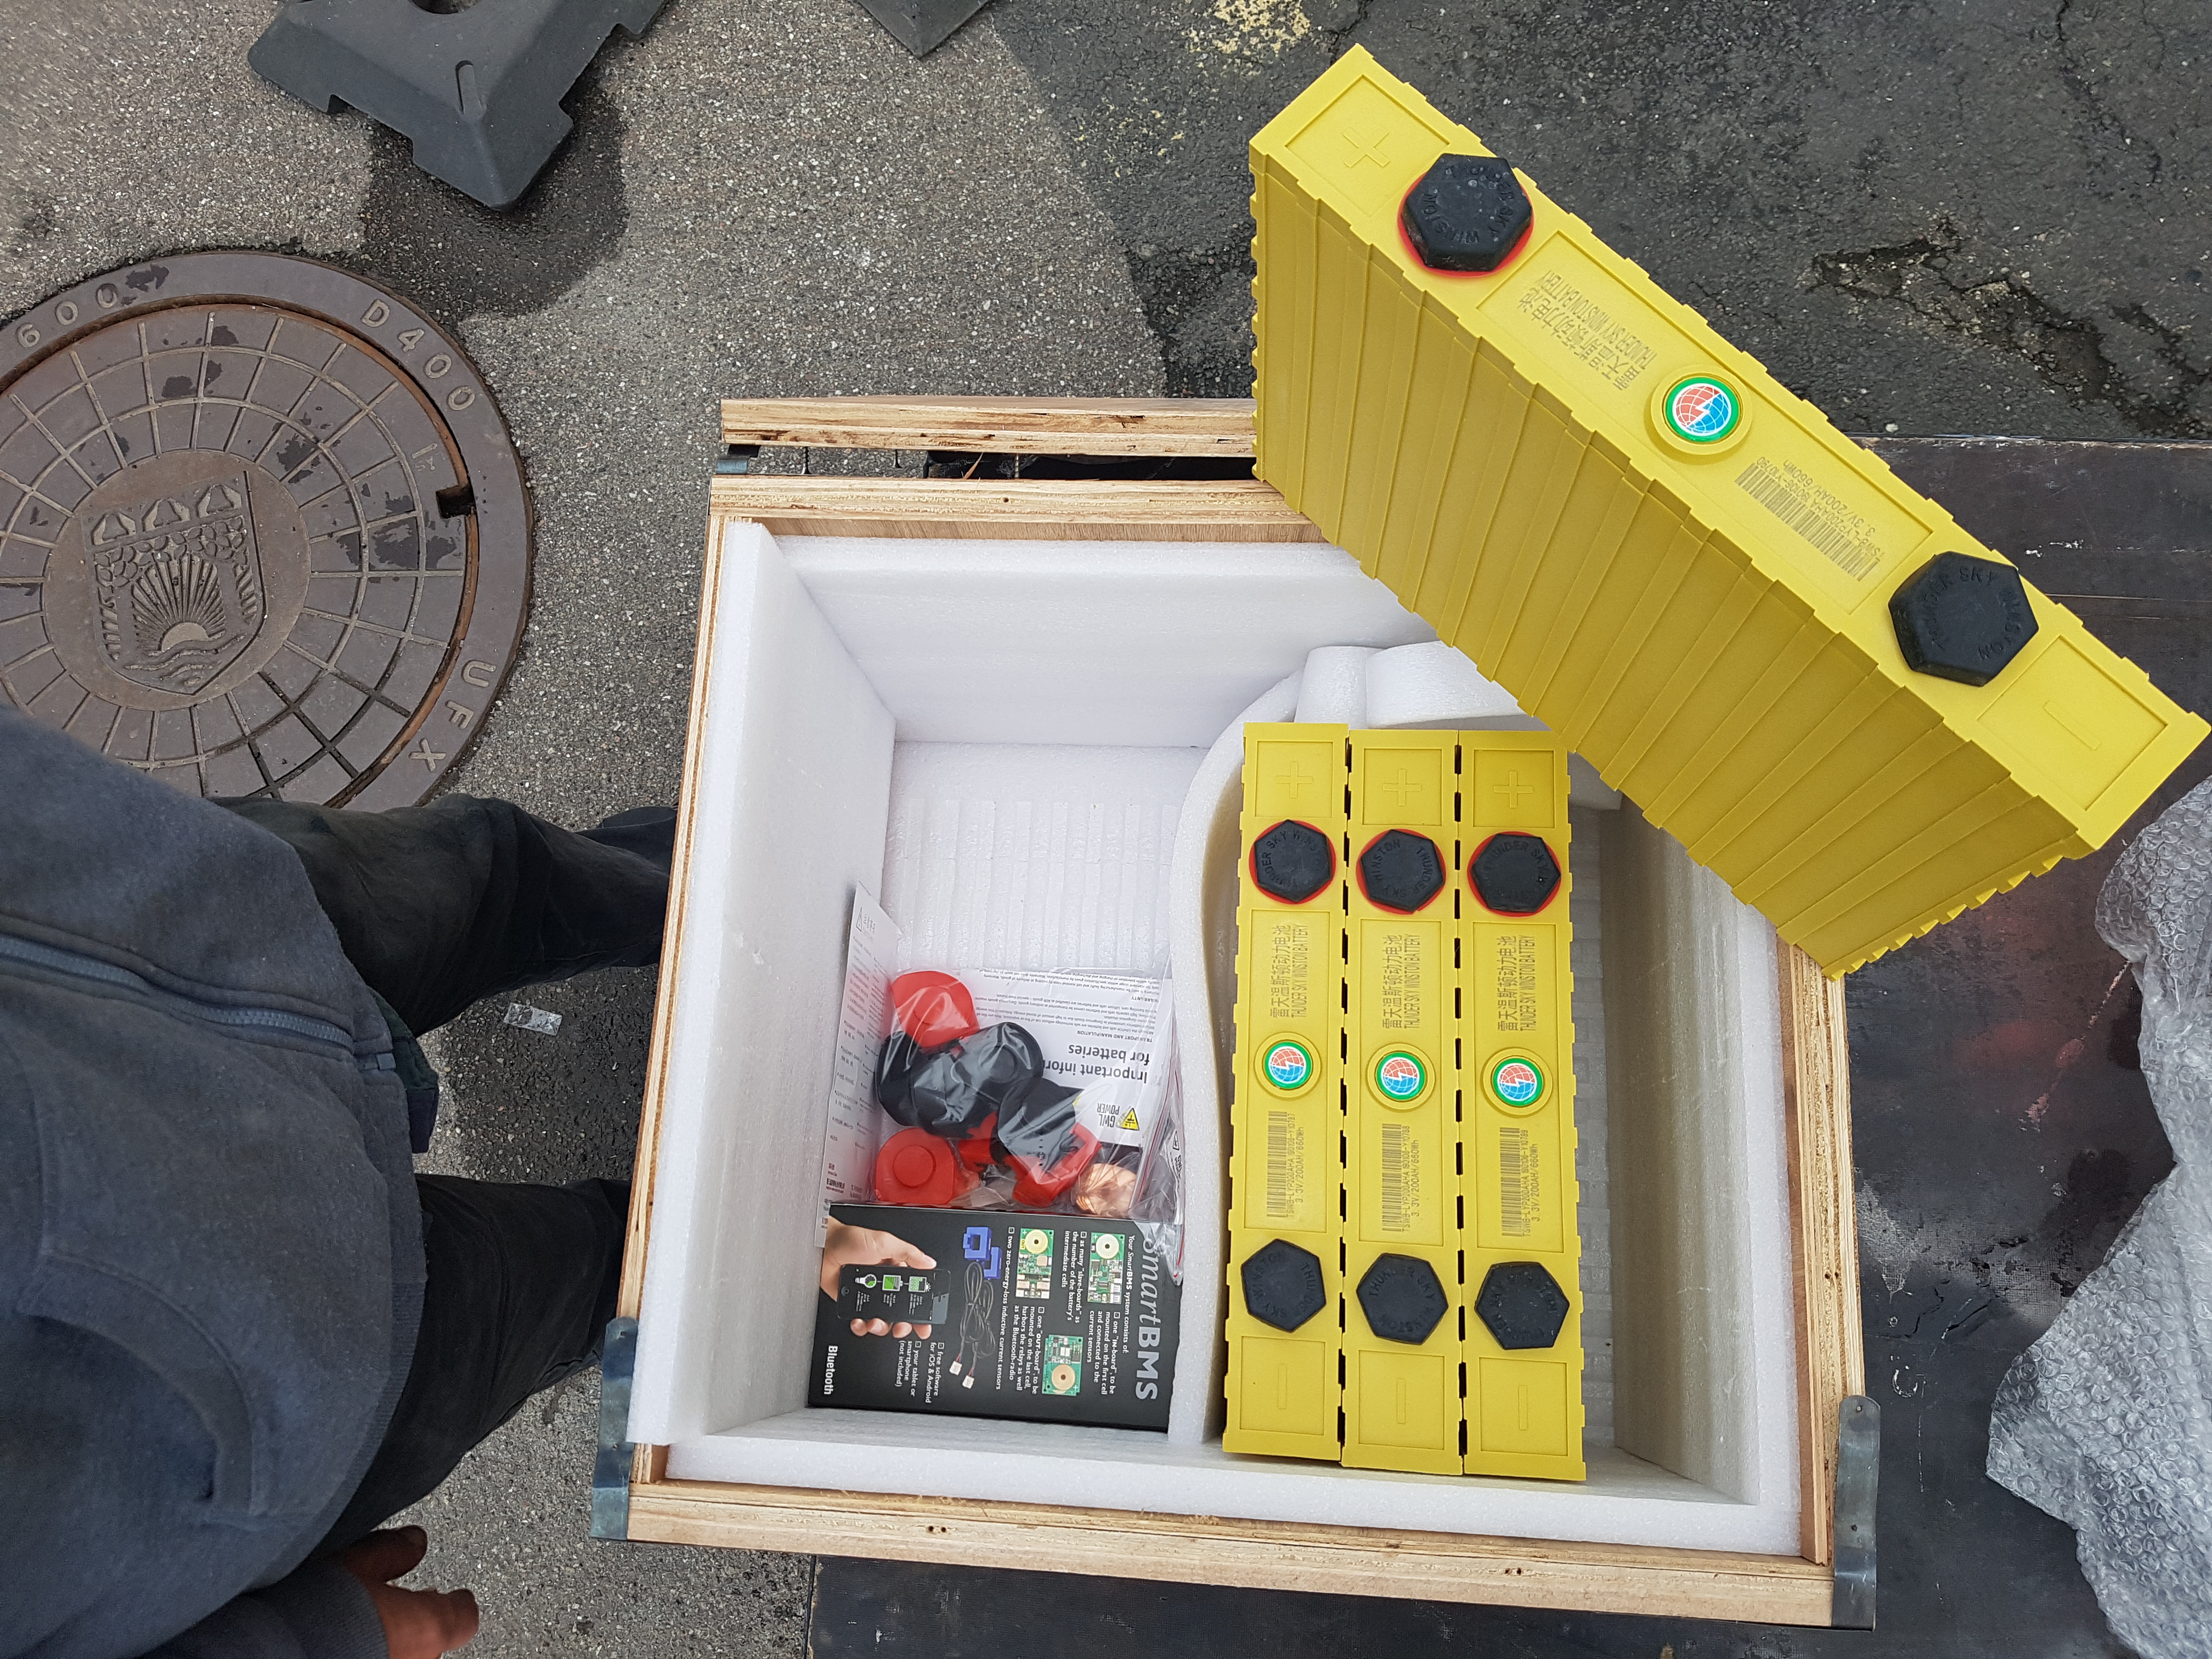
Unpacking the Cells from the packing crate and checking that all is ok.
I also have sequenced serial numbers on the Cells

I then built a box to keep the cells compressed
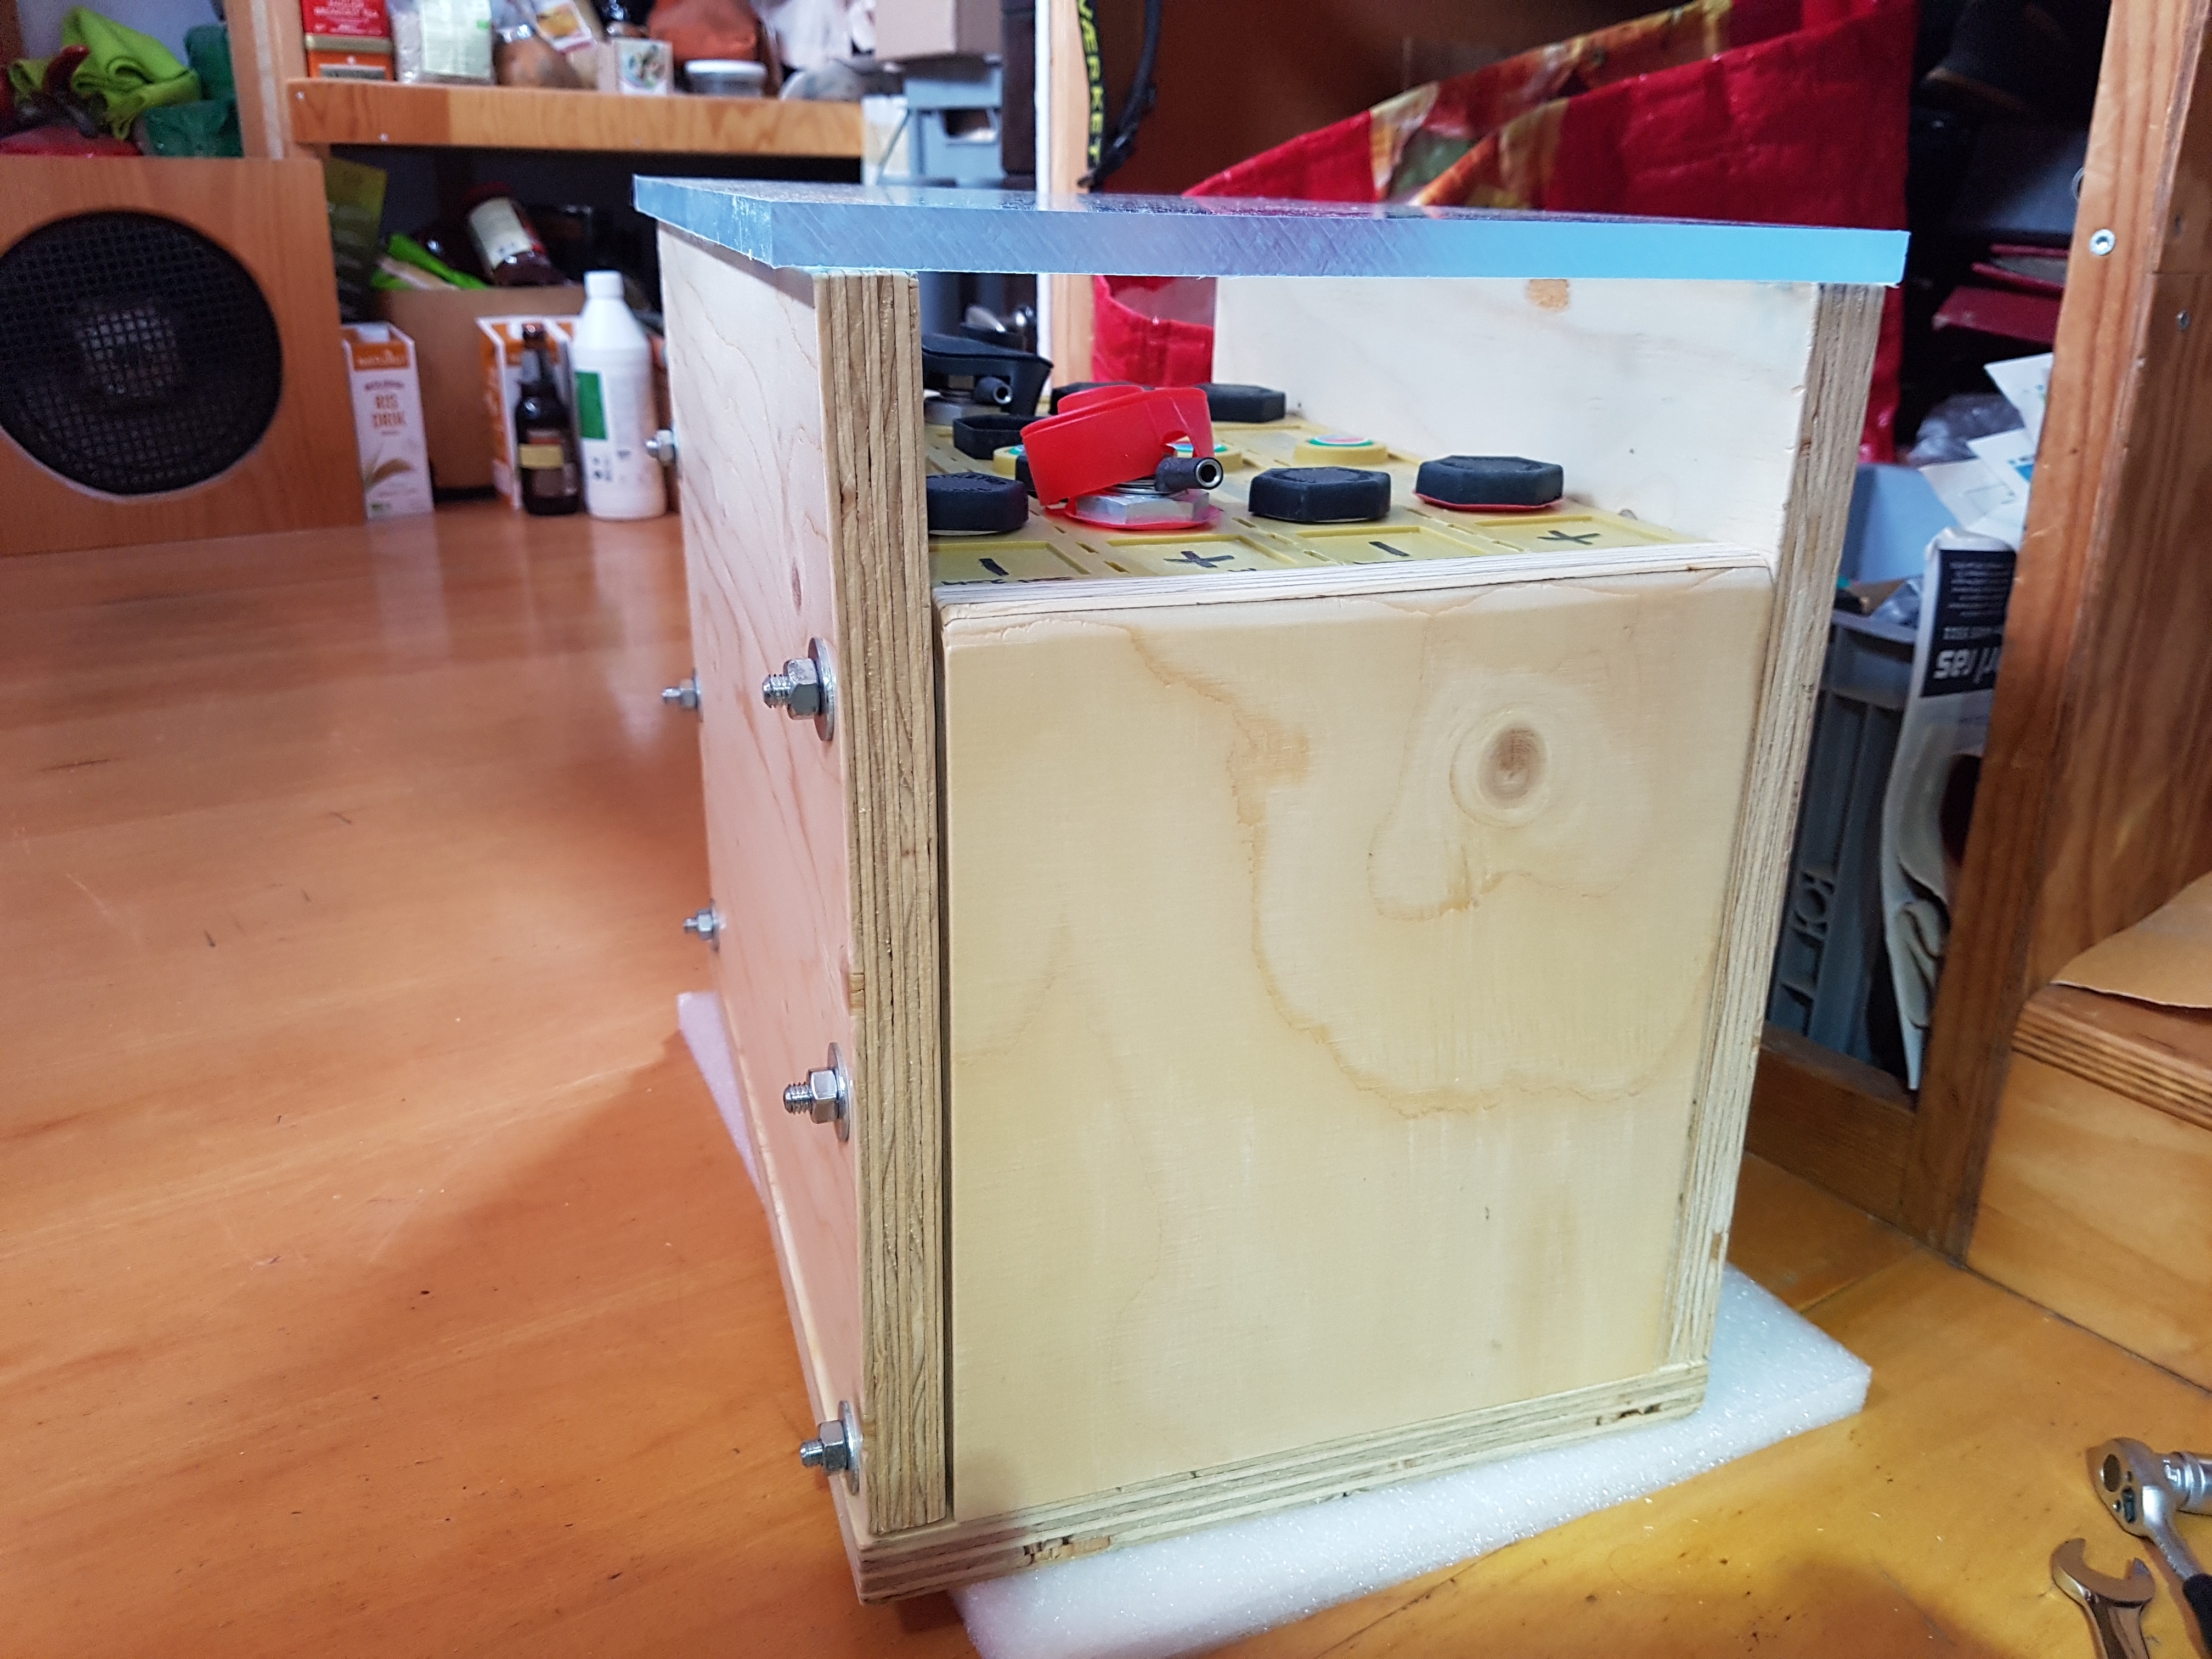
The finished box with the clear Perspex top that screws down and stops accidental shorting of the terminals.
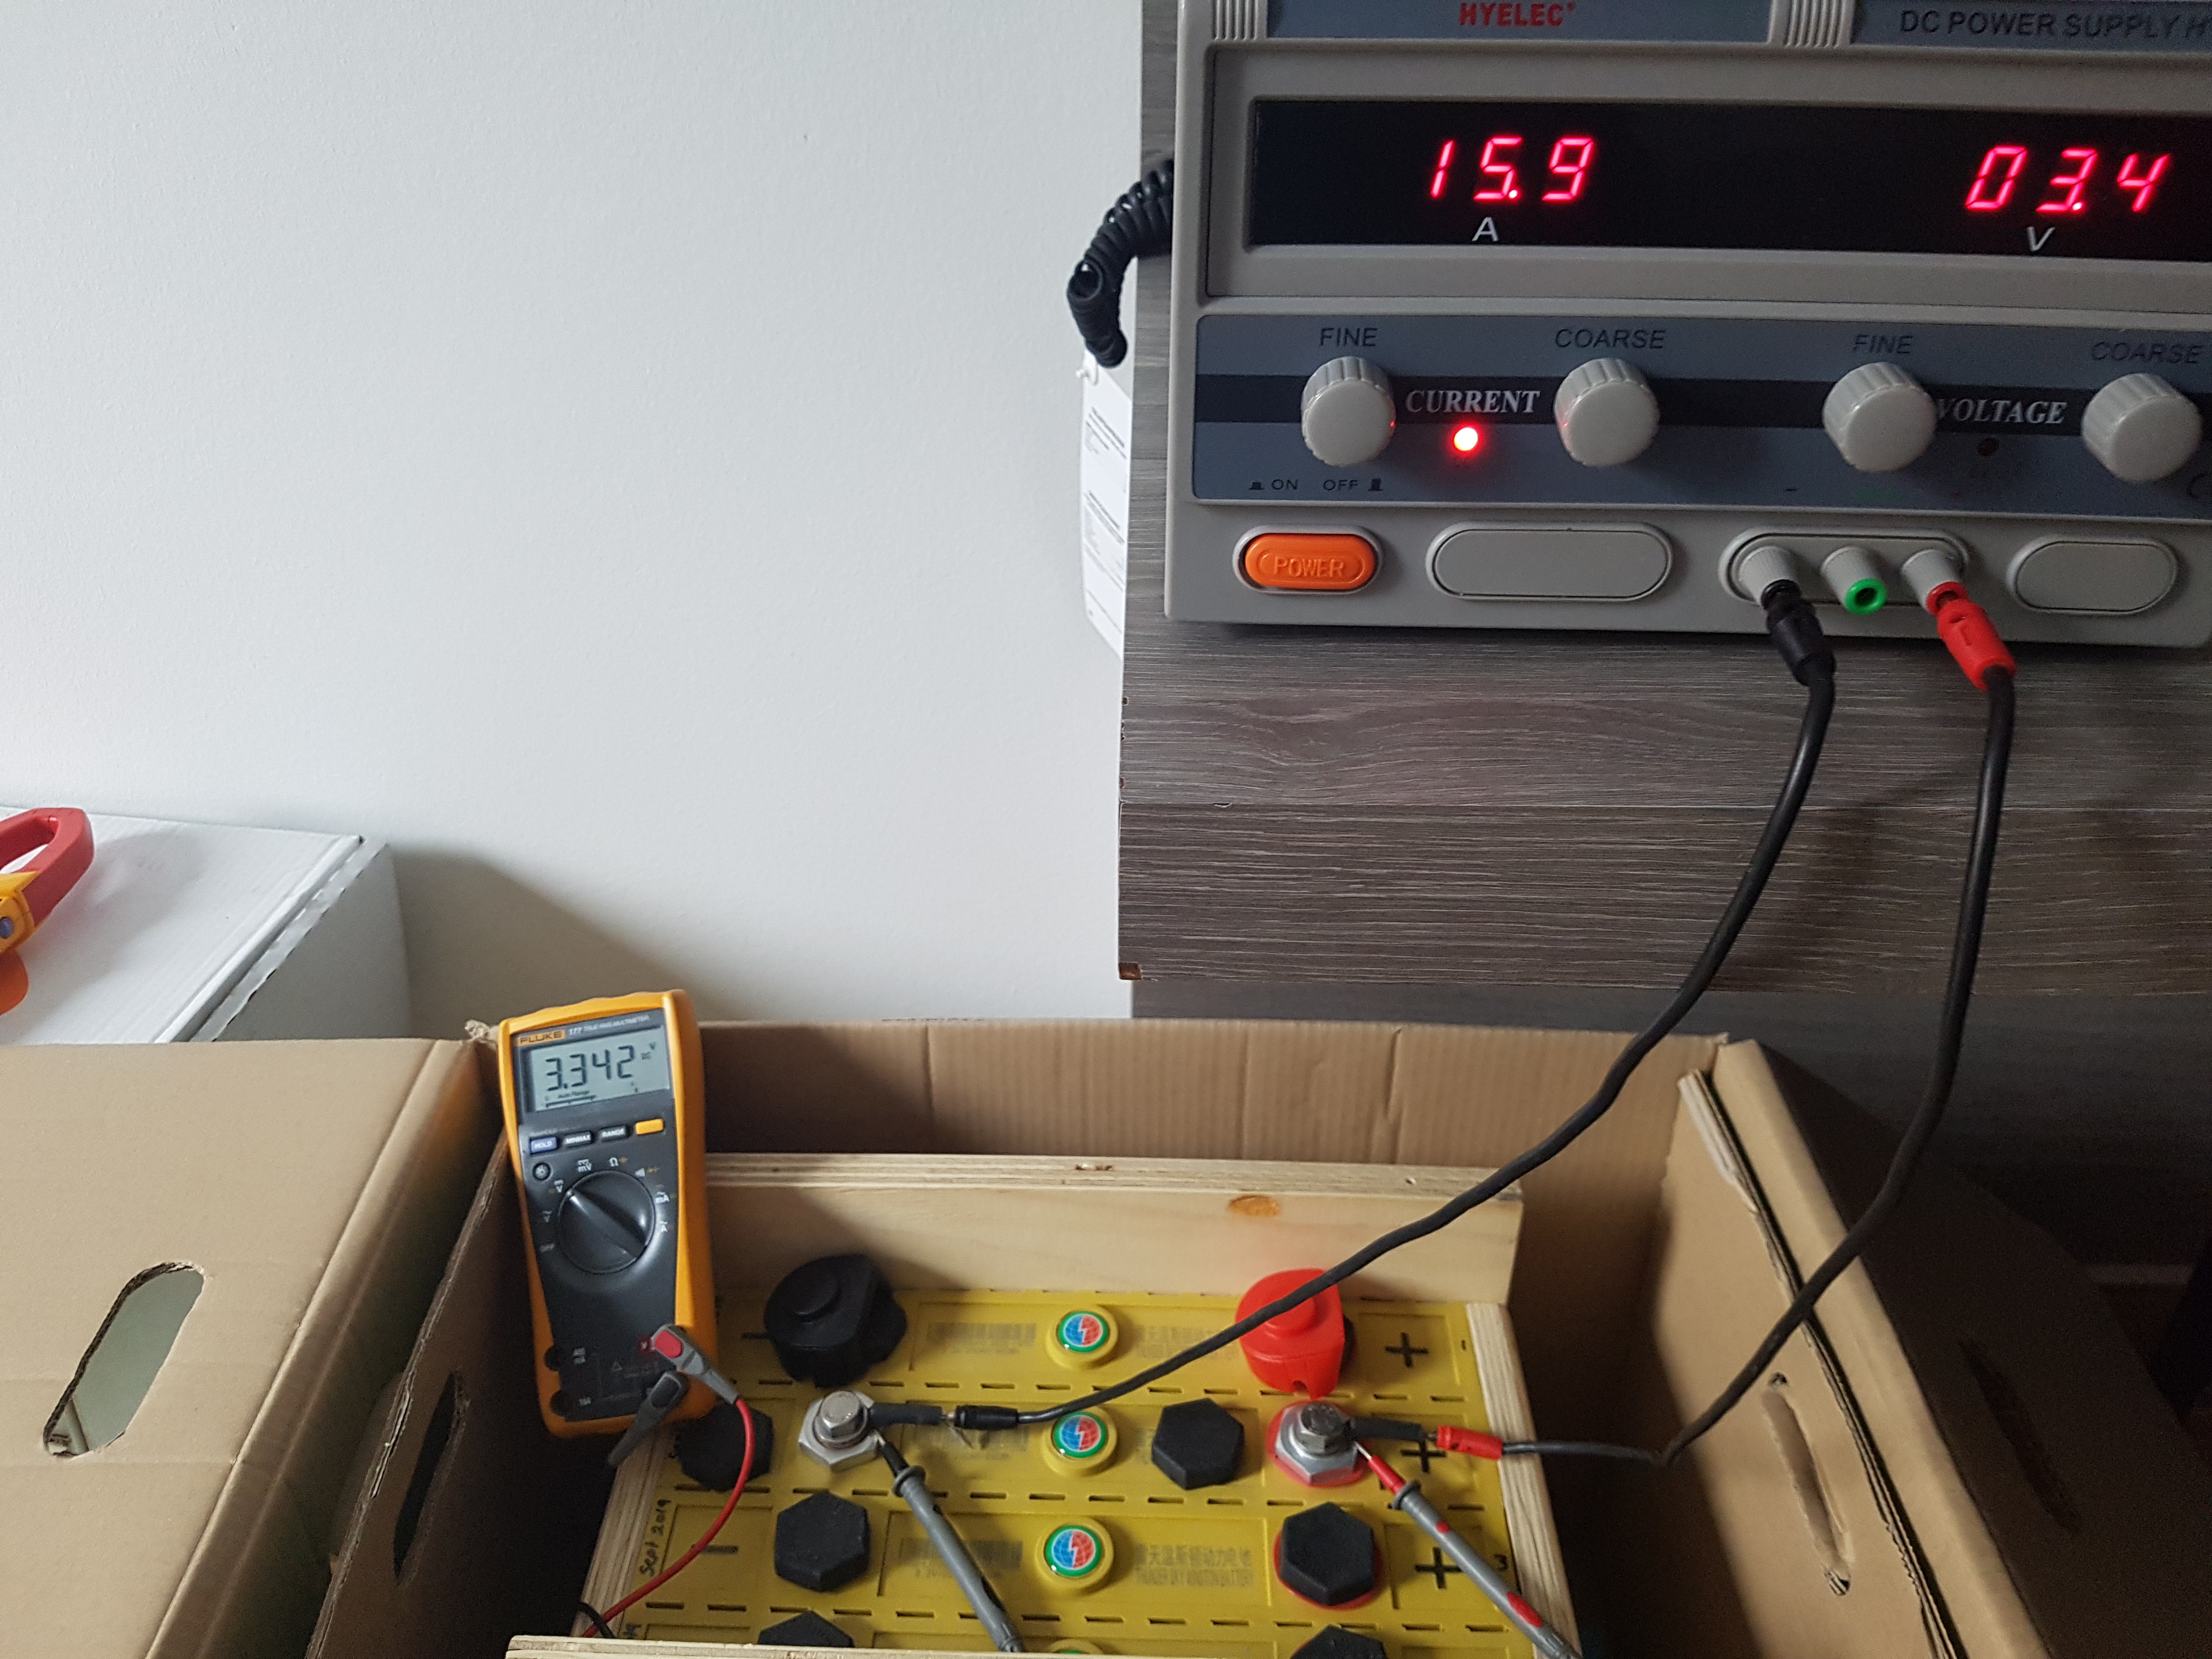
I took the battery to my next job where I was staying in a hotel, so was able to charge the cells .
First individually to 3.45 Volts then all in parallel
After letting them sit over night and a few more little charges to get them to my final resting voltage, I then built them into a 12 Volt battery and charged up to 14 volts.
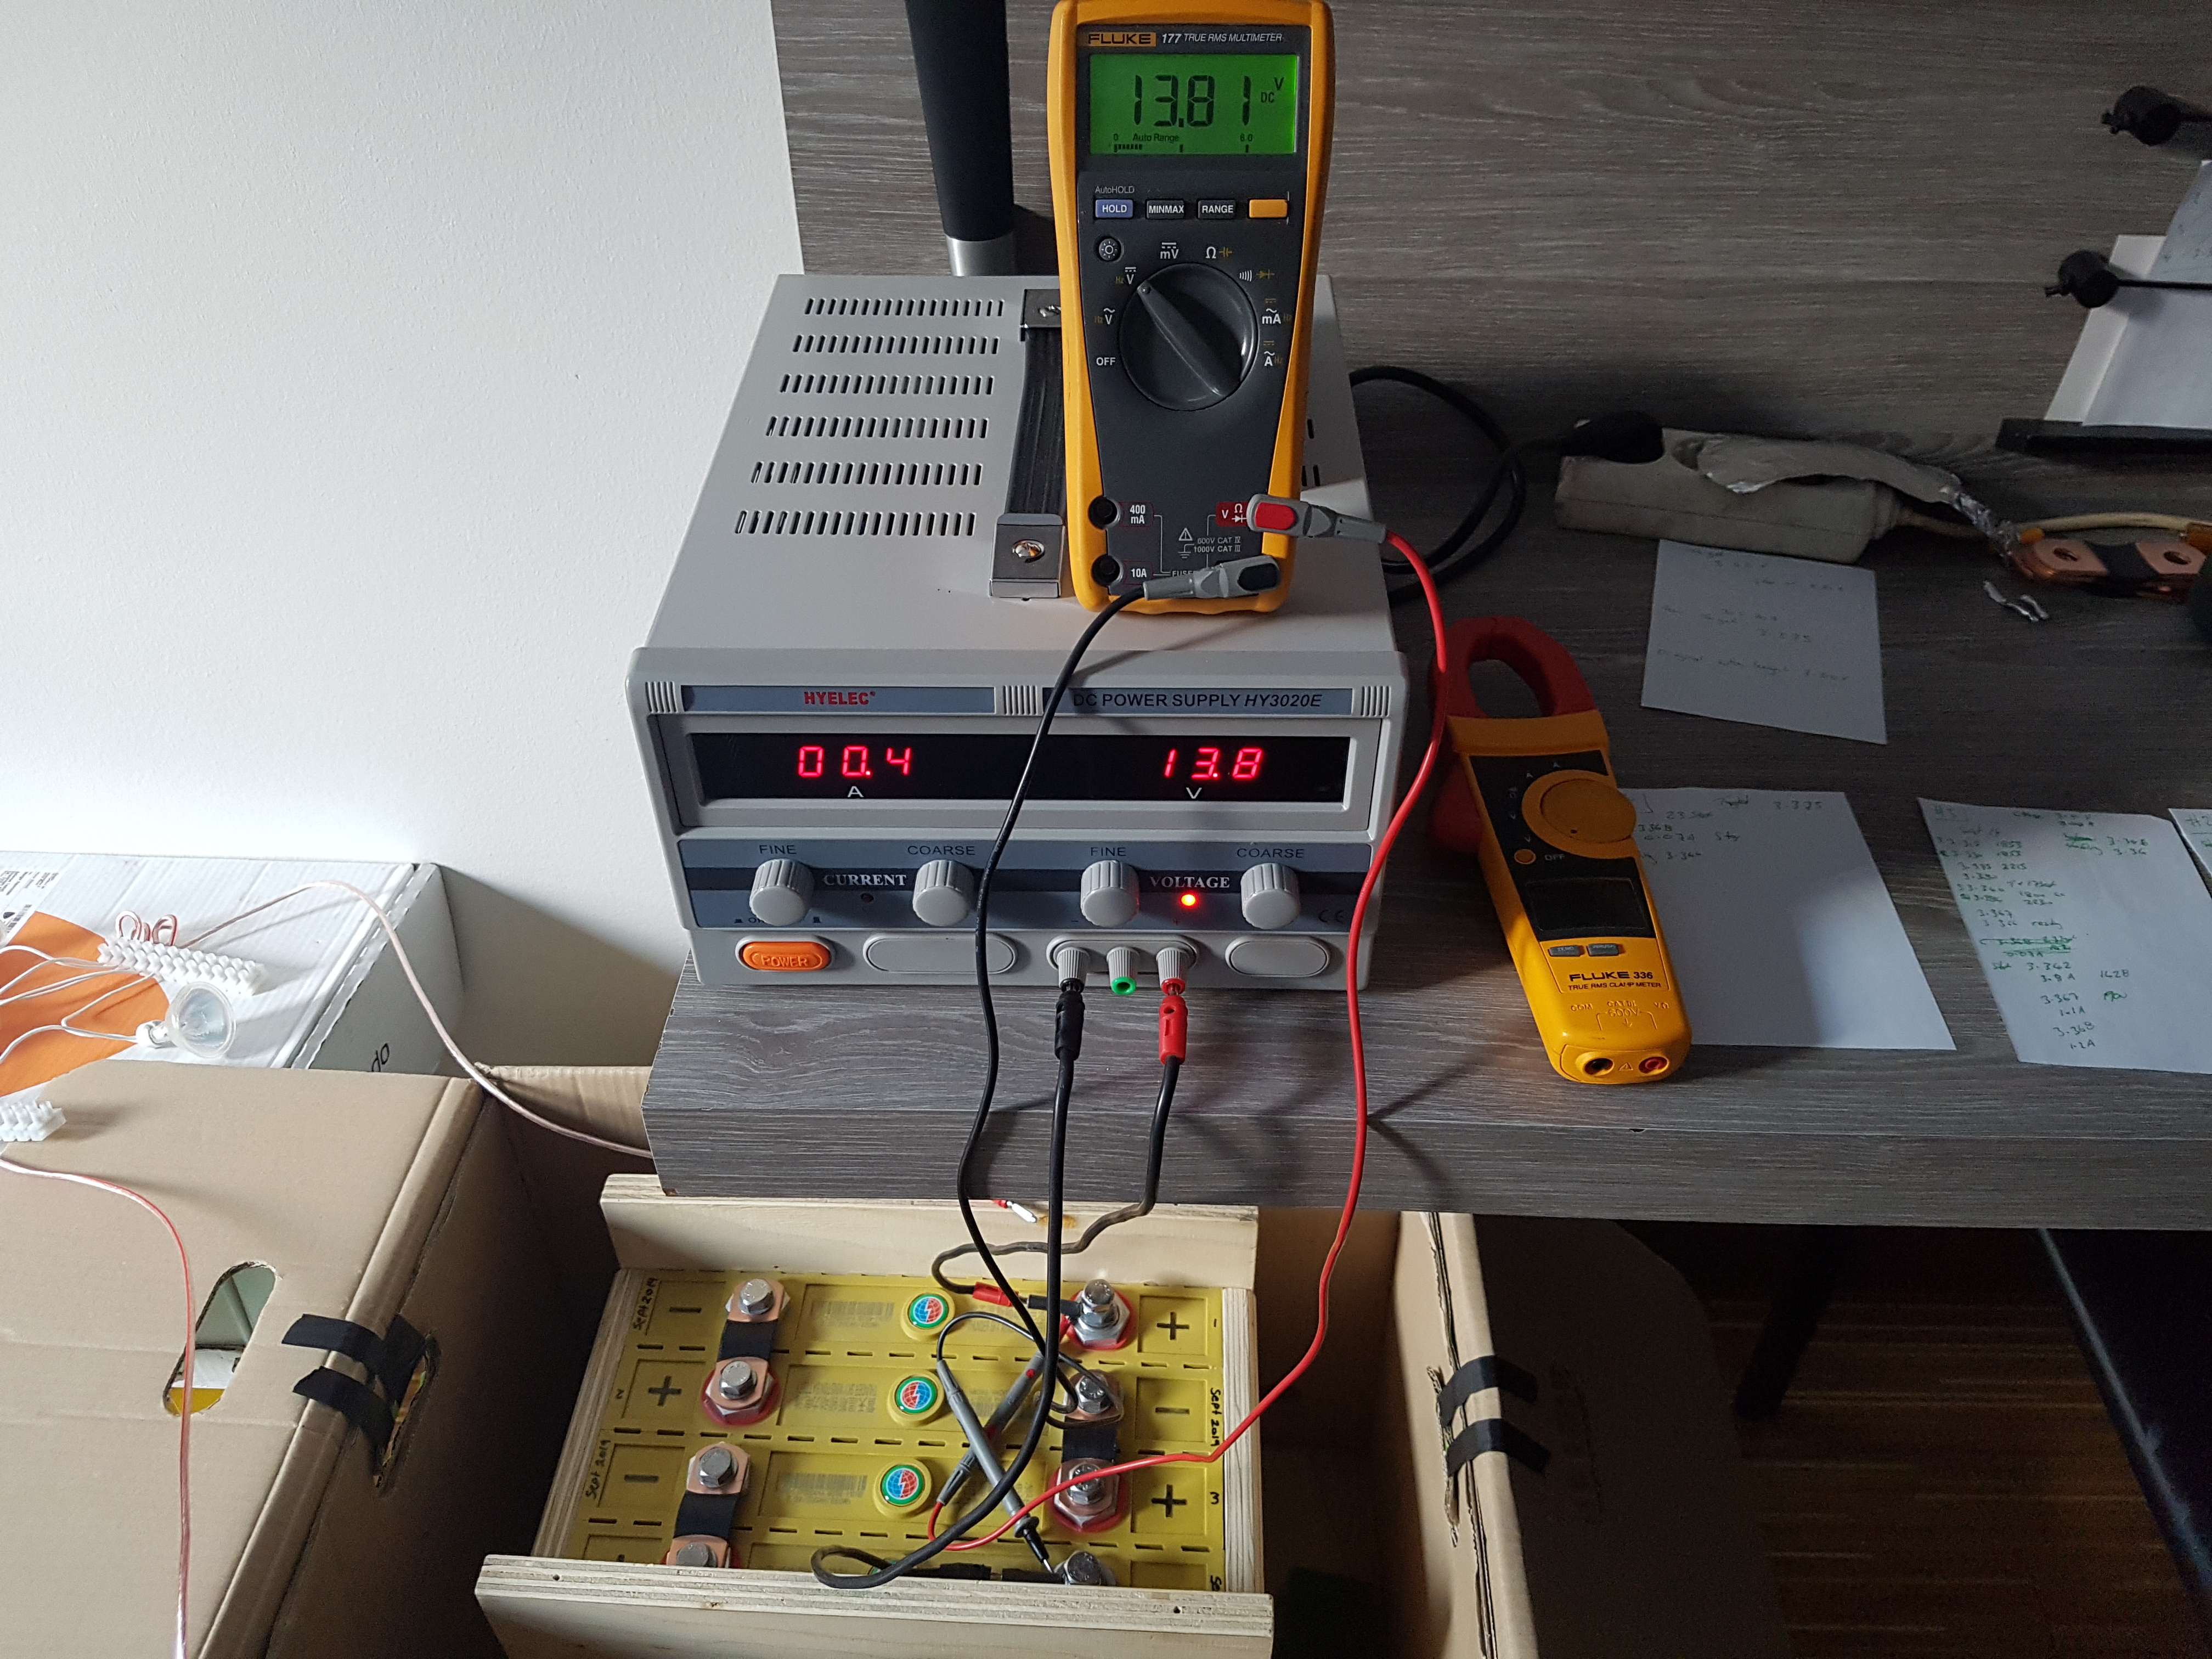
Final charging with my 20A Laboratory Power Supply
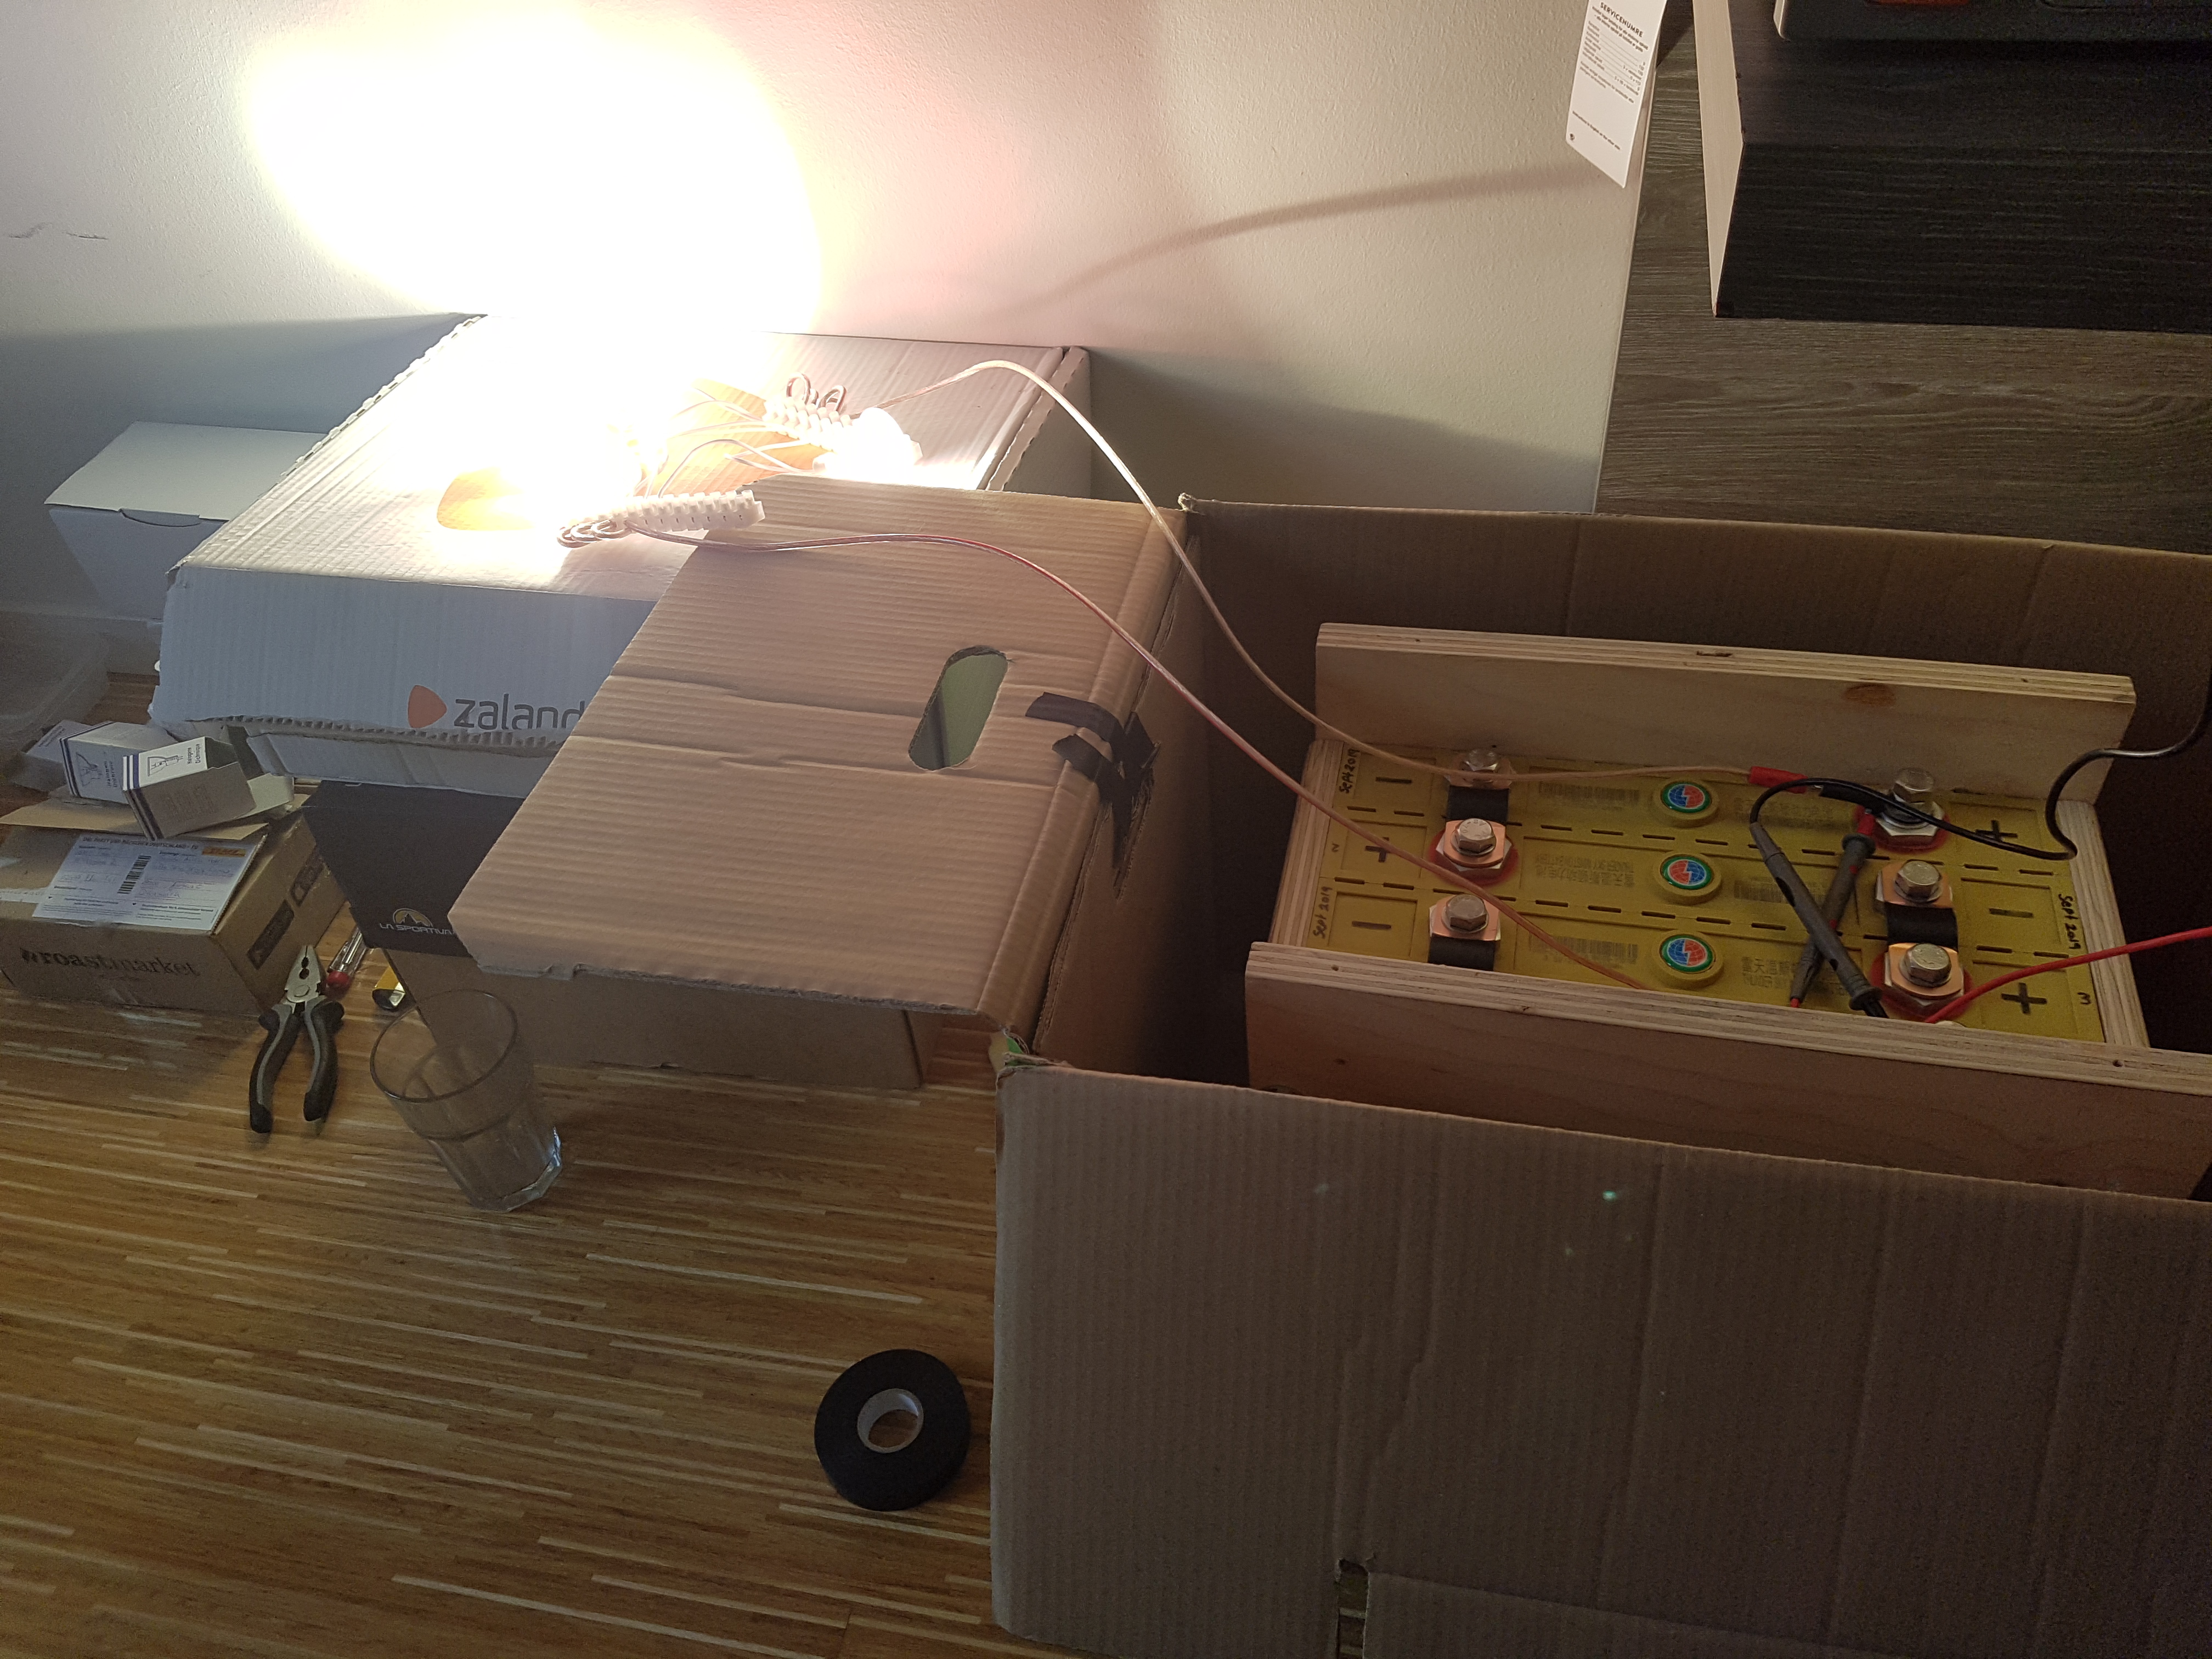
When the Battery was finally at the Voltage I wanted I discharged it by connecting up 5 x 50W Halogen bulbs and pulling out 100 Amps.
This brought the Battery to half full for storage until I was ready to use it.
The next Stage
Once back home in the Truck I proceeded to finish off the wiring rebuild and connect the new Battery into the system.
First to do was build the battery with the BMS (Battery Management System) and screw the battery box in position with insulation around it including a spangürt to hold it all in place.
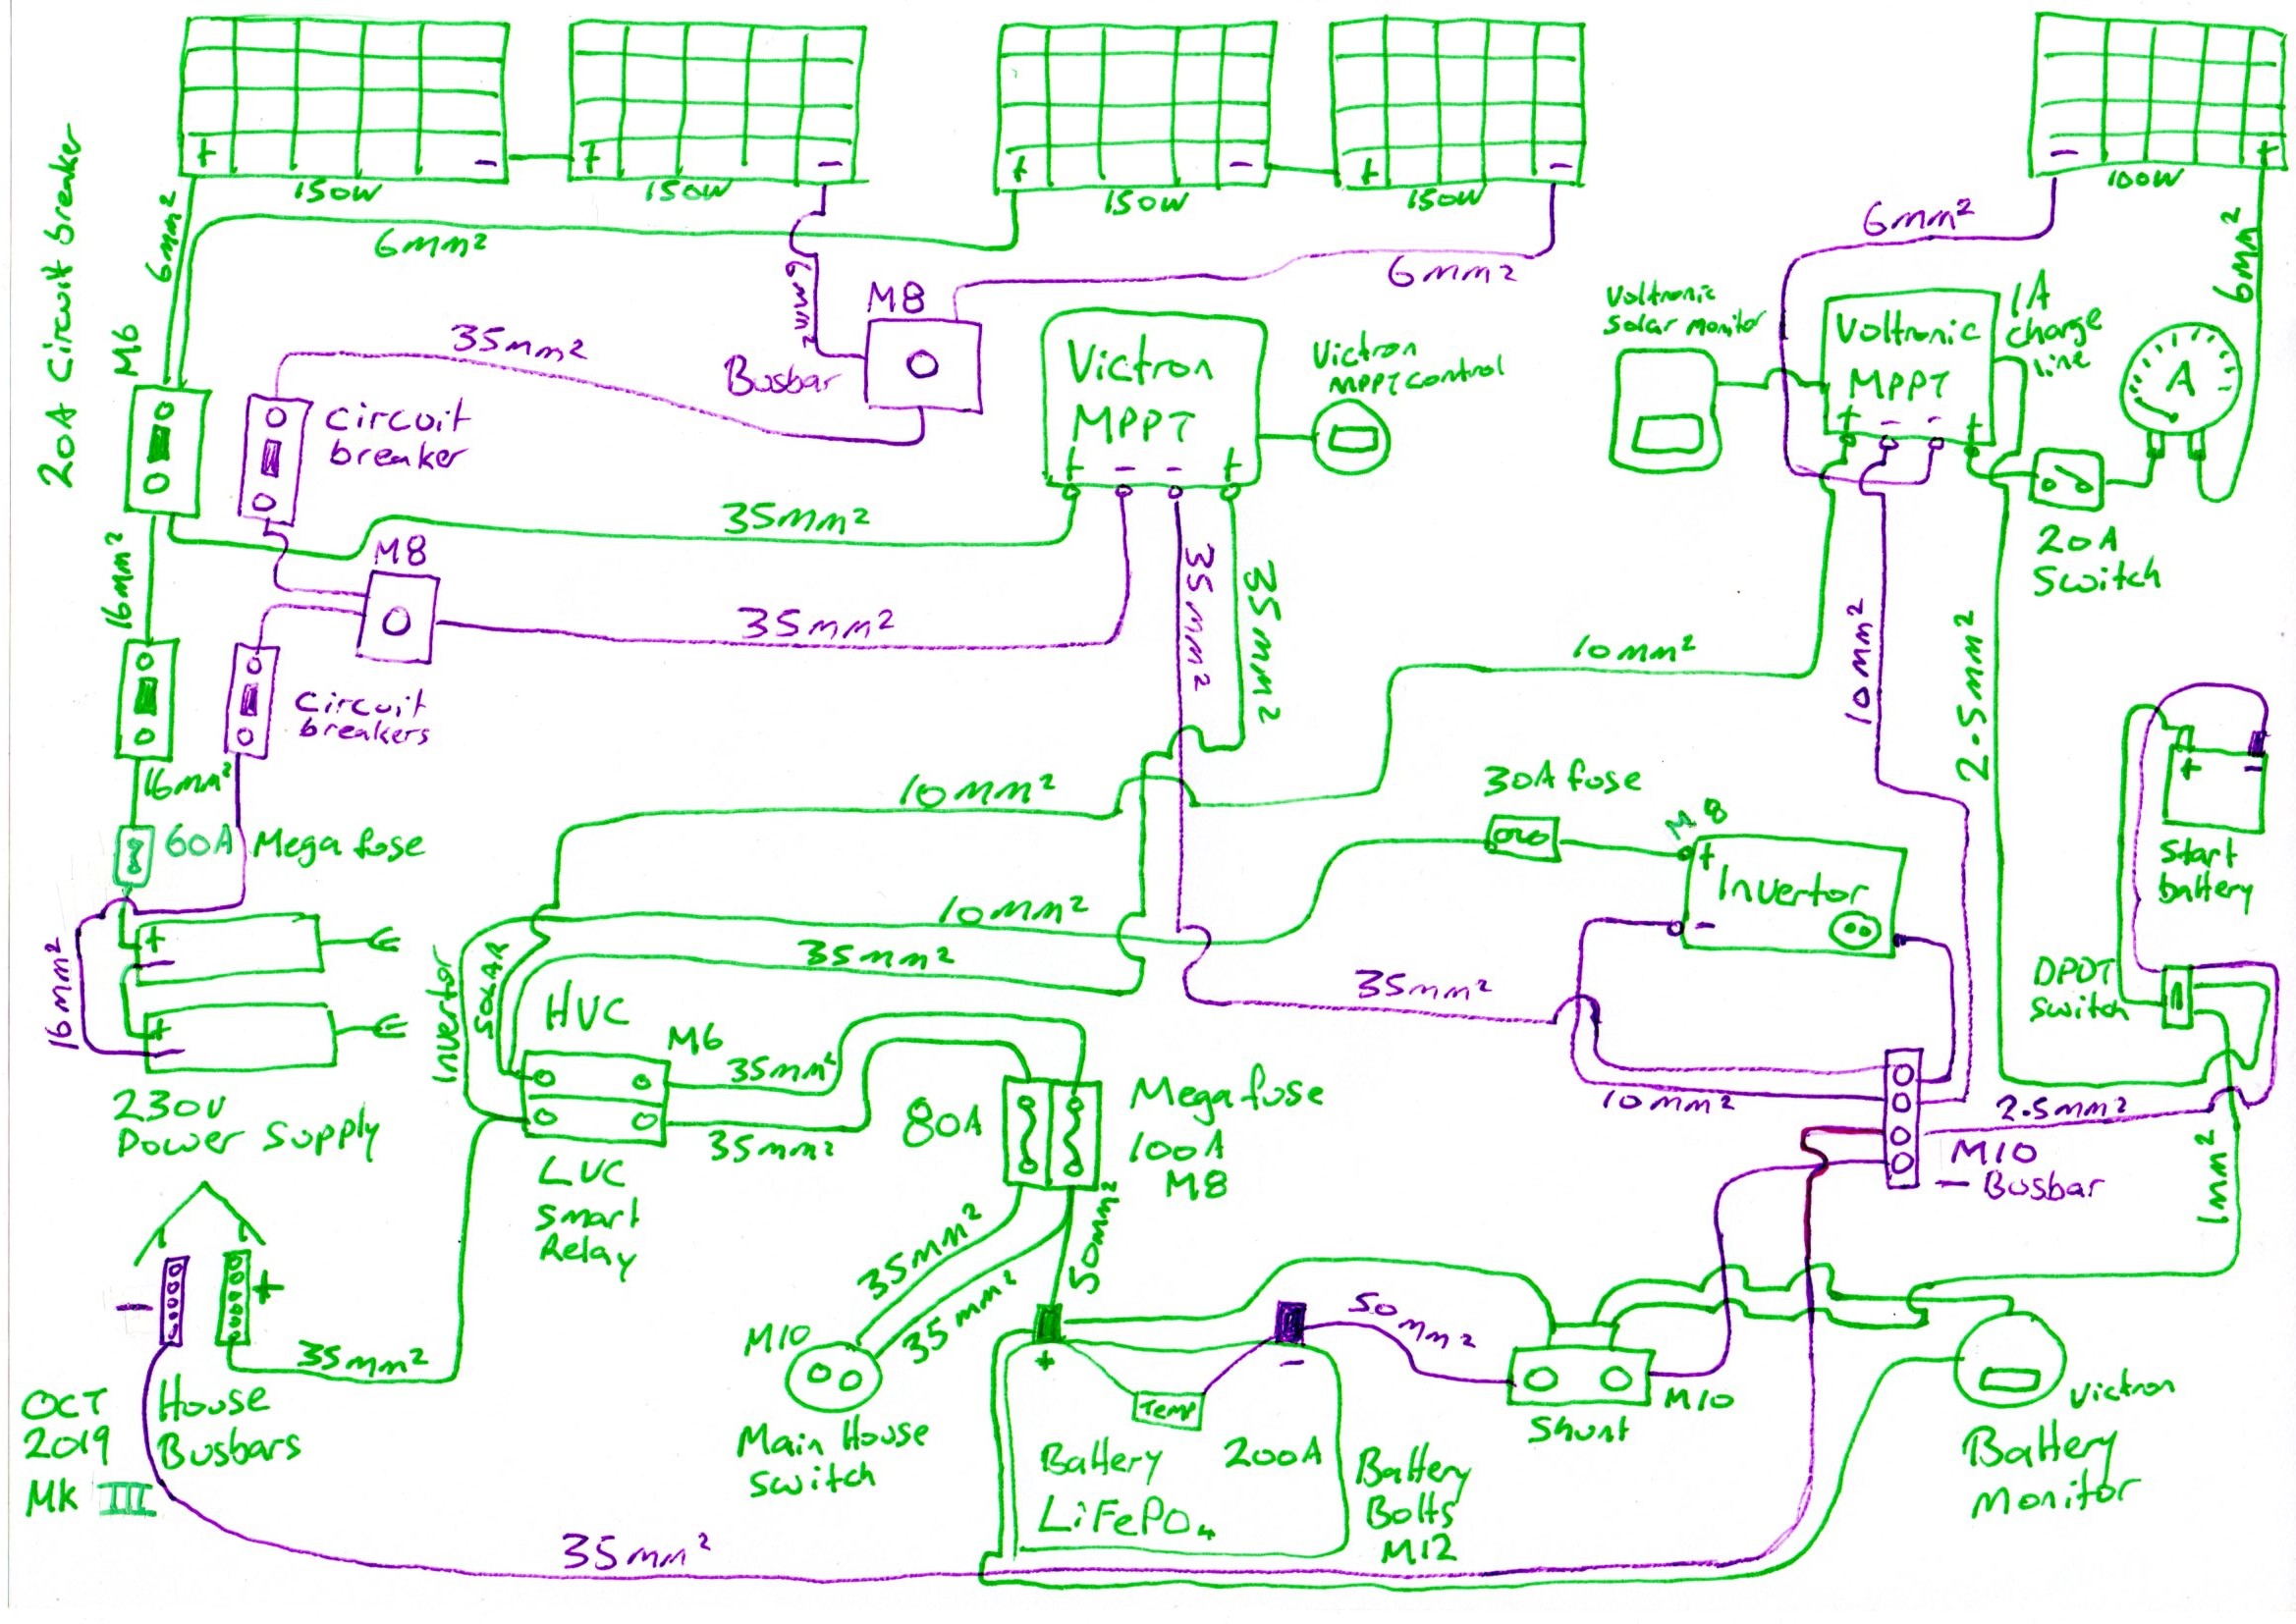
So here also is the updated Electric Plan, Oct 2019 Mk III, that I will be working to!
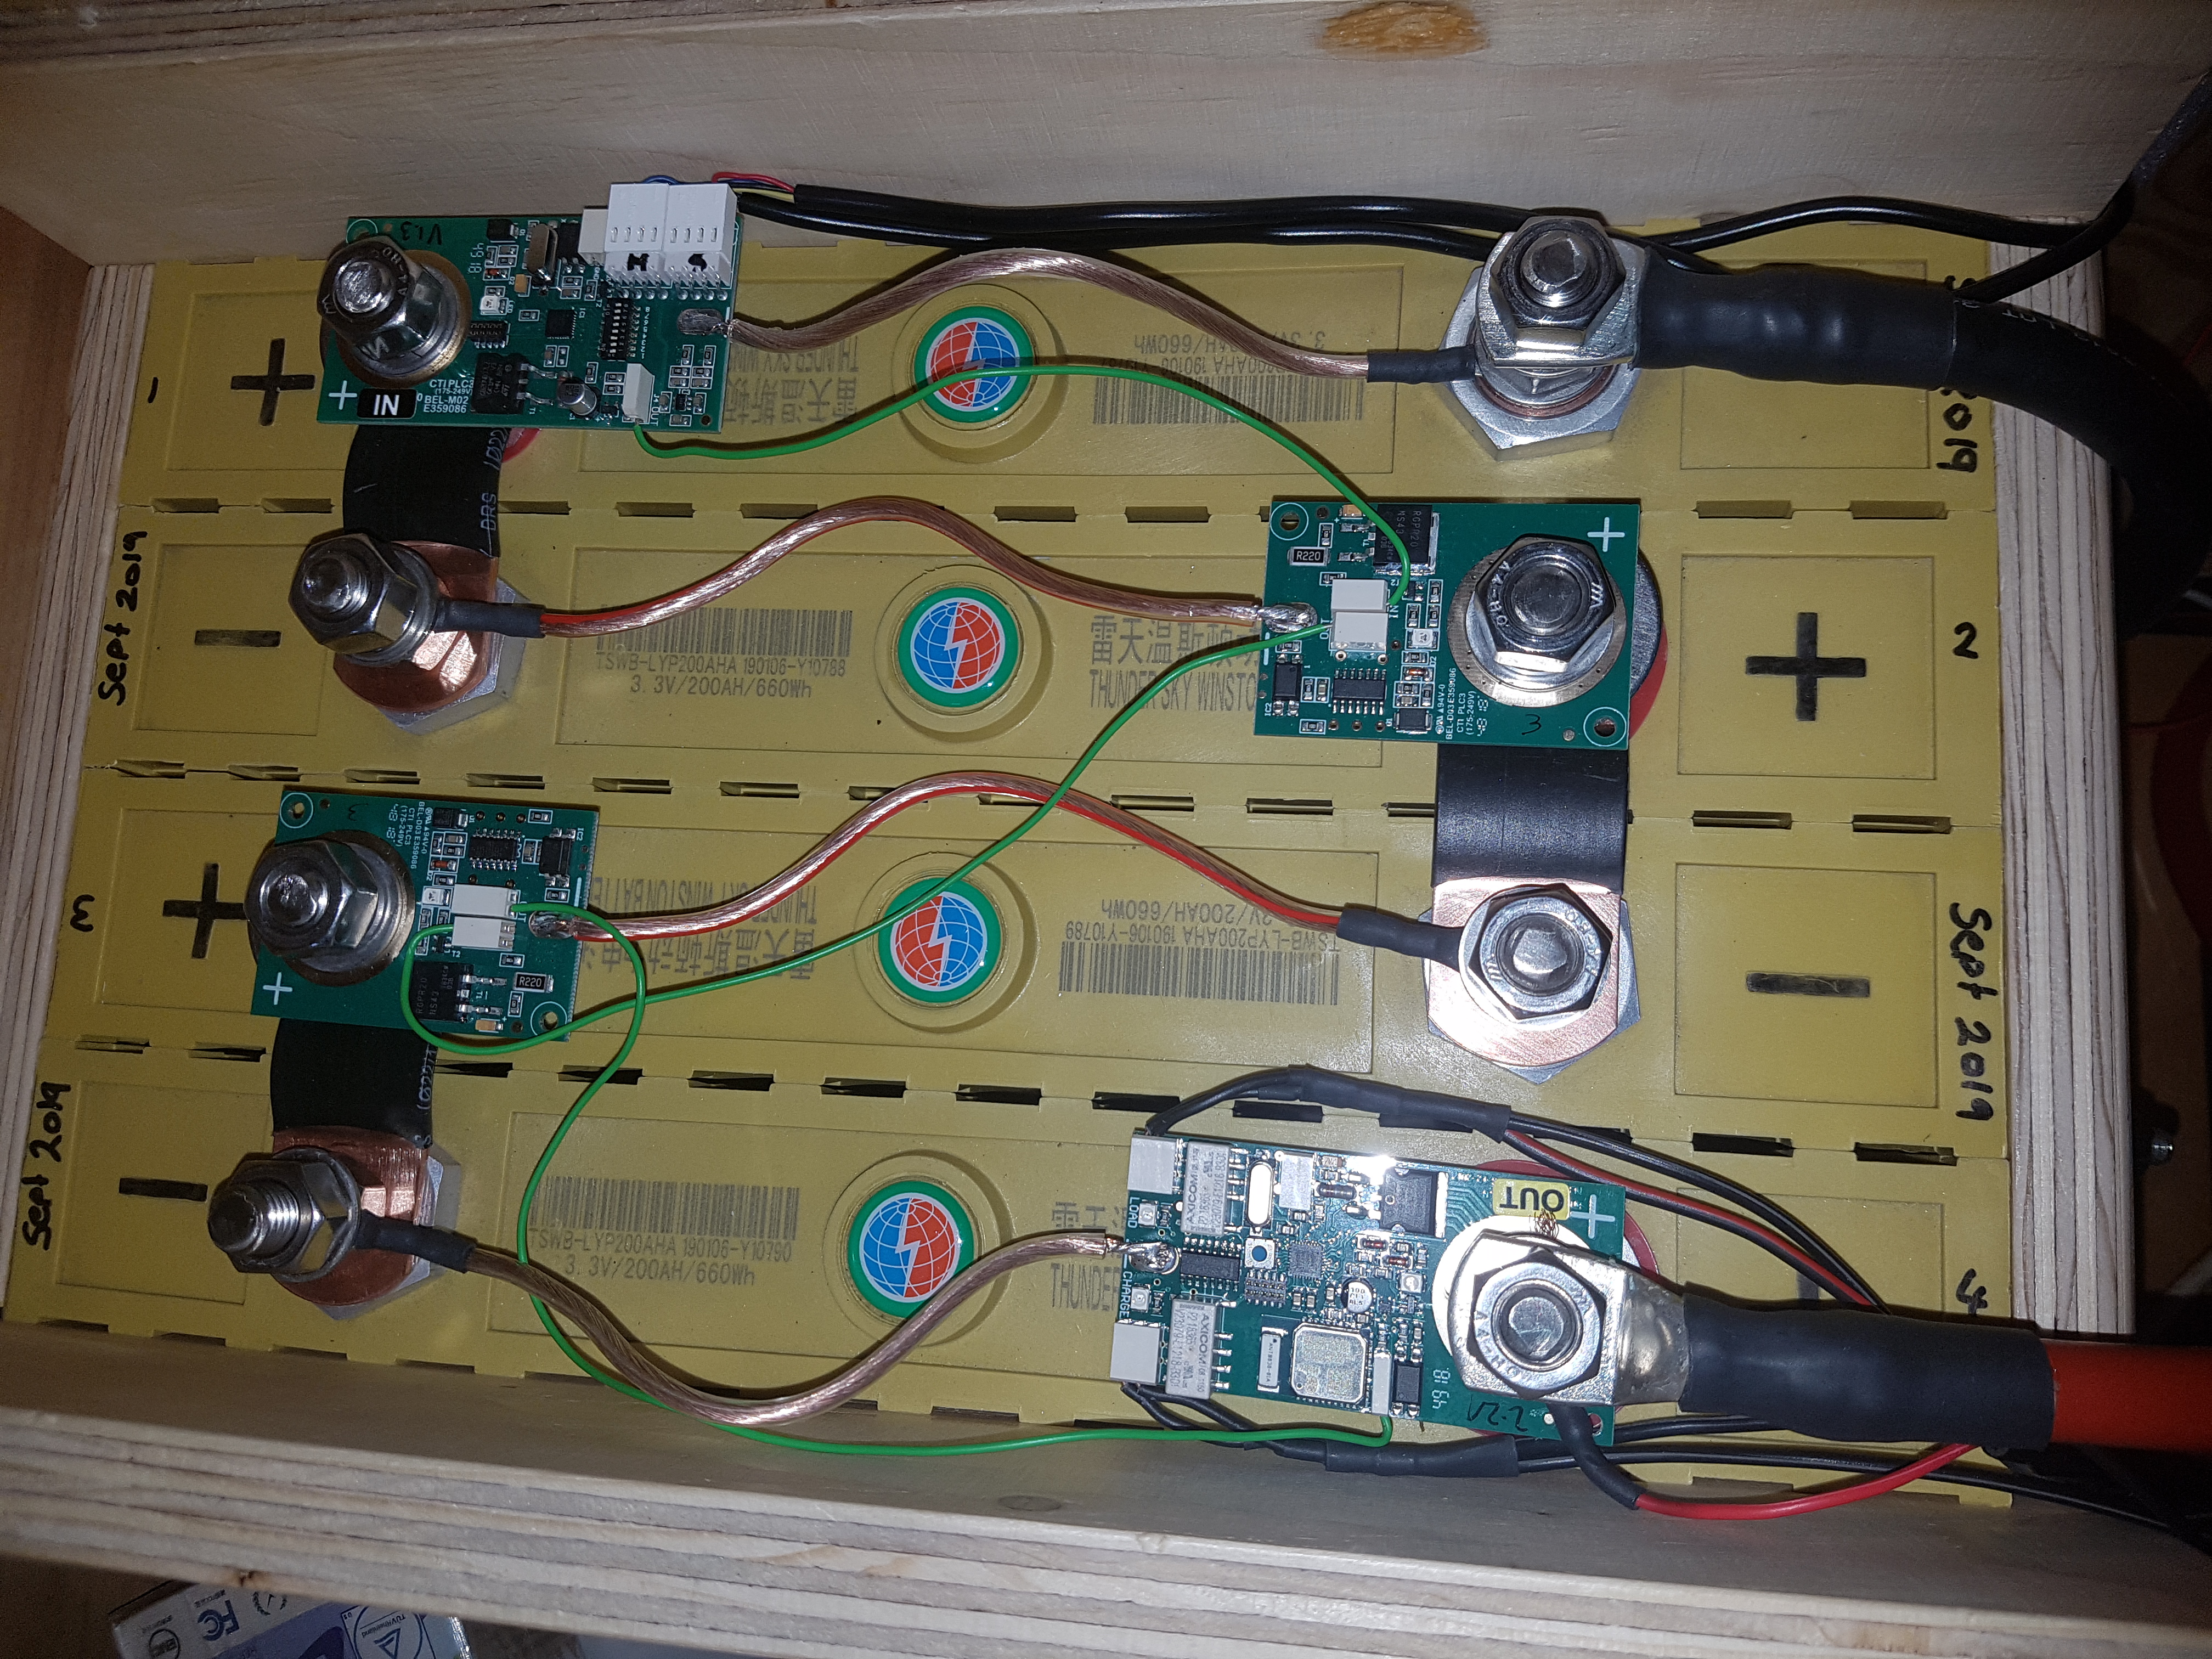
Soldering the cables on to the single BMS boards of the Smart BMS.
I ended up replacing this BMS in Dec 2020, as I found it not good.
No real control on the settings, little wires that kept breaking the housings away from the circuit board, not accurate monitoring. Also really fiddly to get the tiny wires into the holders and then they often didnt hold them and they would fall out.
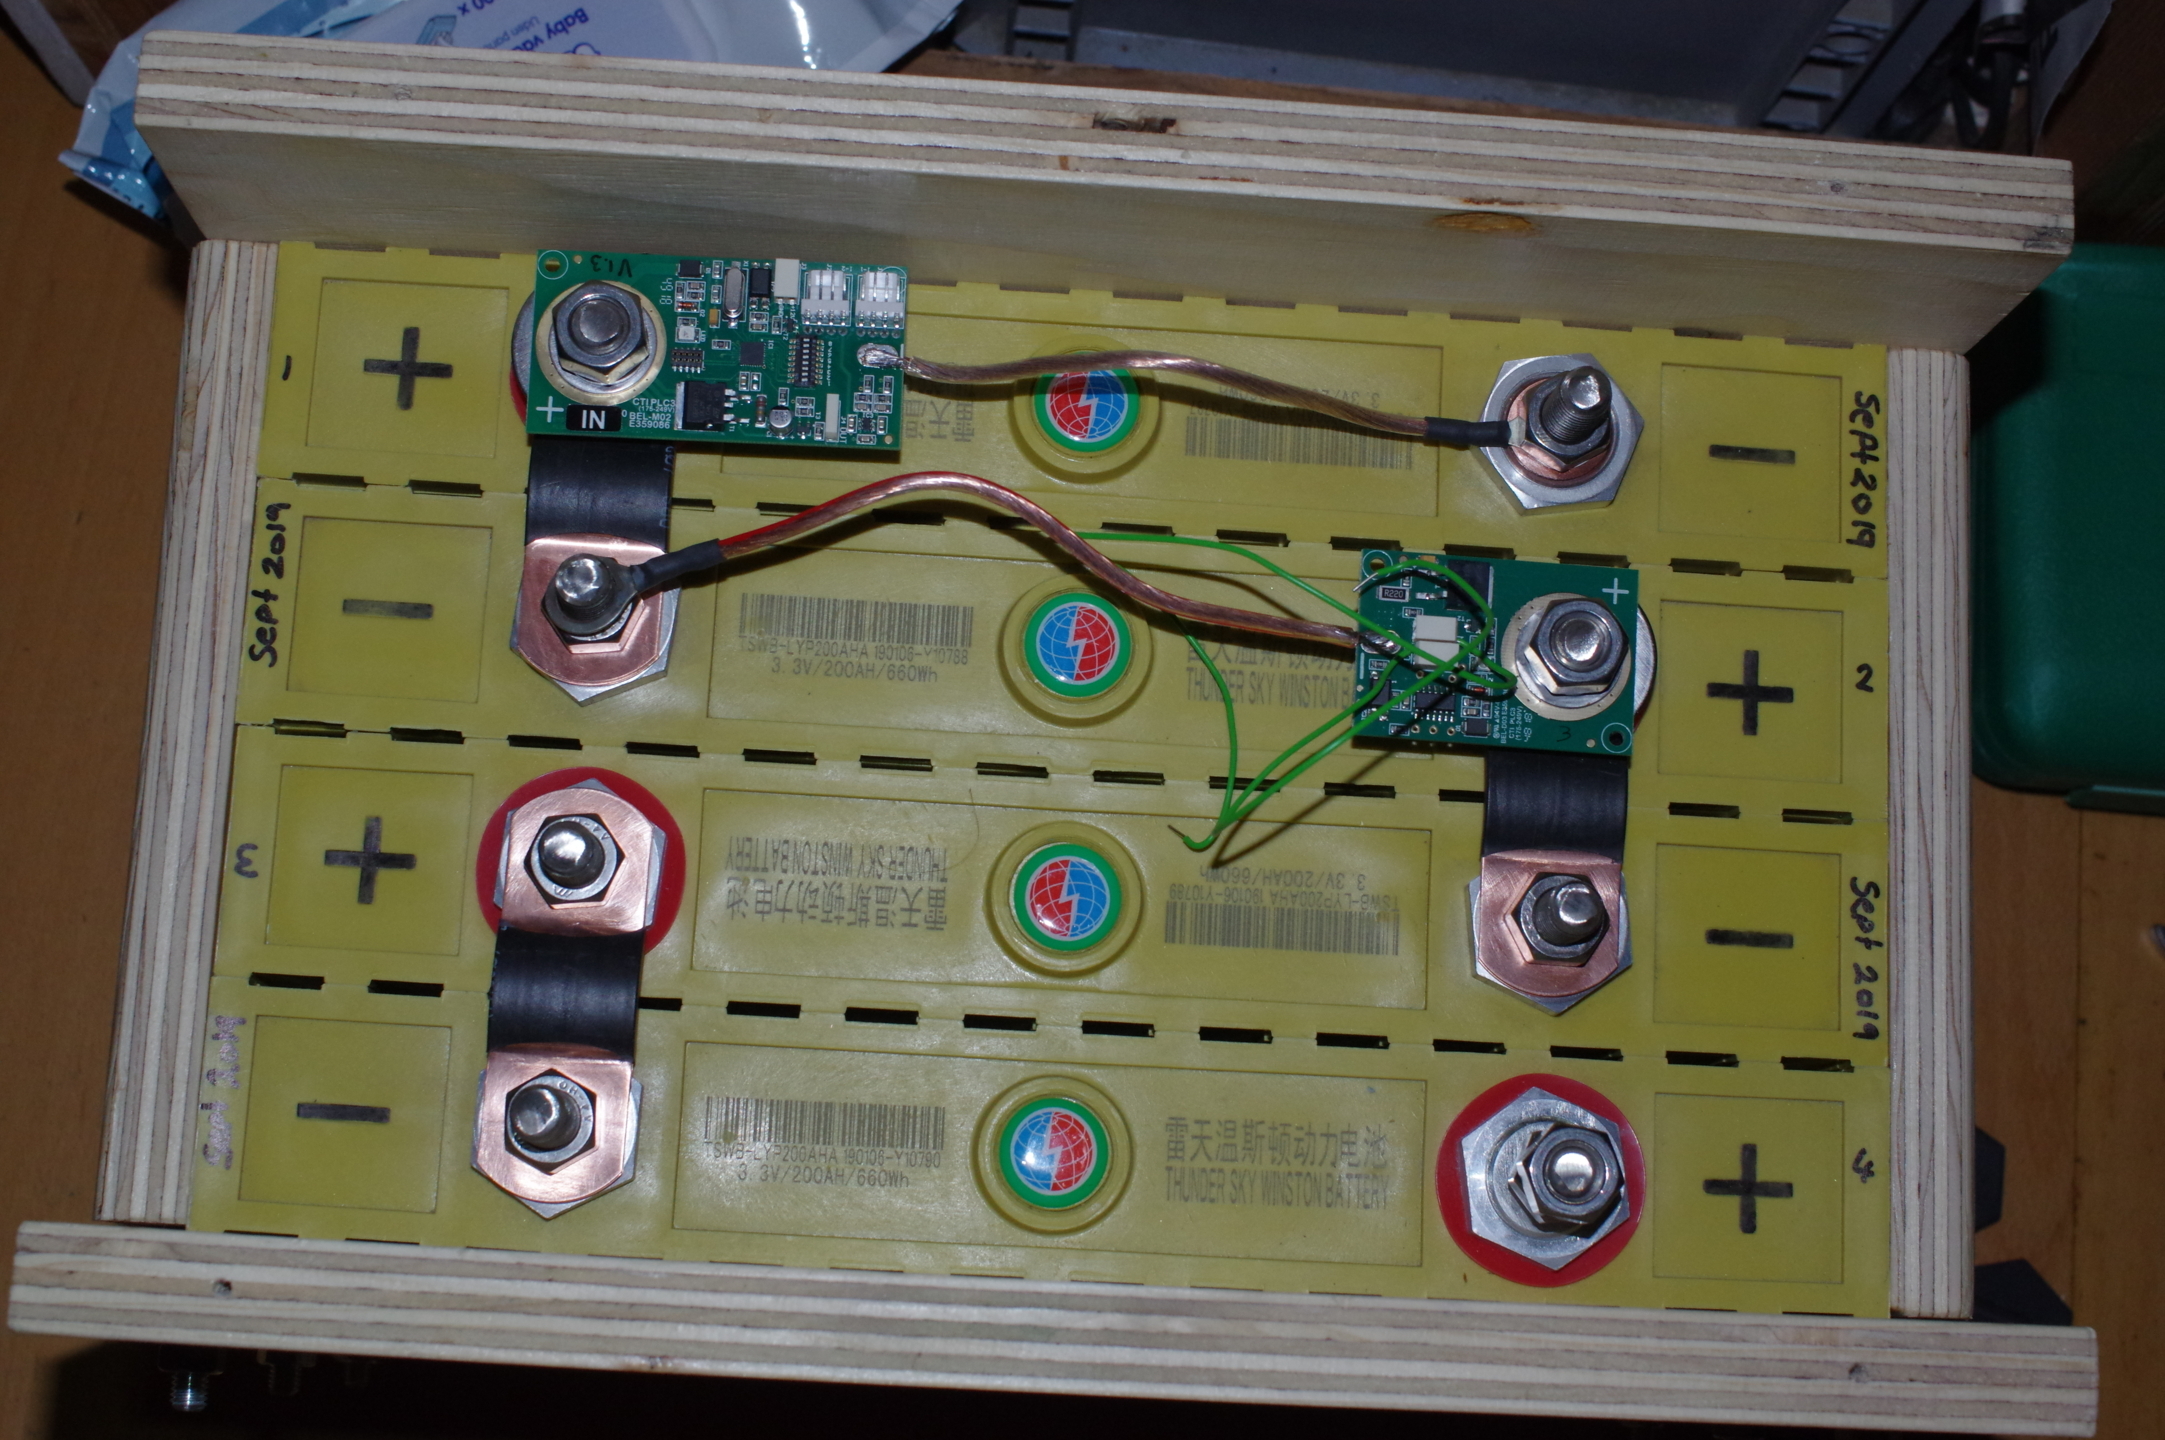
Mounting the BMS
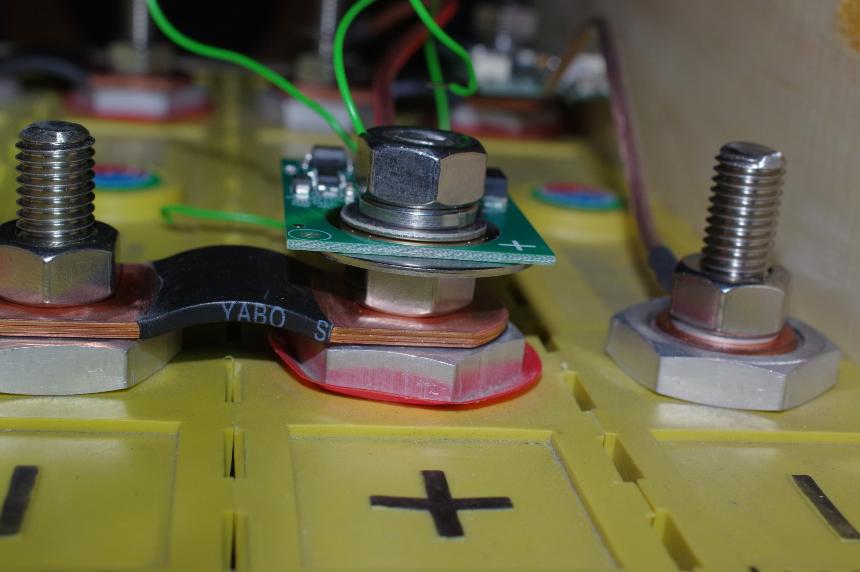
Ive mounted my BMS boards a little higher so that they clear the Cell links.
Also so that I can remove them if I go away for any length of time, as with no current coming into the battery they will slowly discharge the battery!
Between all my components Ive been putting a thin smear of Sanchem NO-OX-ID anti corrosion paste
Now was time to start the clean up and rewiring of the electric systems connecting the Battery.
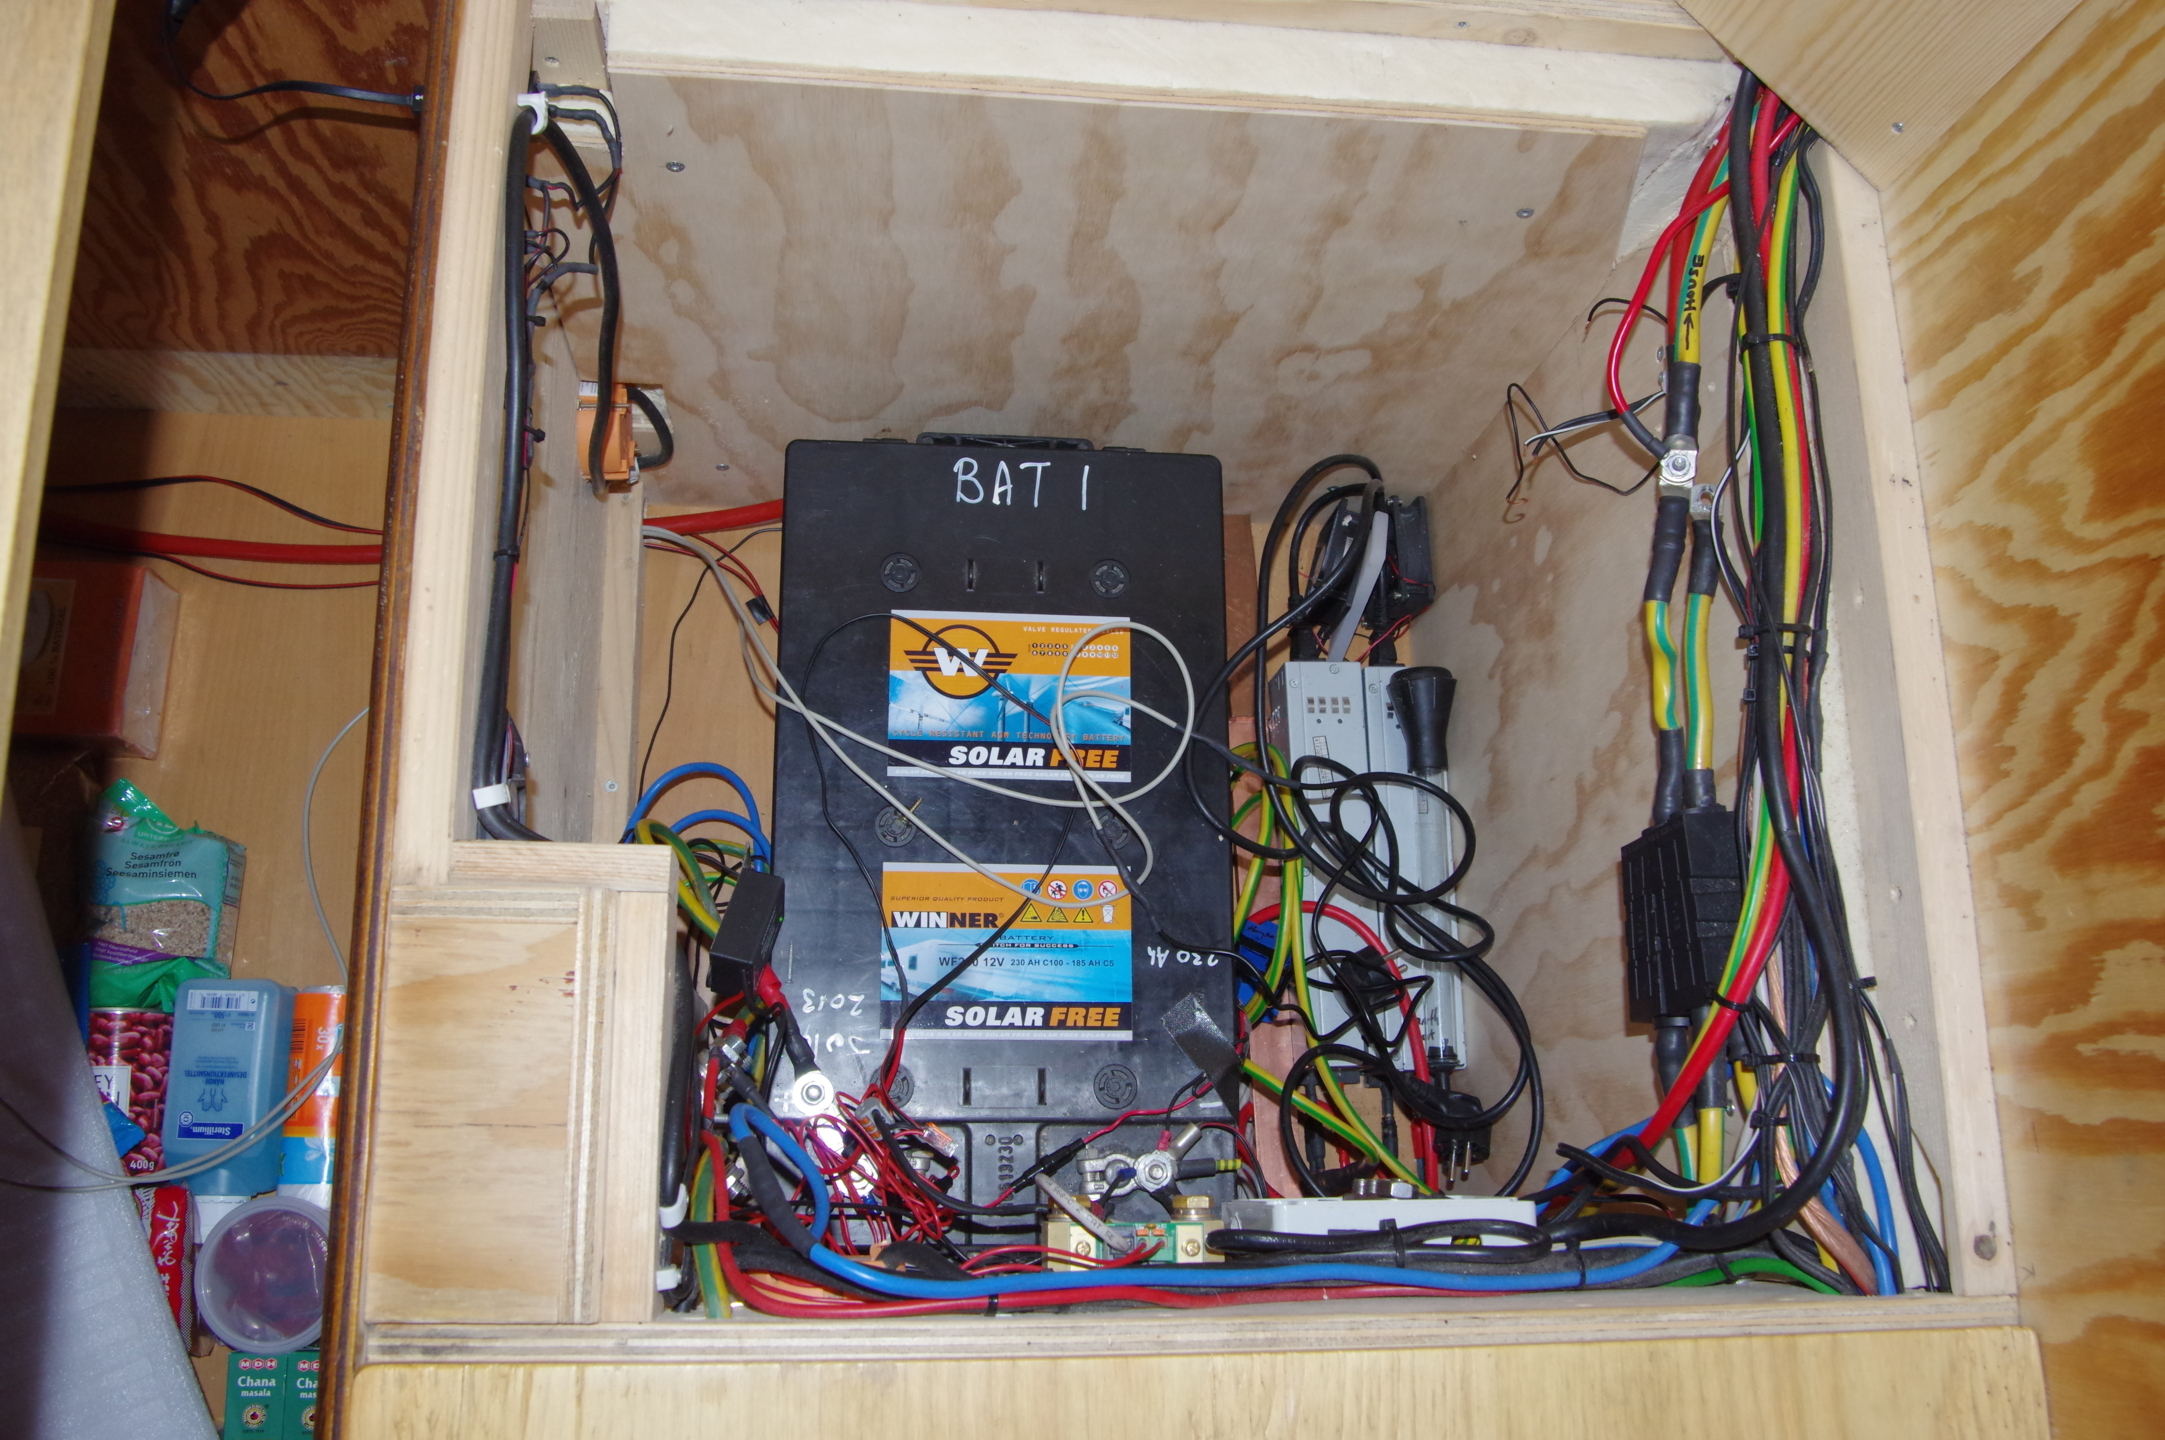
My old 70kg Lead Acid, AGM battery that Im now retiring after 6 good years of use.
There is a little life left in it so will look for a new home!
A lot of wires need to be removed and new ones suitable for the new LiFePO₄ system built in.
Also as my friend Boris said, my Battery box was messy and untidy! ?
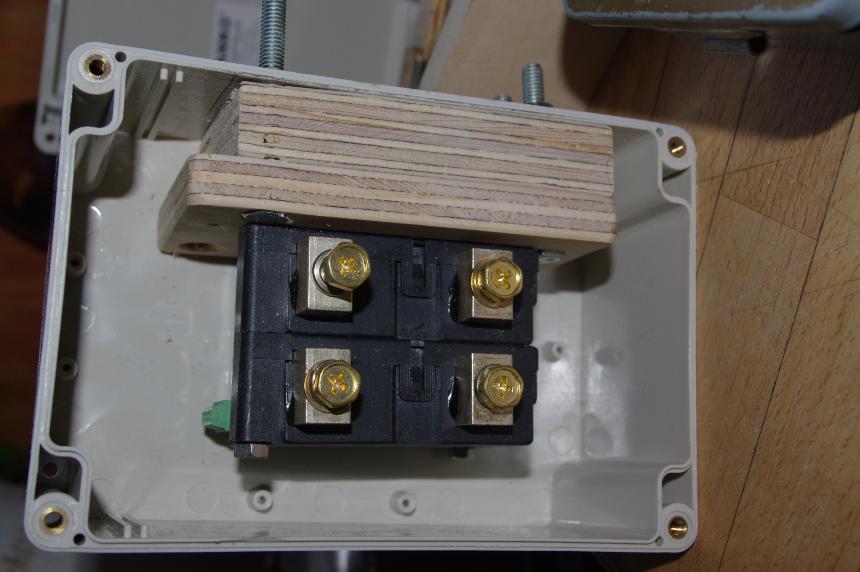
Built a wooden spacer and mounting for my 100A Latching Relays and placed in a plastic box
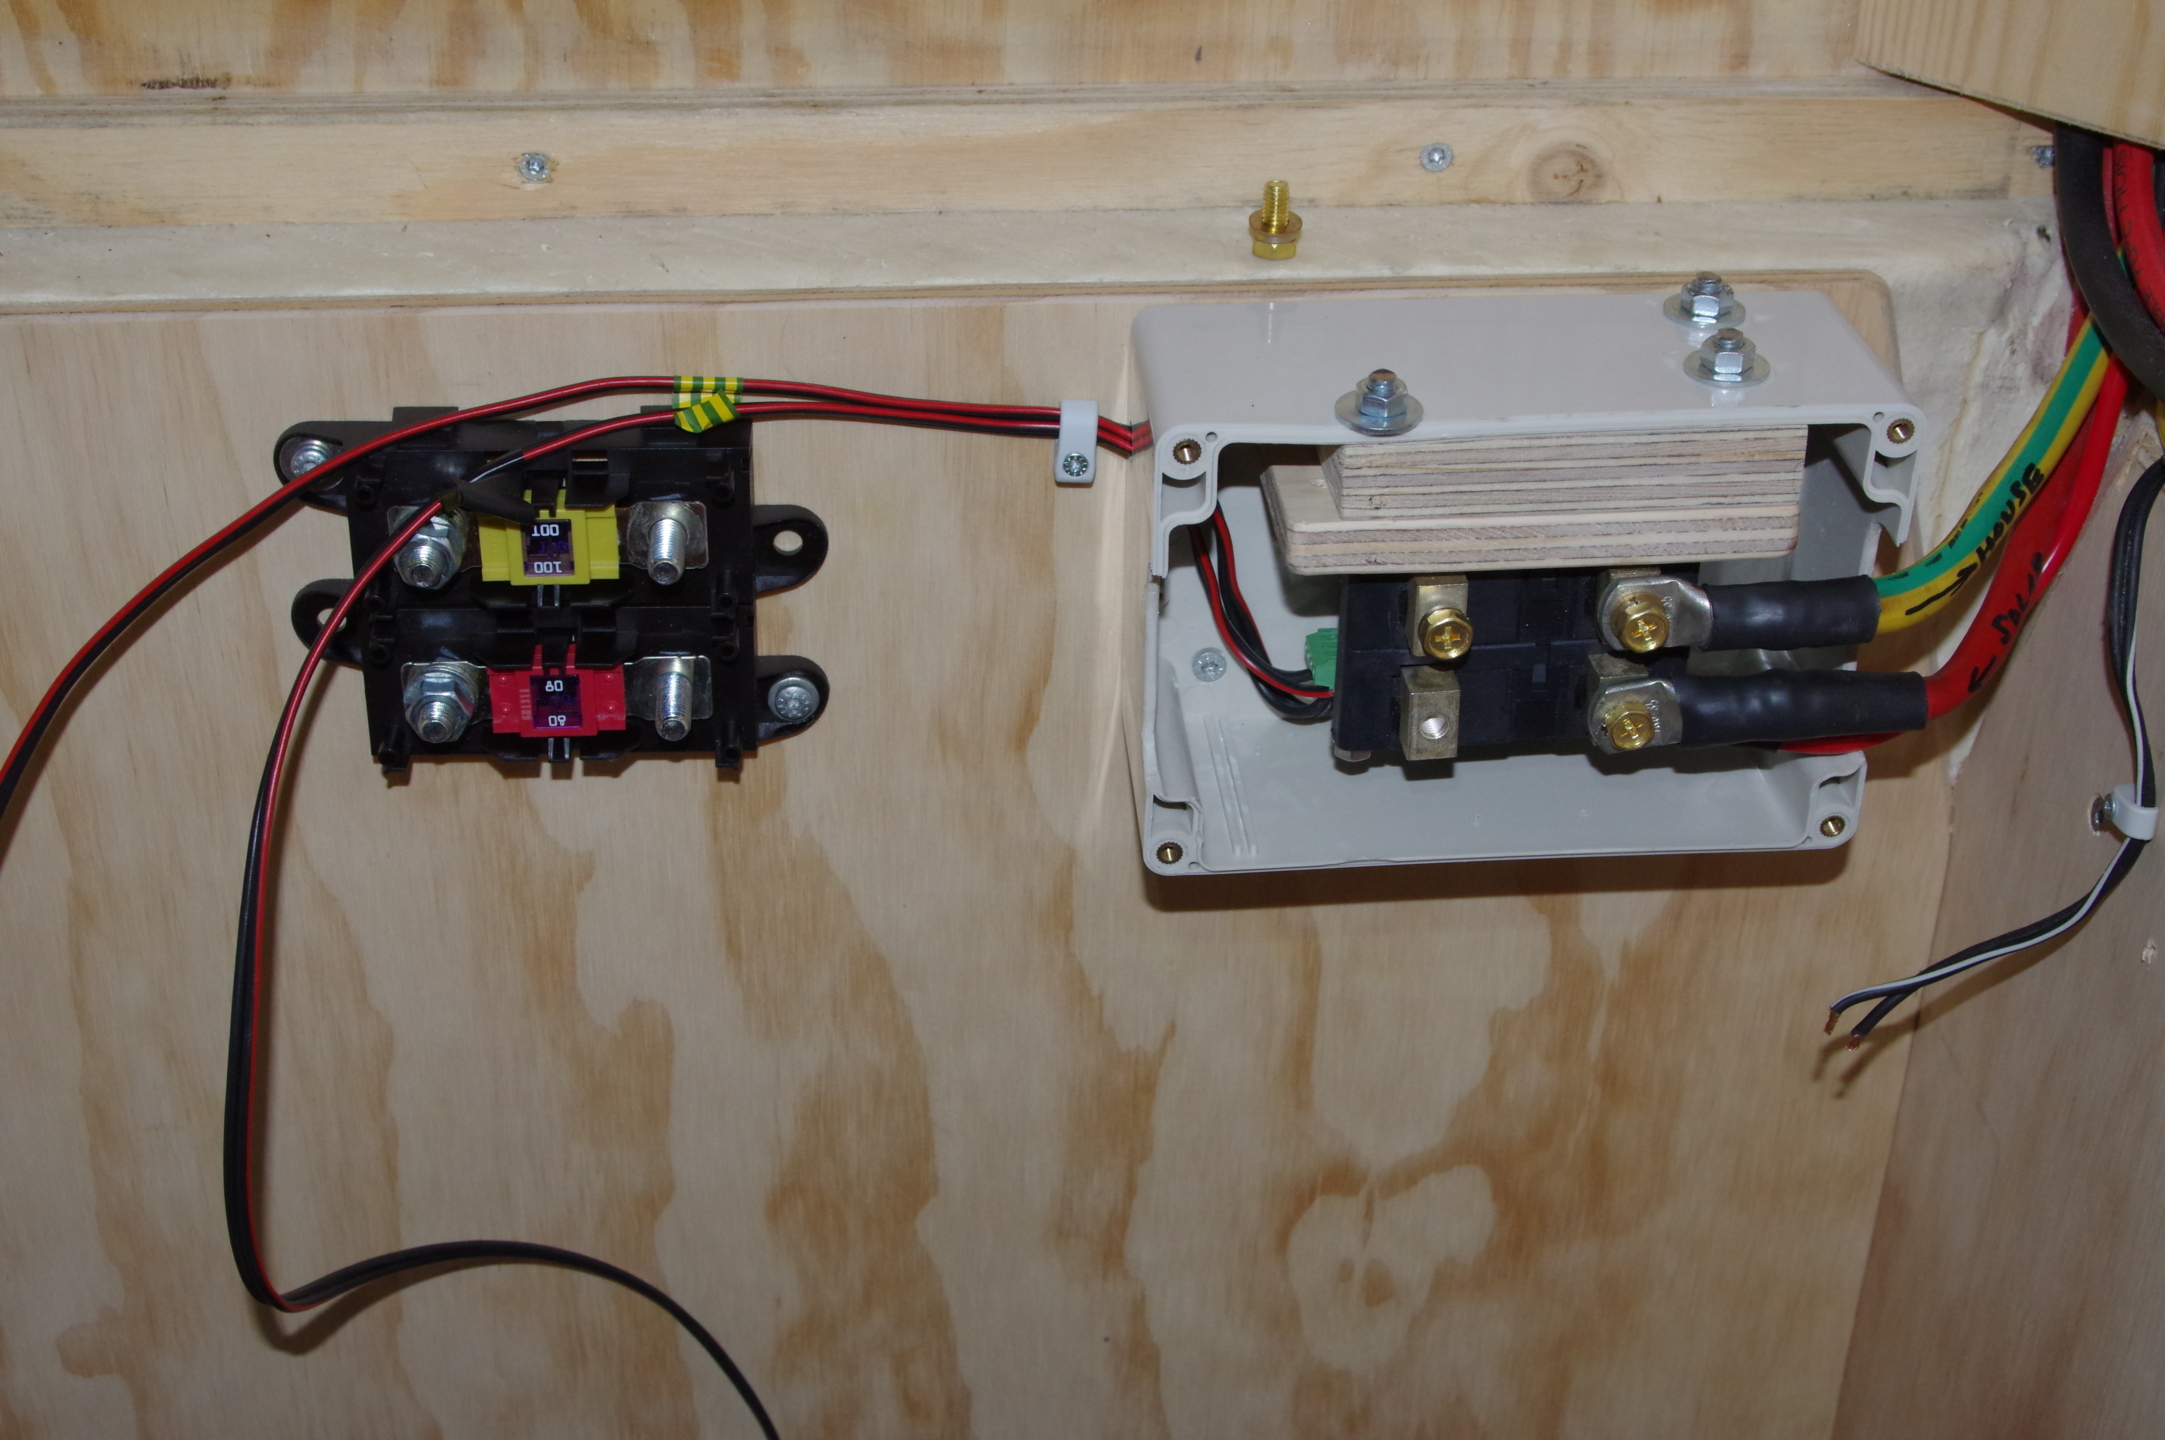
Now with some cables connected and the two main fuses for power into and out of the battery ready for cables to be attached
Due to the job taking a few days I set up some temporary cables to keep the house powered
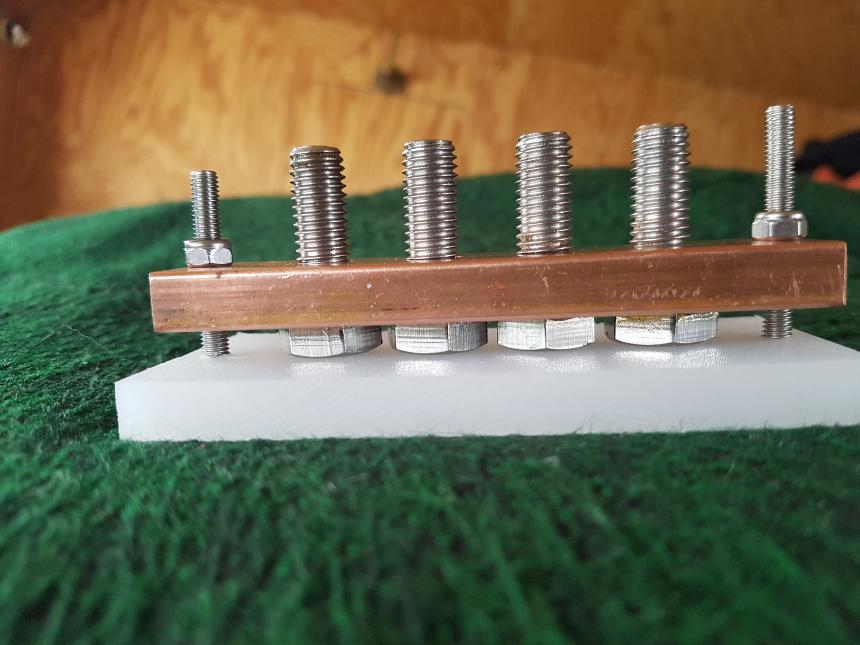
Using some nylon cutting board as insulation, I thread tapped a 30mm x 10mm copper bar for 8mm Stainless Steel, bolts that I am going to use as my Negative Busbar.
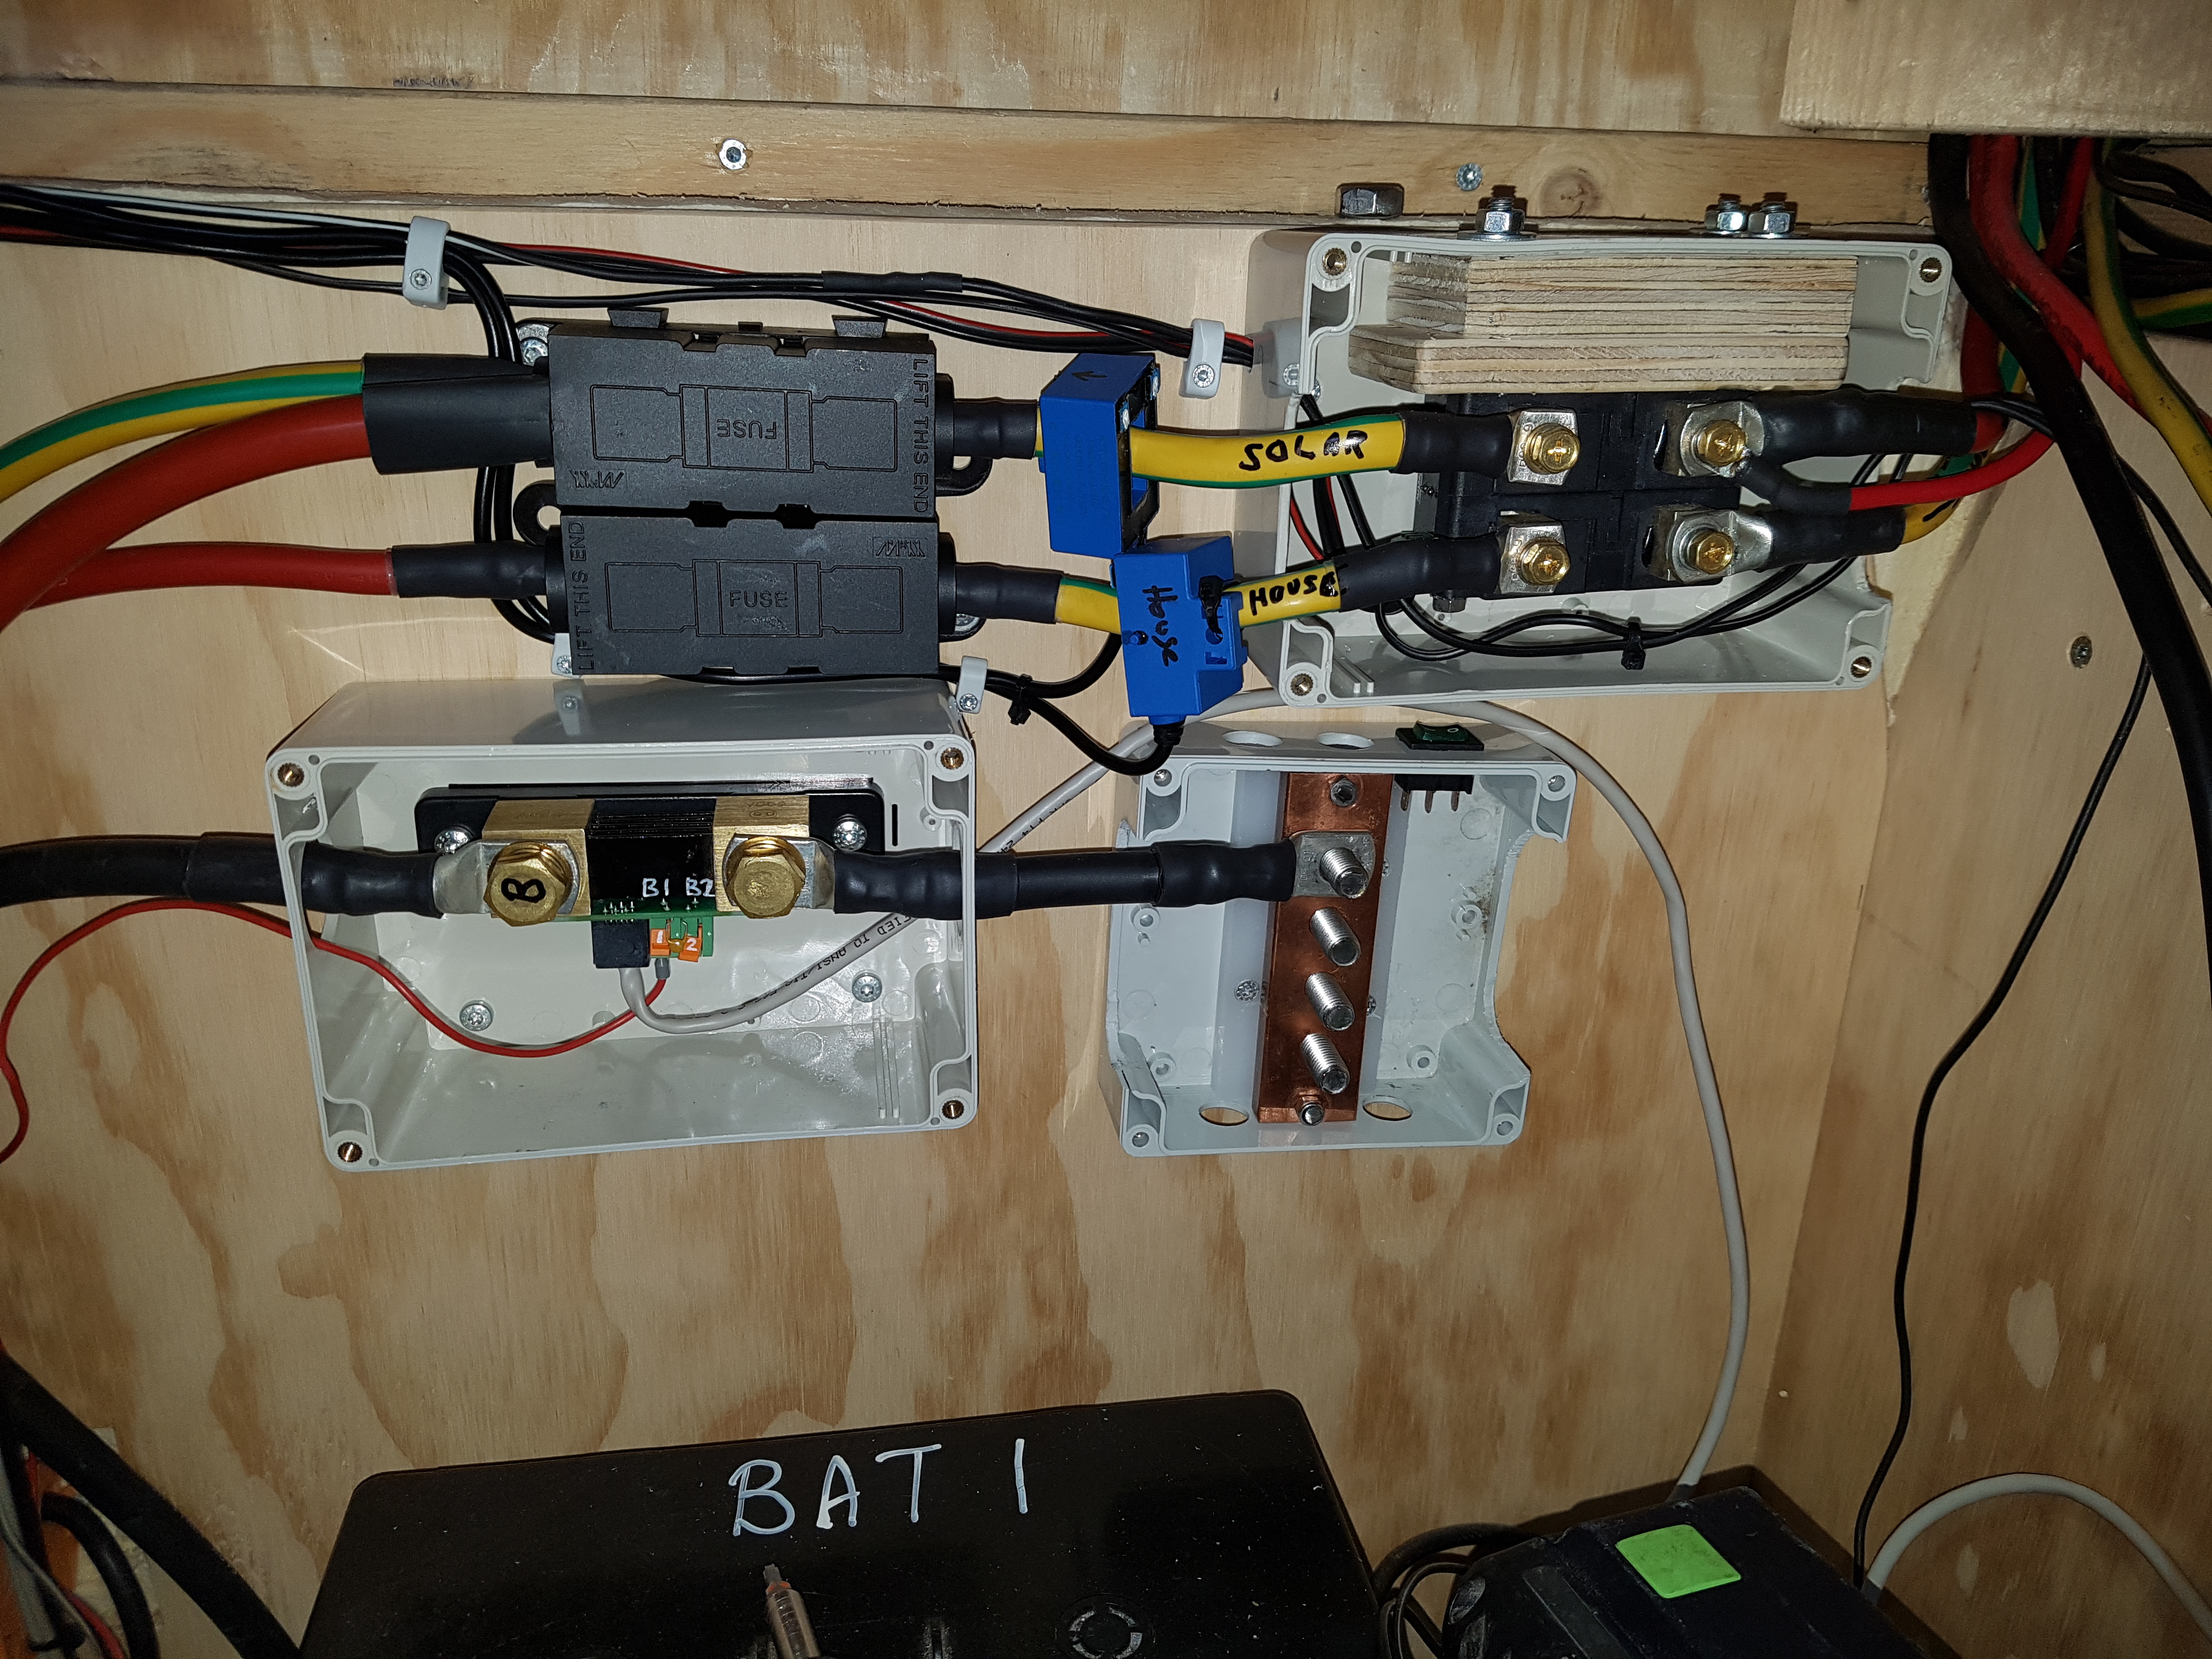
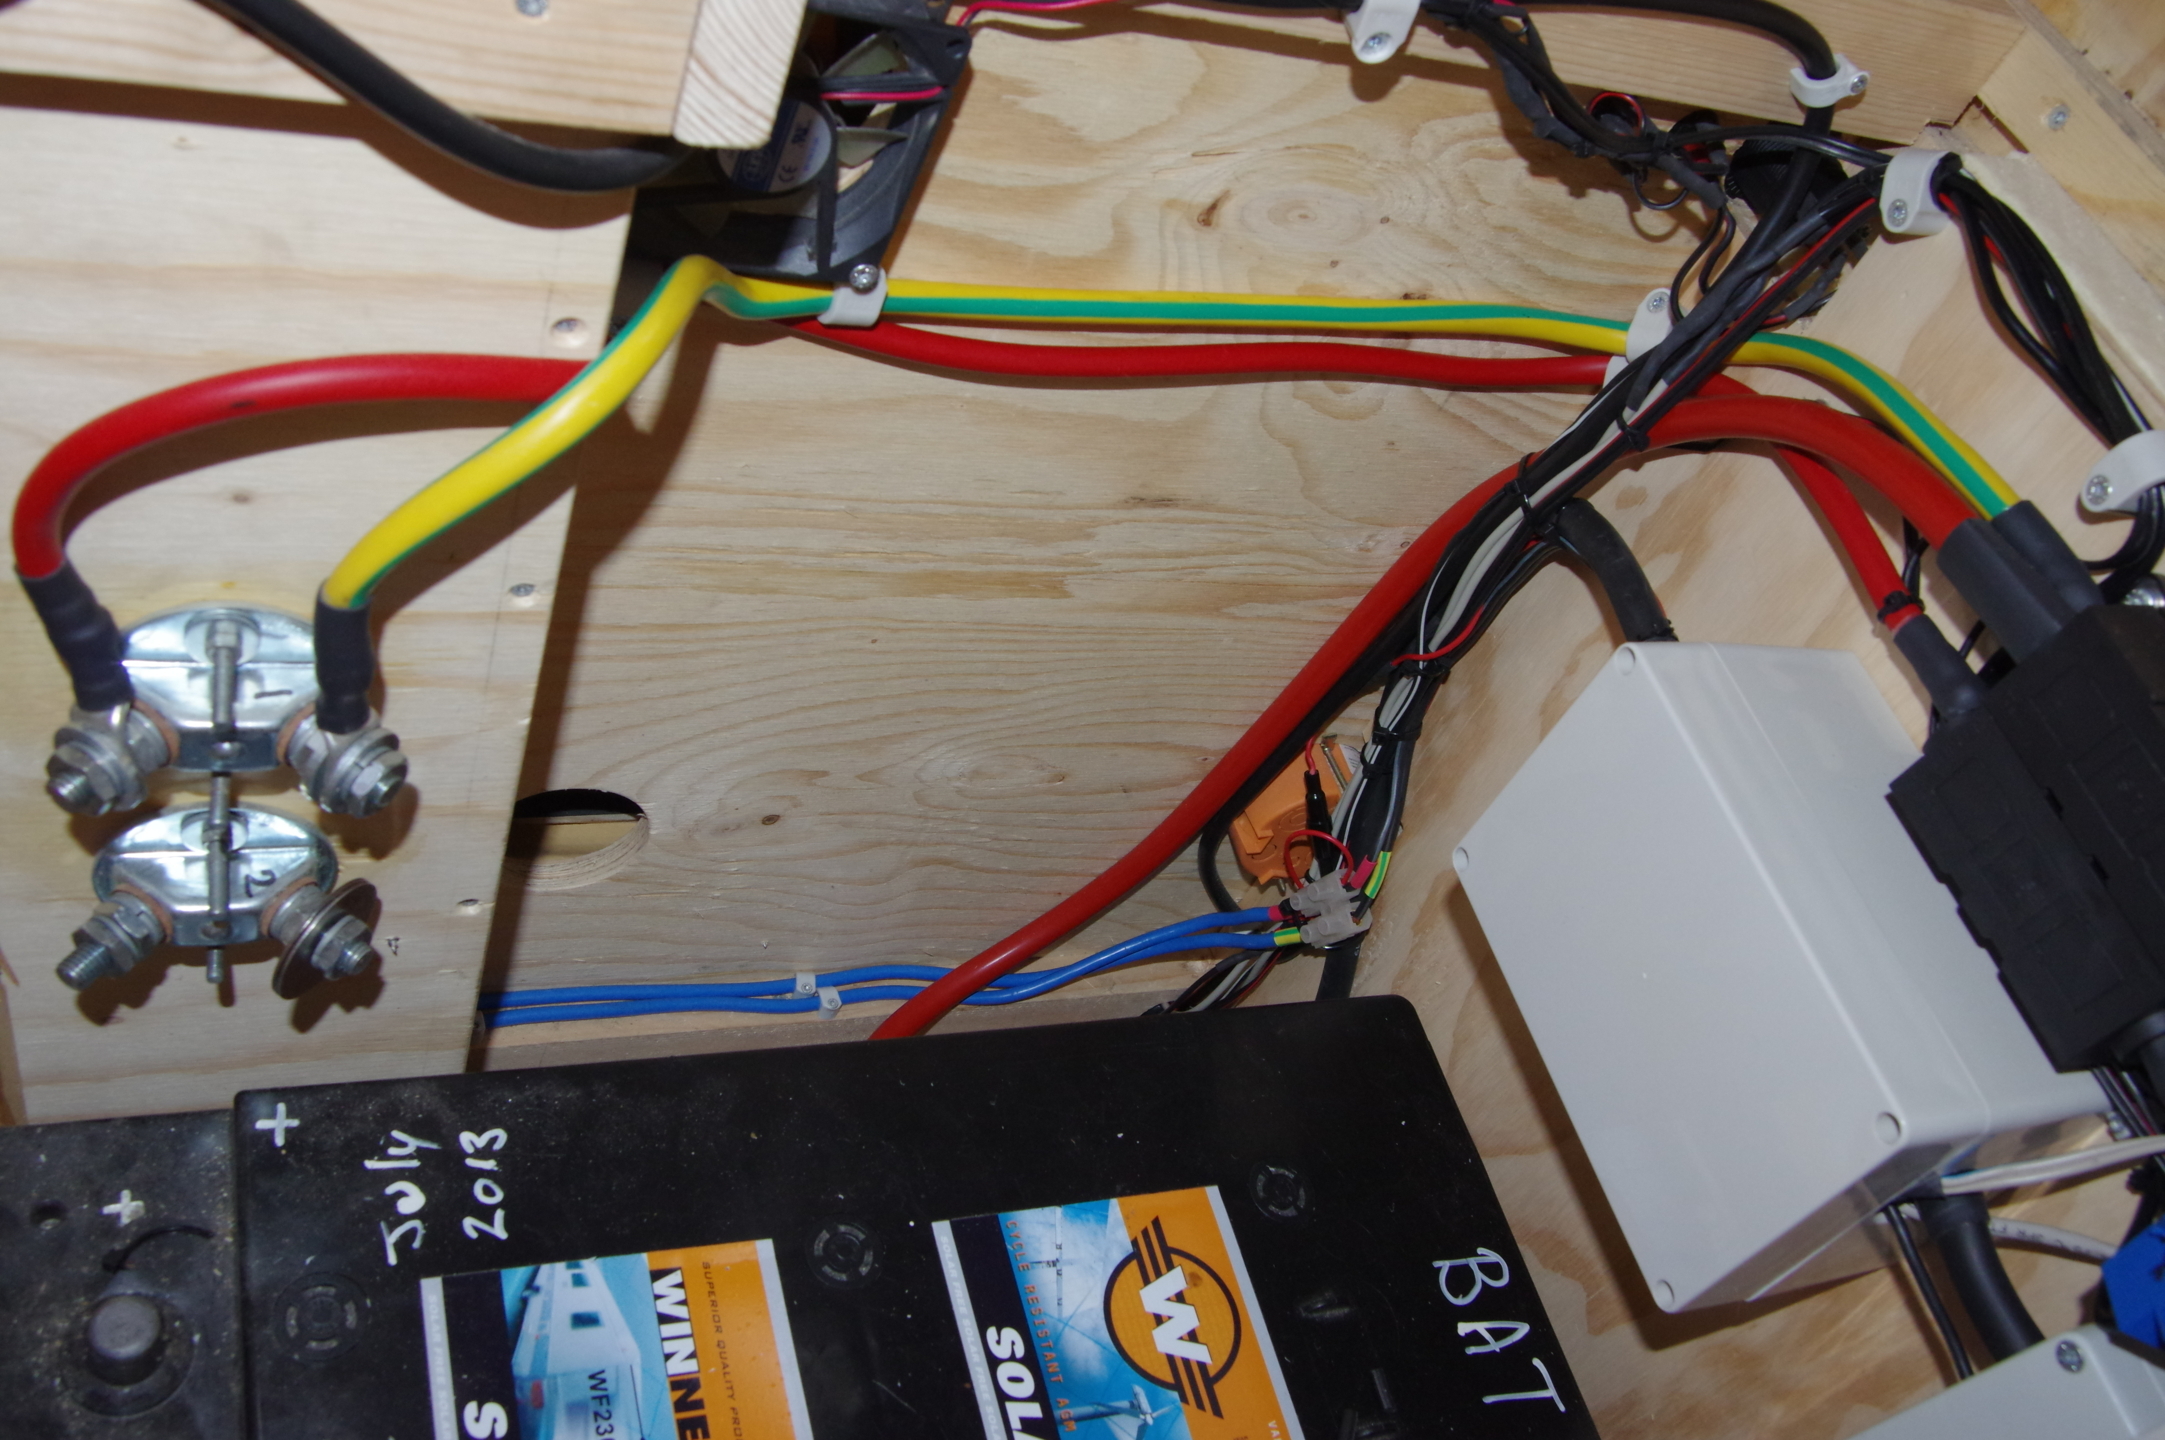
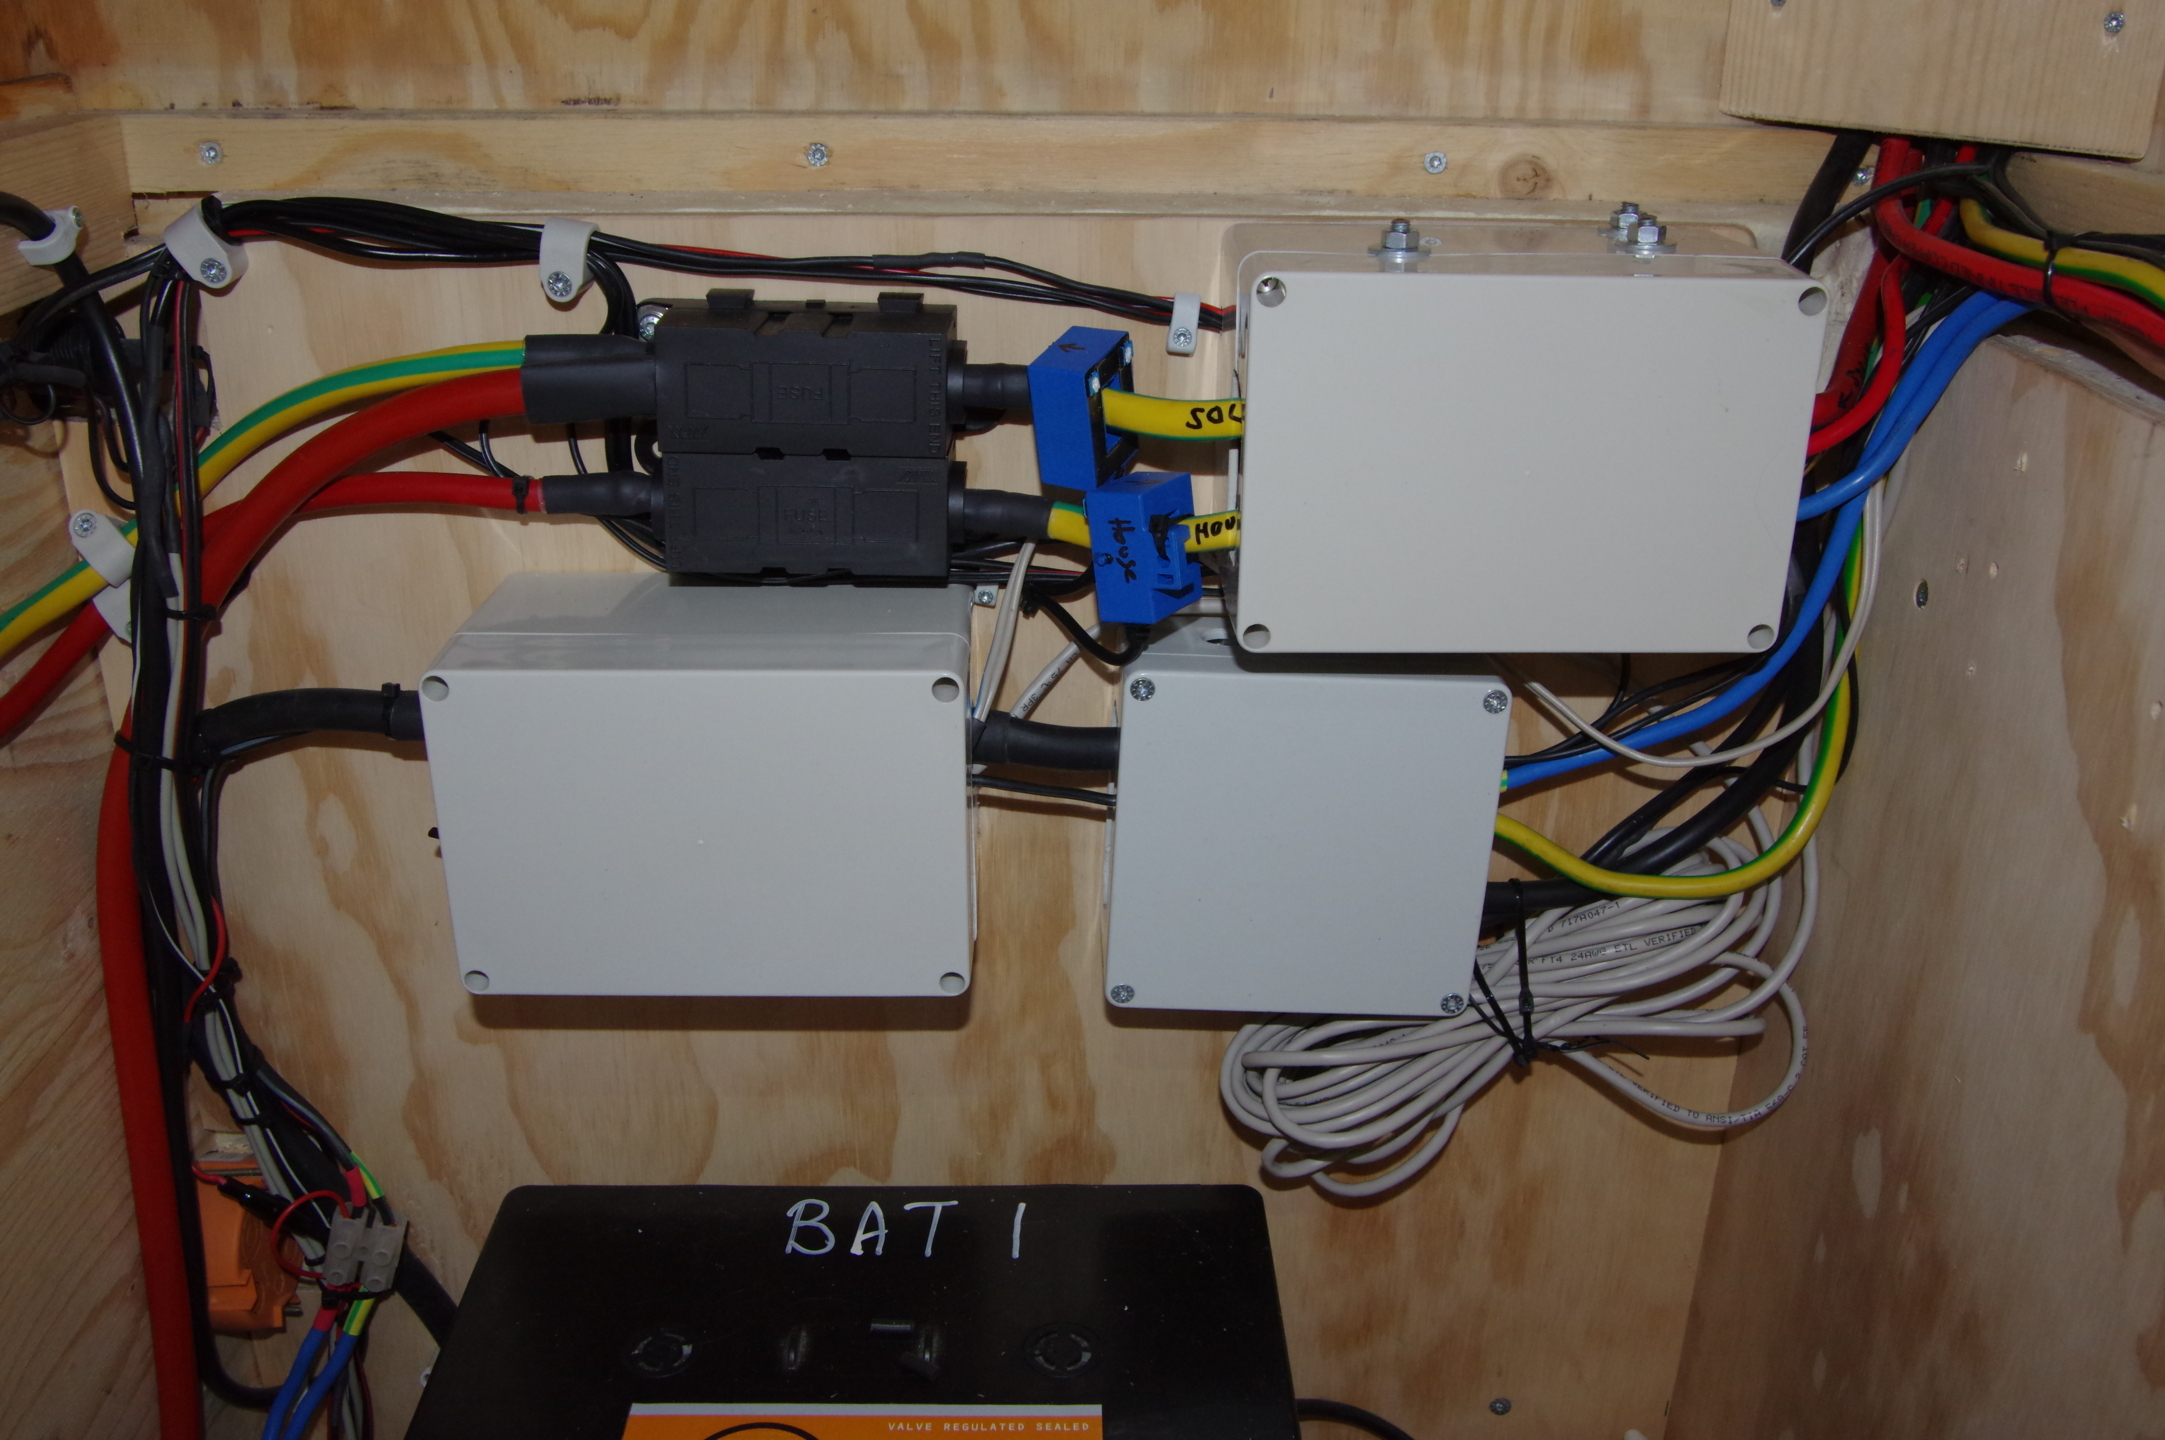
(Clockwise from top left) Fuse box, Latching relay, Negative Busbar, and the Shunt for the Victron Battery Monitor
The Blue things around the cables are the current counters for the BMS
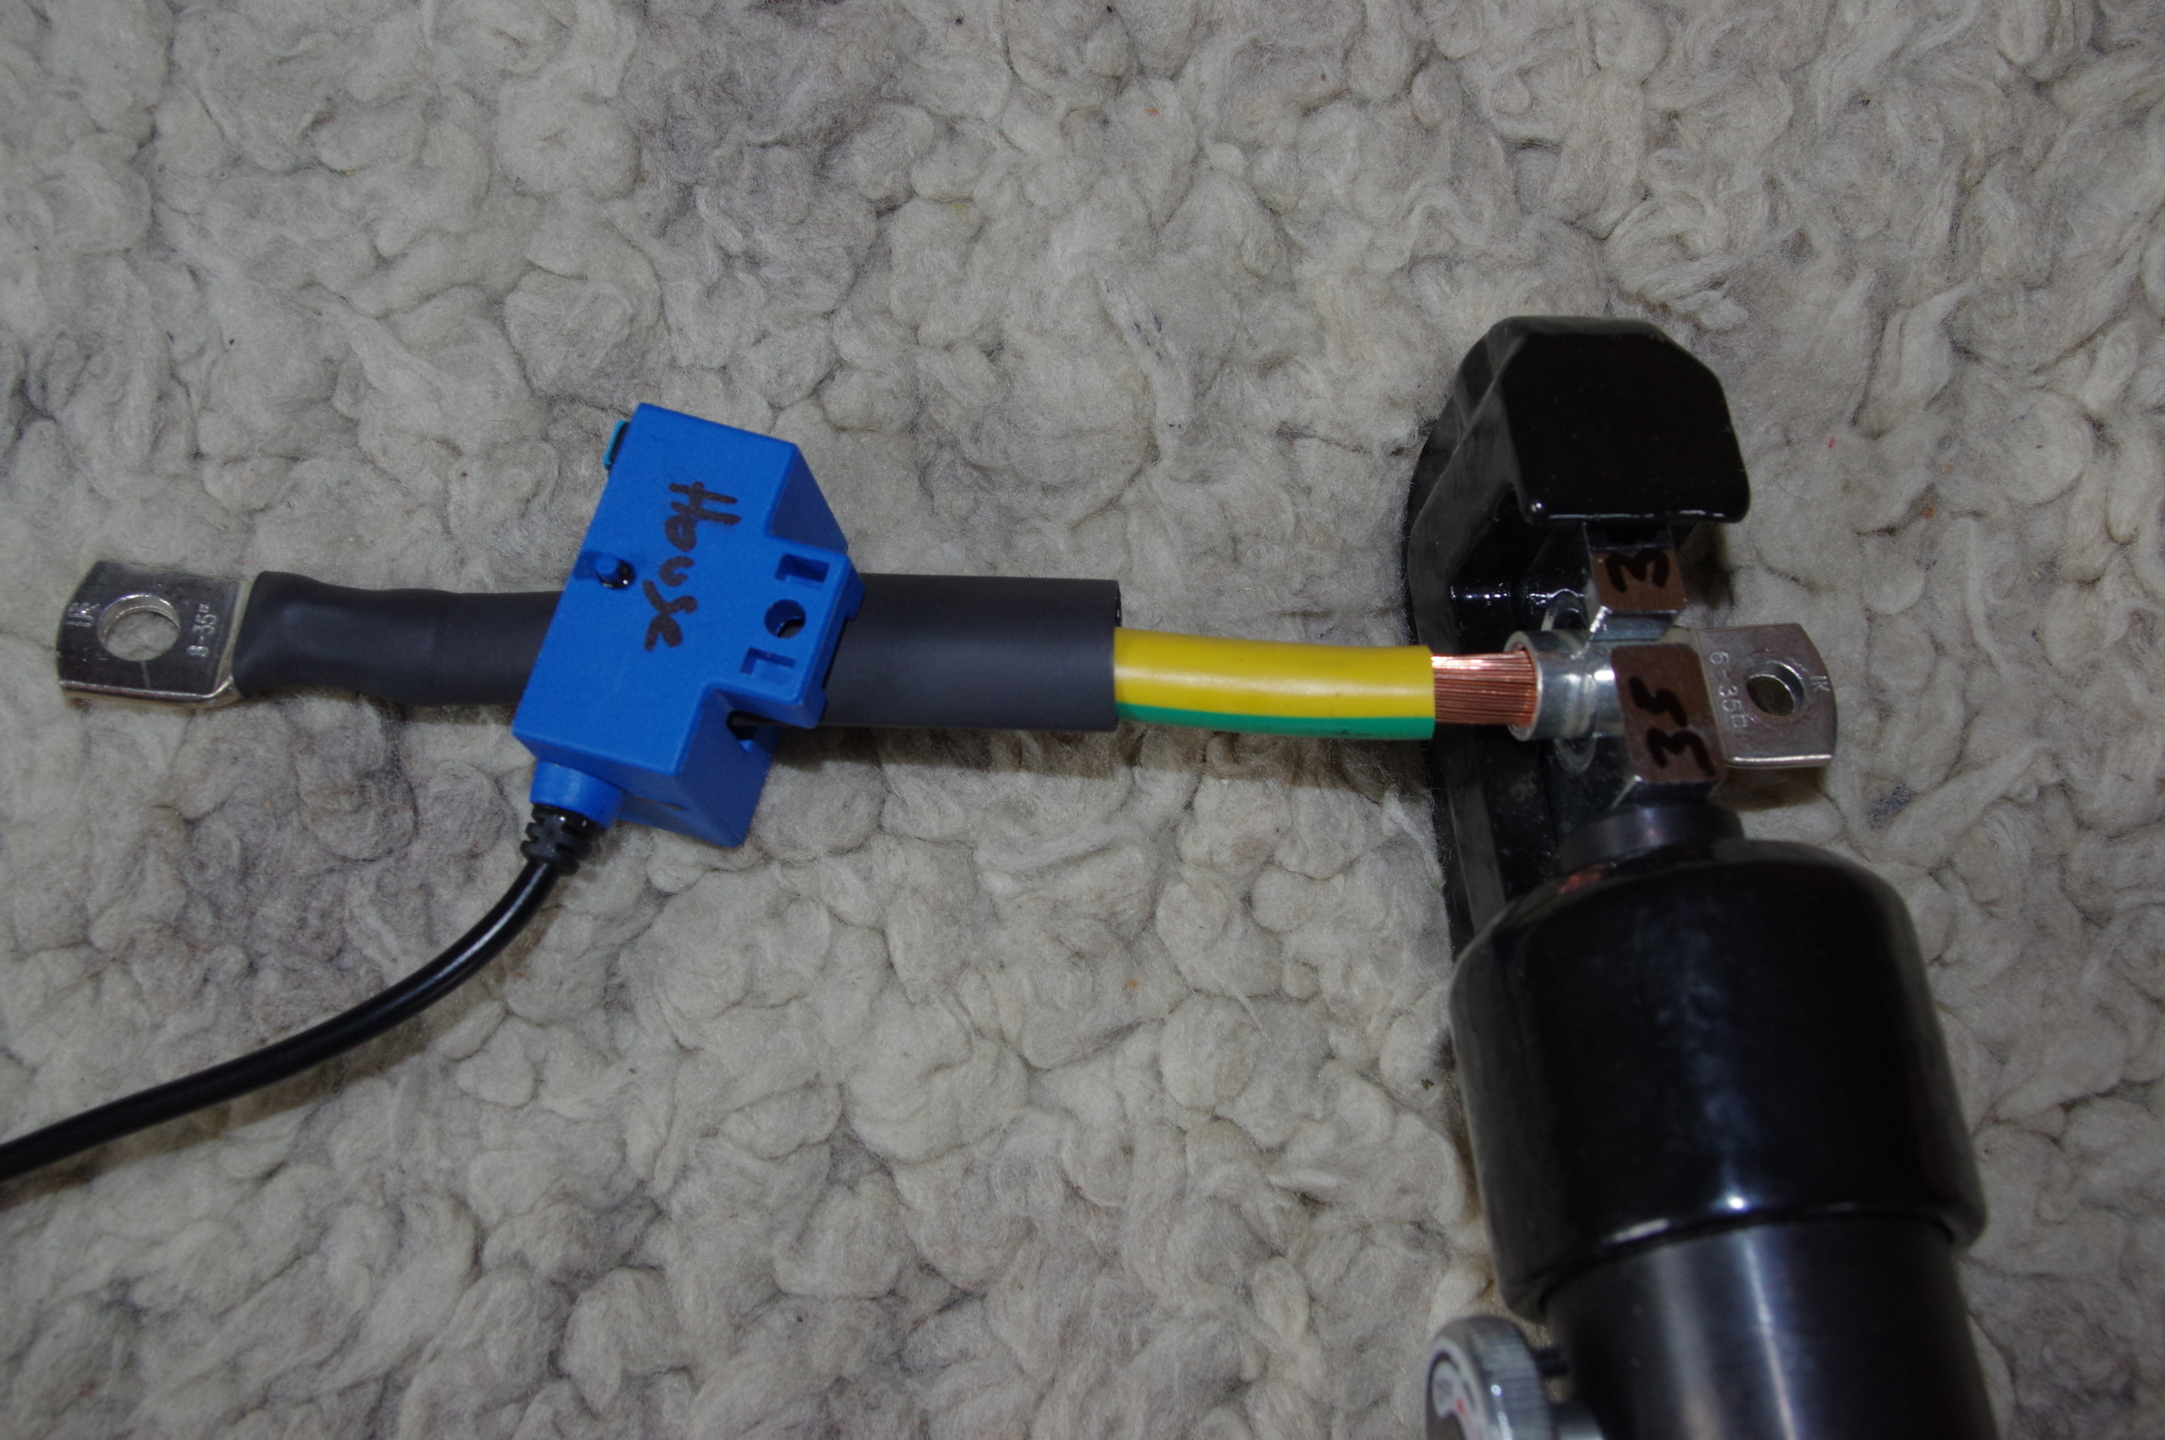
At this stage the Red 50mm2 positive cable from the battery hasn't been finished so Ive just slipped some Shrinky over the end for protection, going into the fuse box.
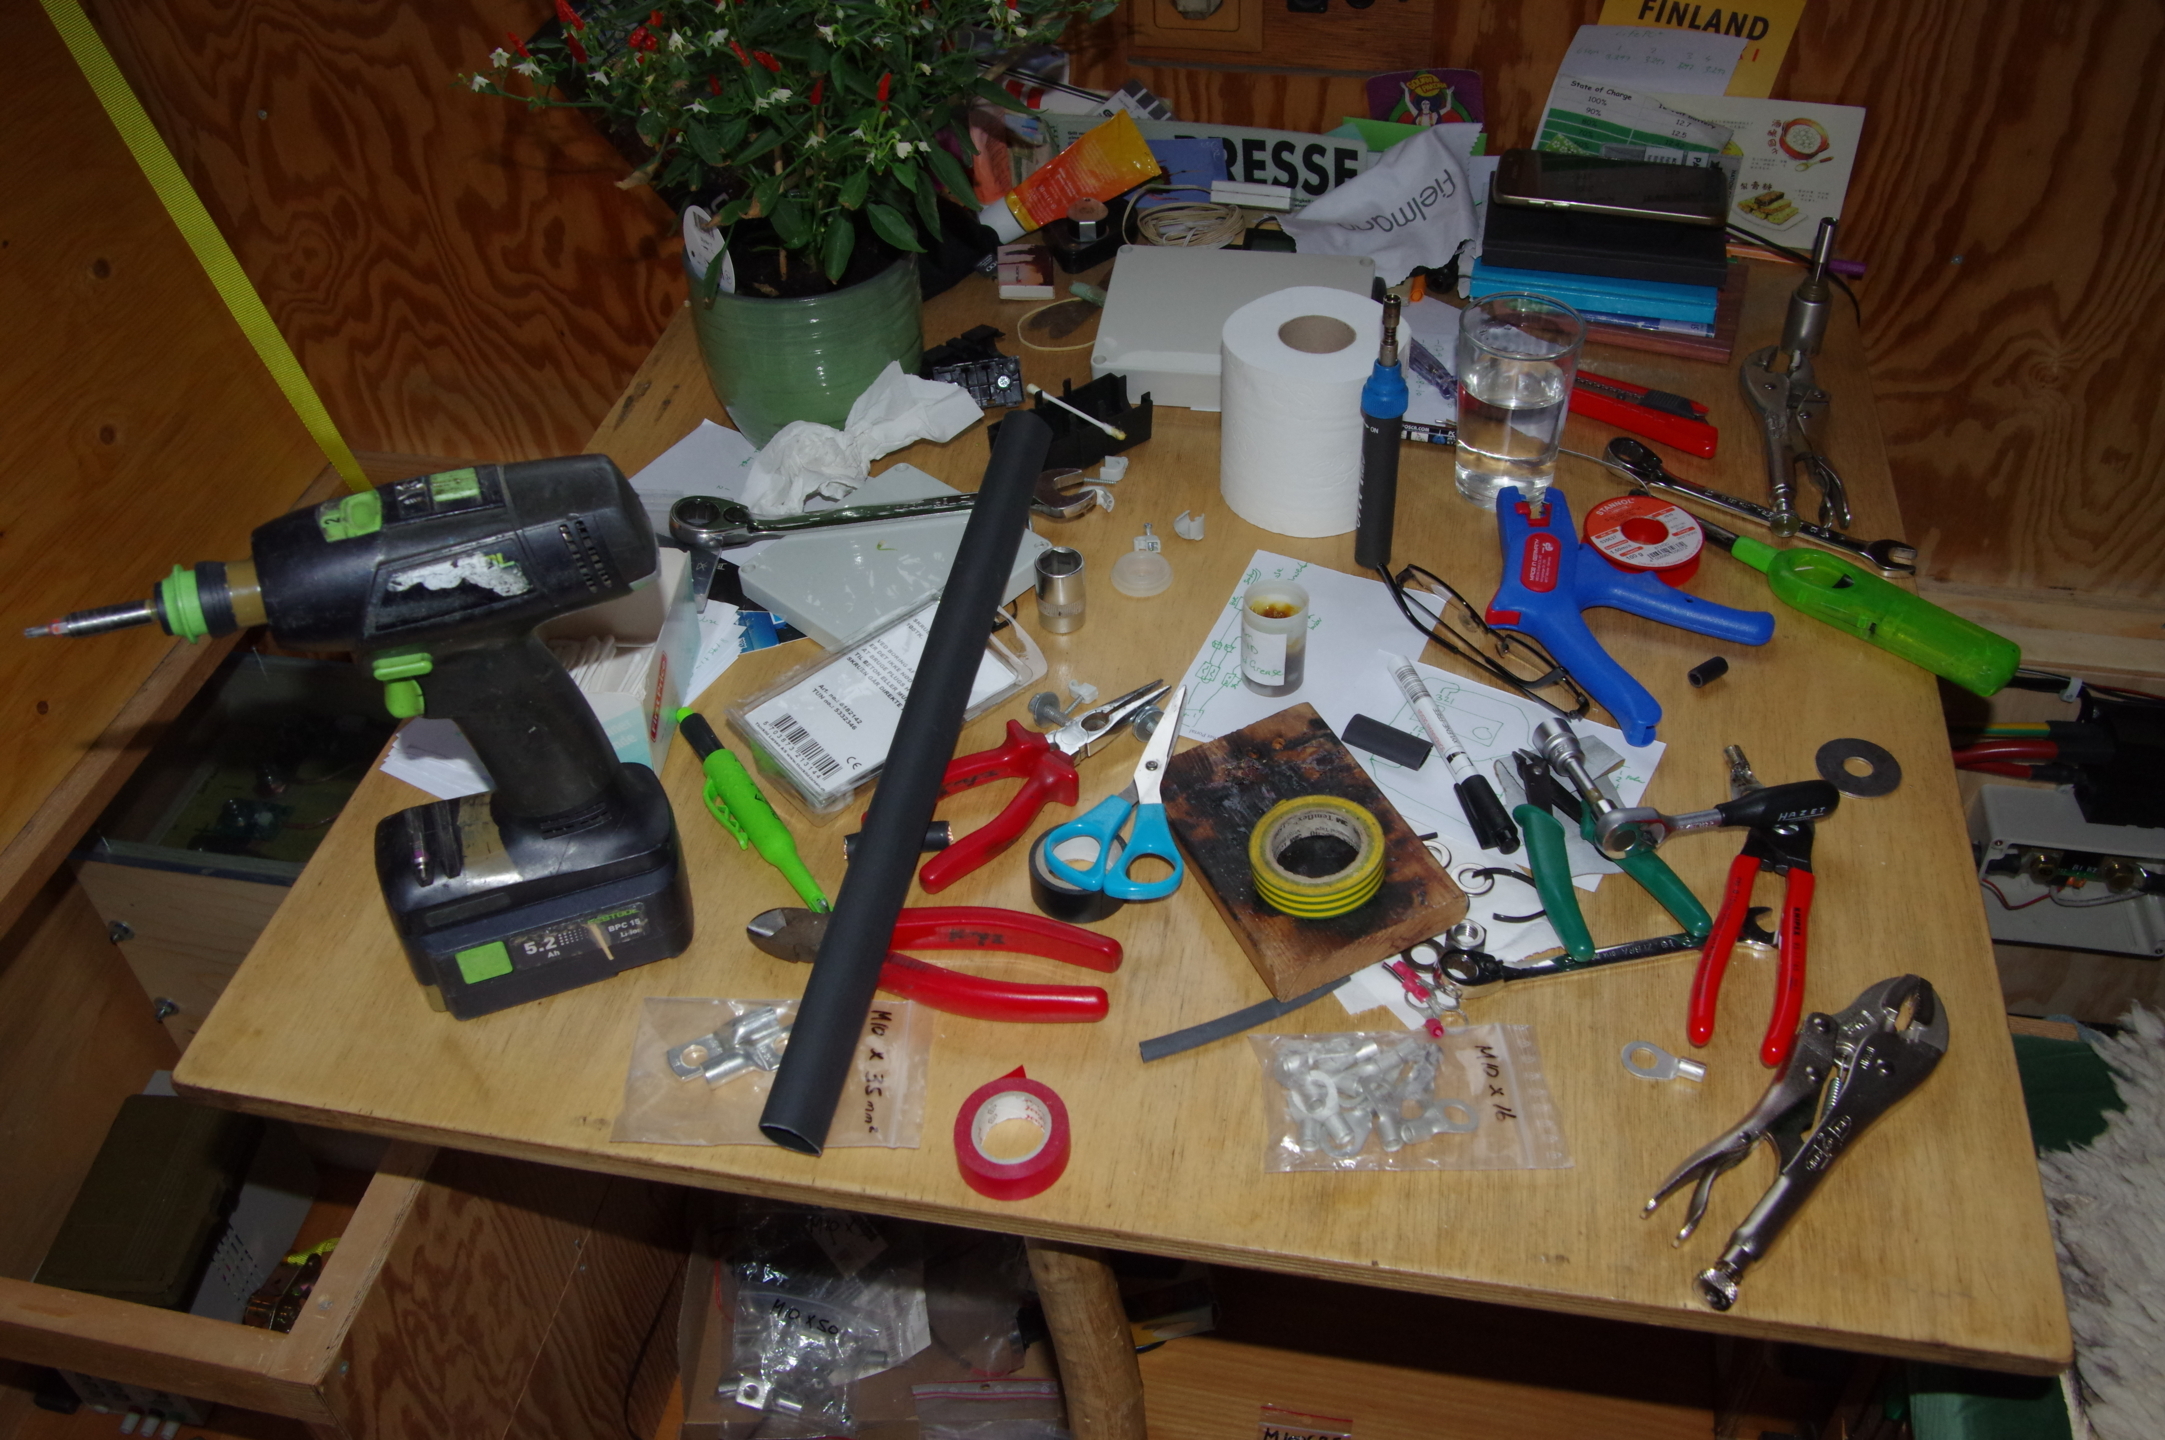
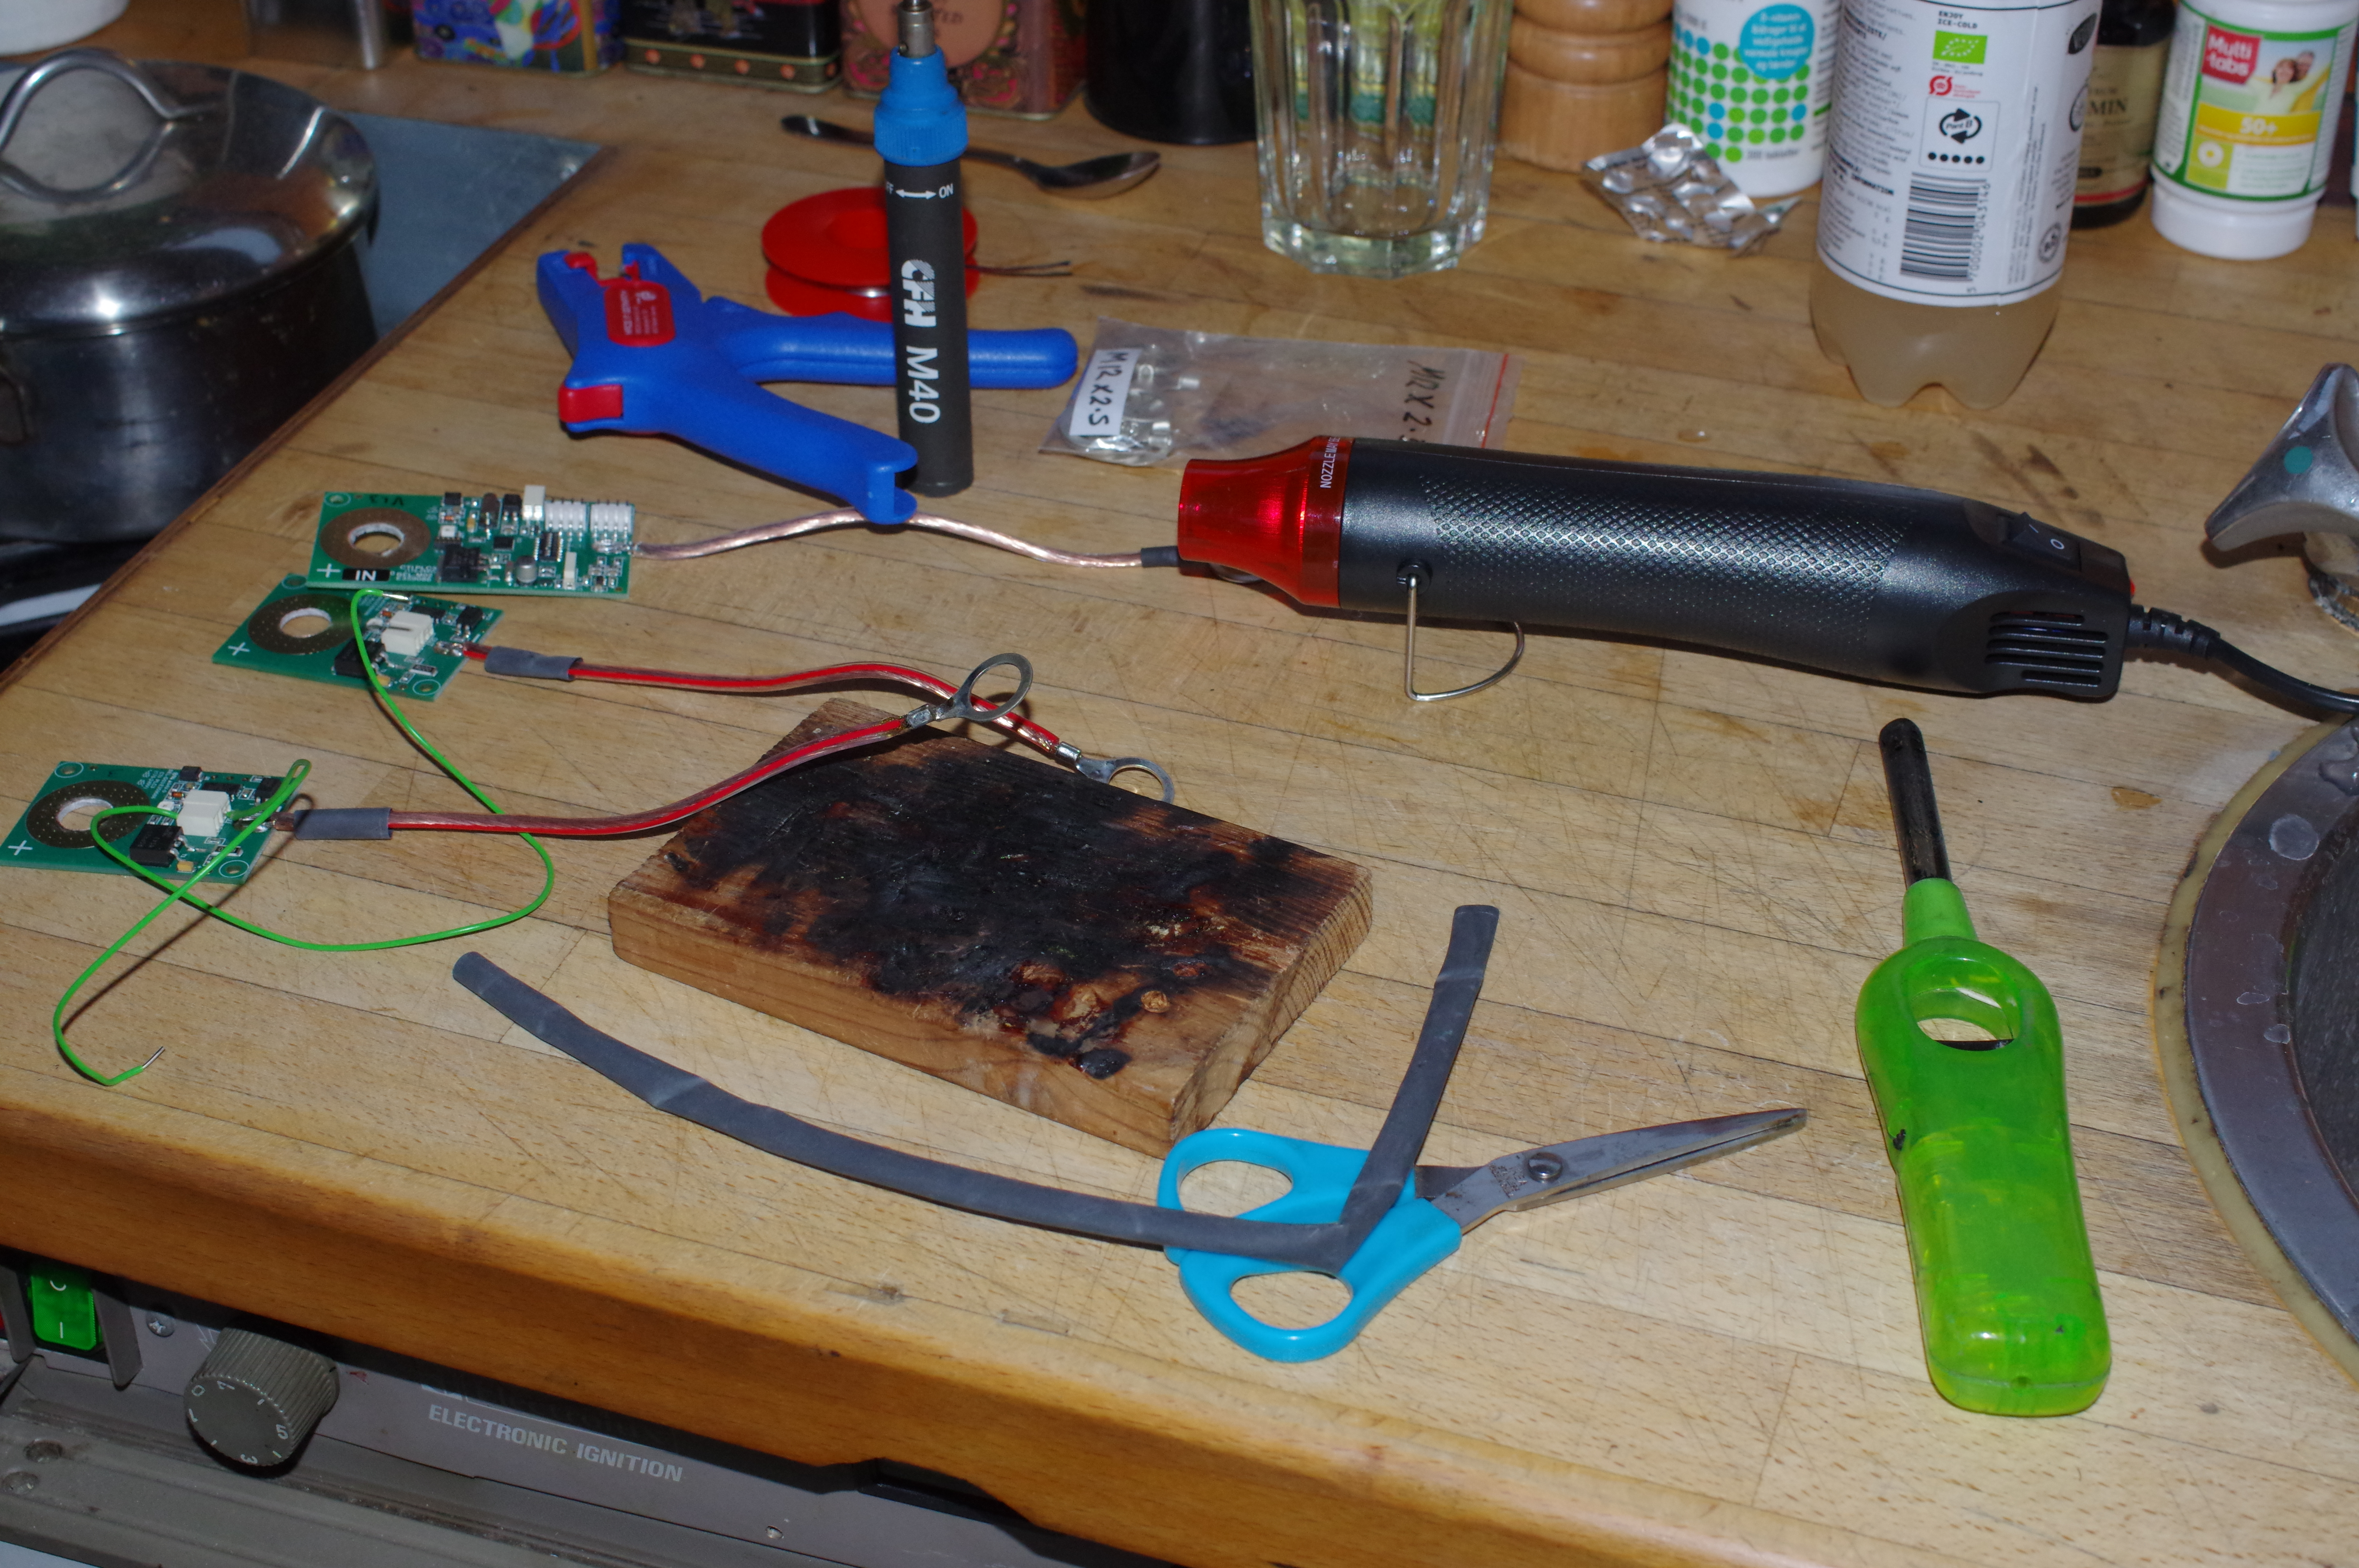
Table full of tools as Im working
Very happy with the Hydraulic Crimping Tool that I bought.
But after Crimping I still heat it and solder the connection then cover in Heat Shrink!
This is not the final cable position, it will be snuggled up to the cable eye terminal for crimping
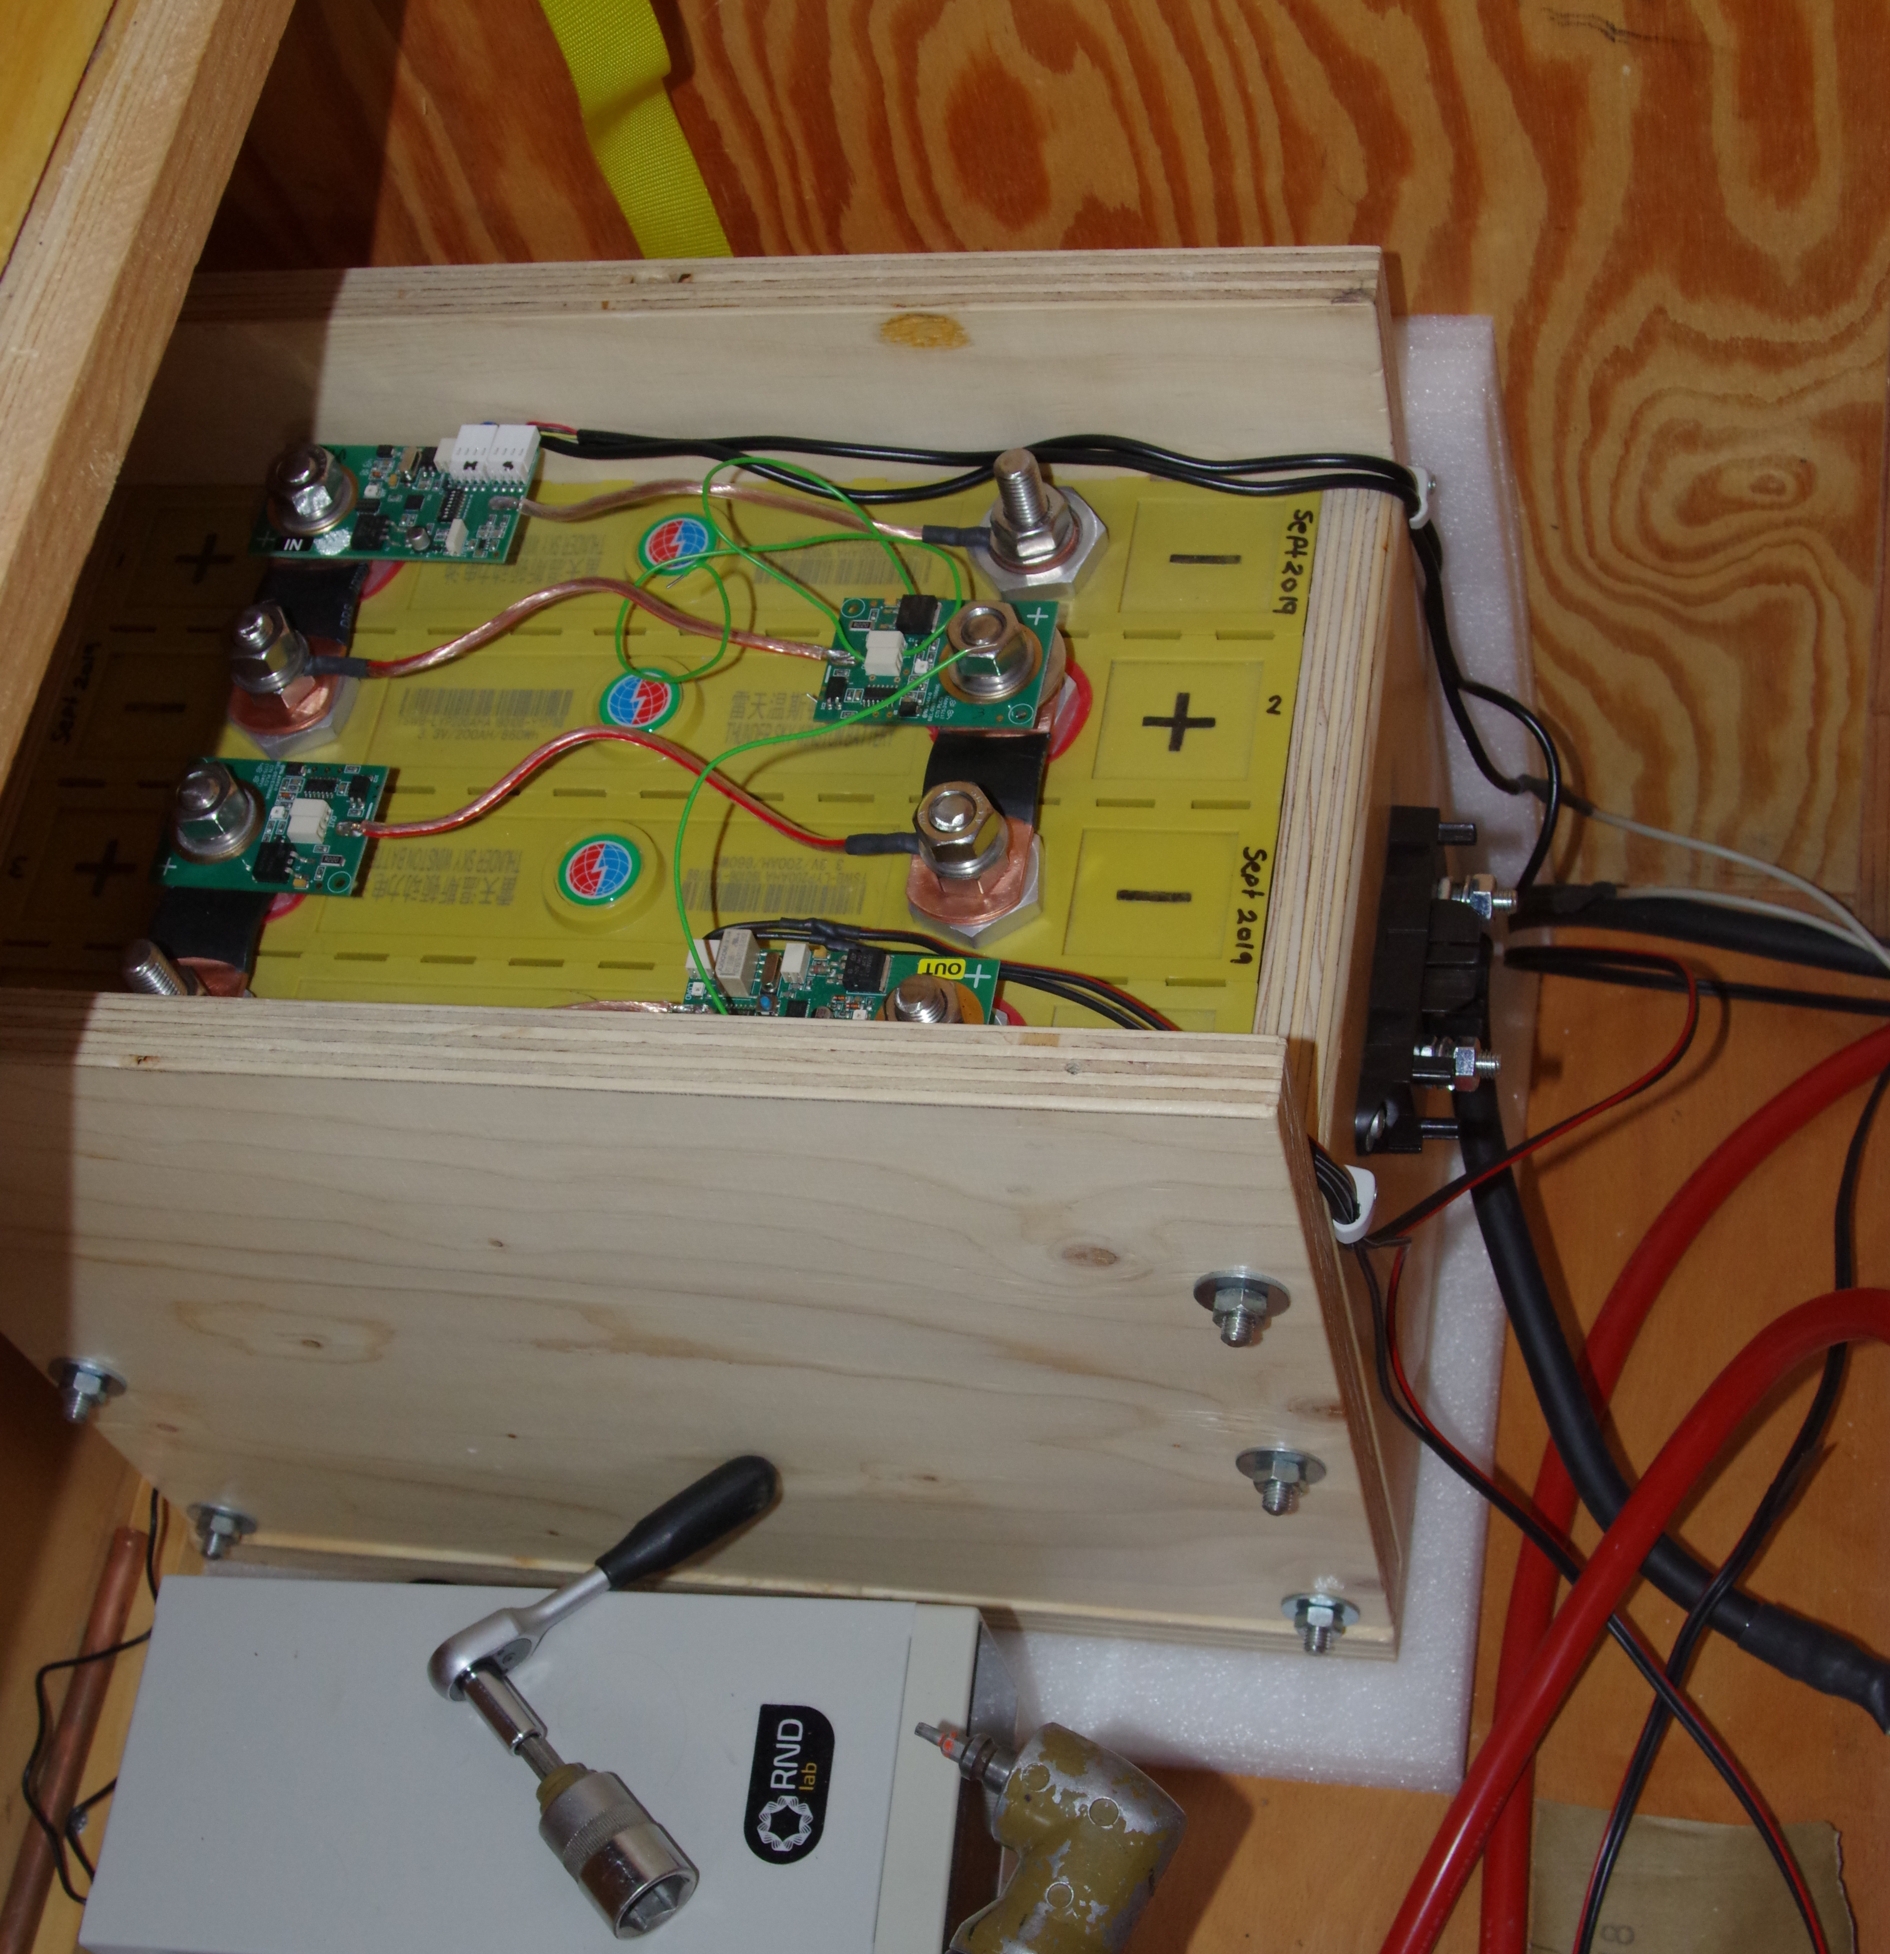
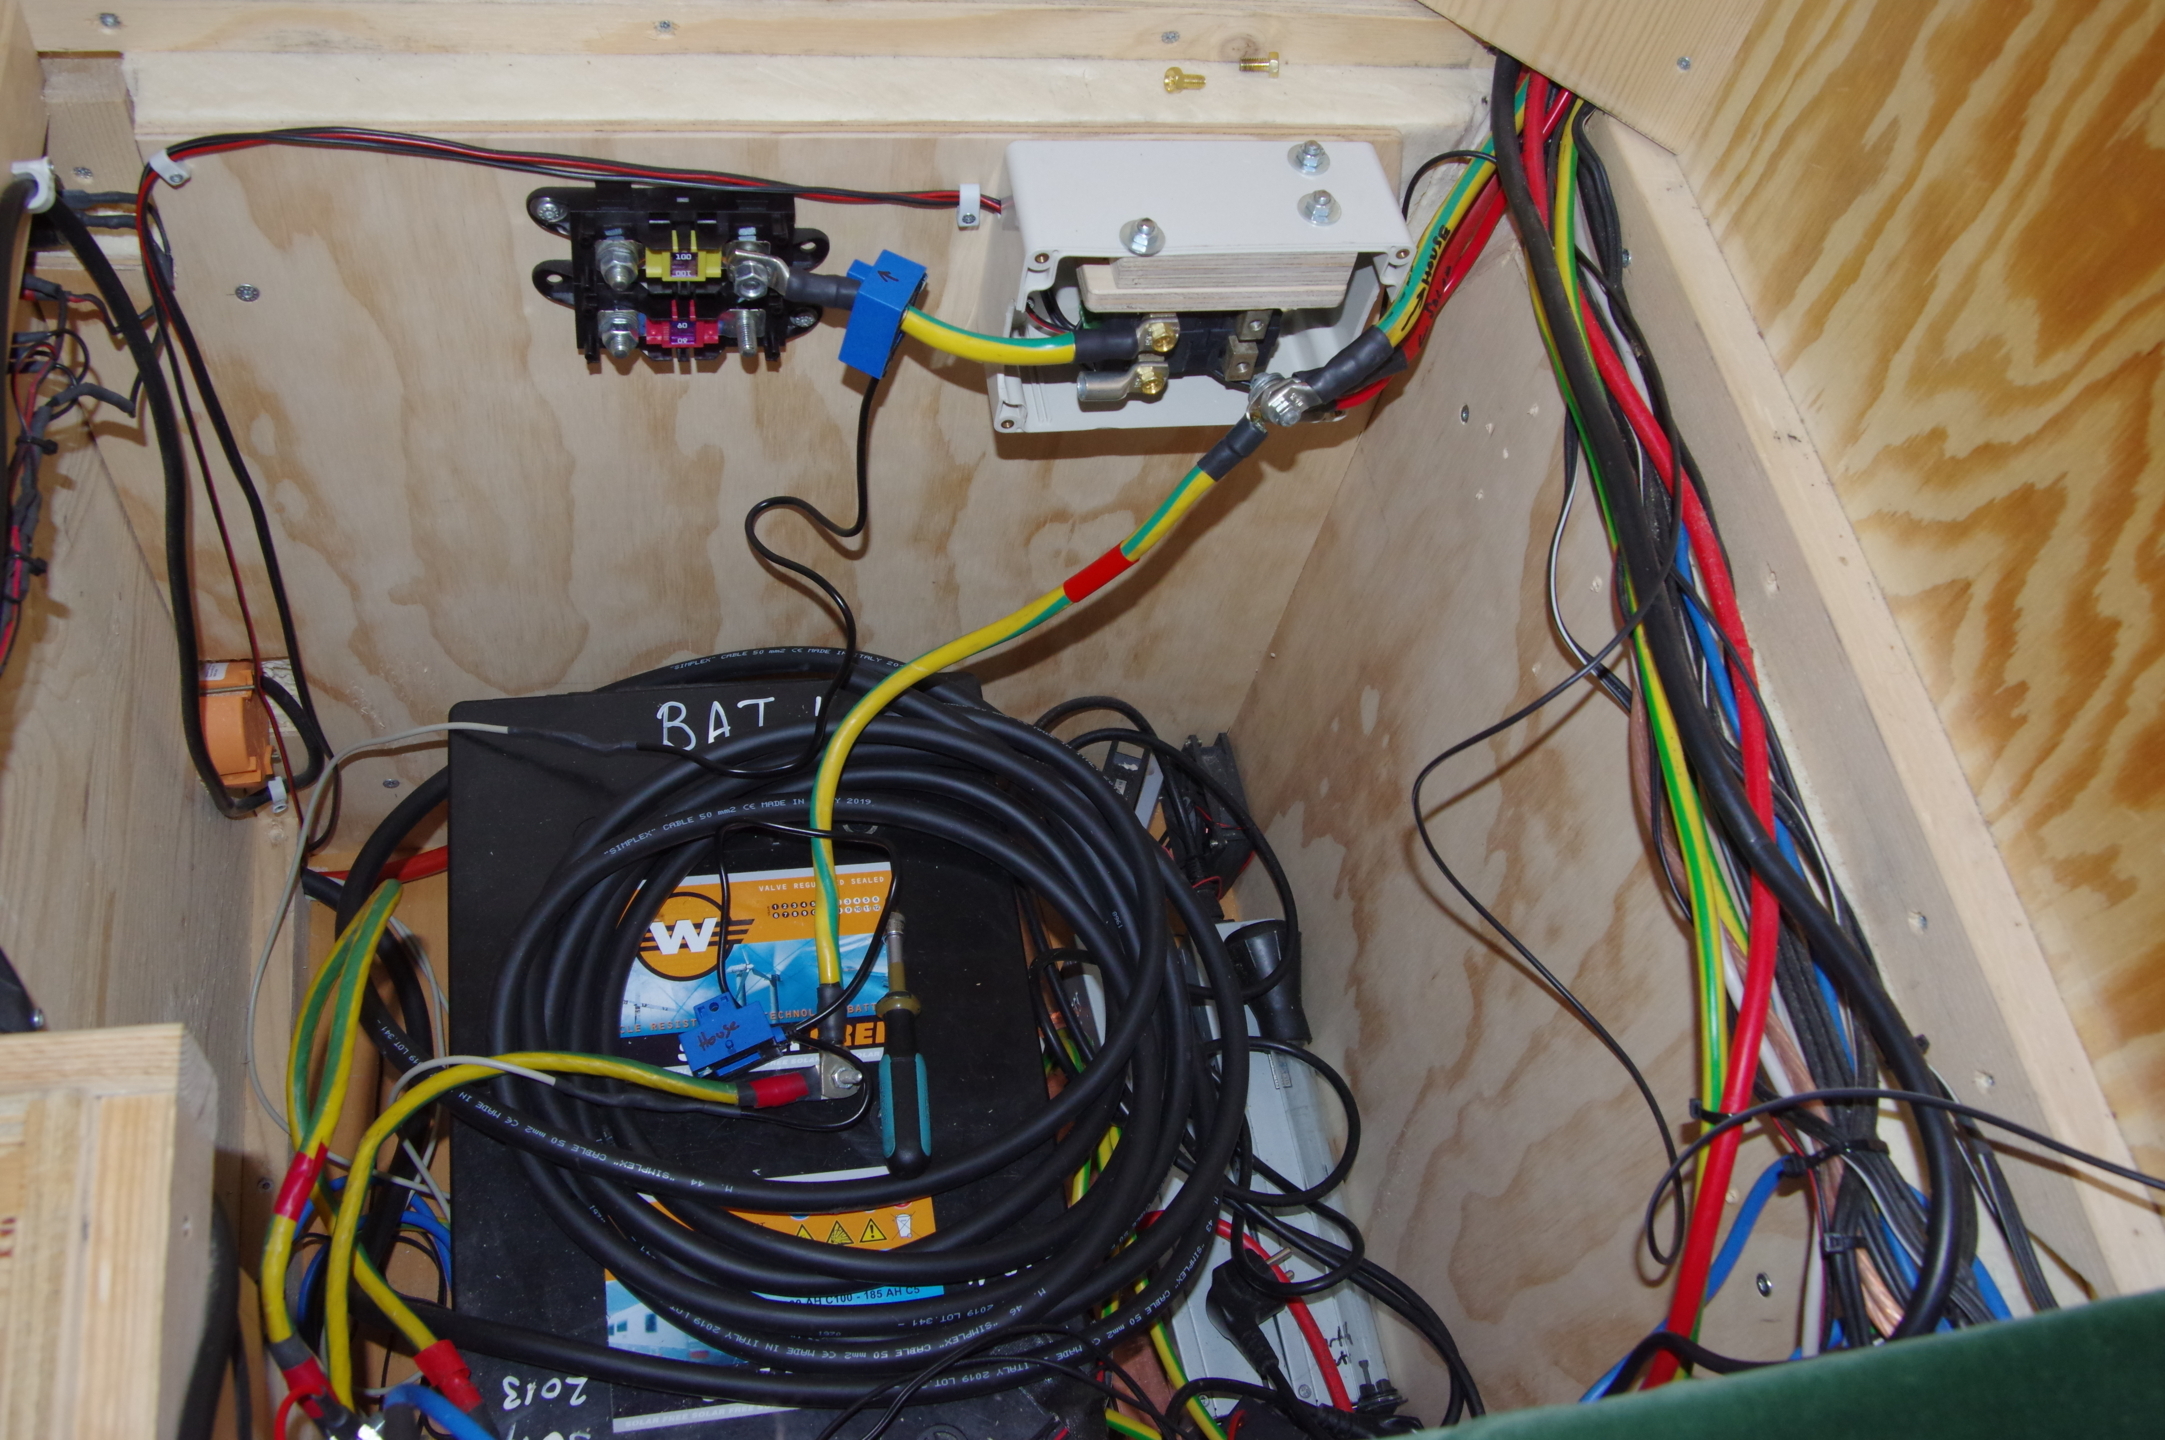
Starting to lay the 50mm2 cables for the battery and I already have the fuse mounted on the side of the battery box.
The two small black cables at the rear are going to the current counters for the BMS.
The yellow band behind the box is the end of the Spangürt that is tightened over the battery when driving to securely hold it in place
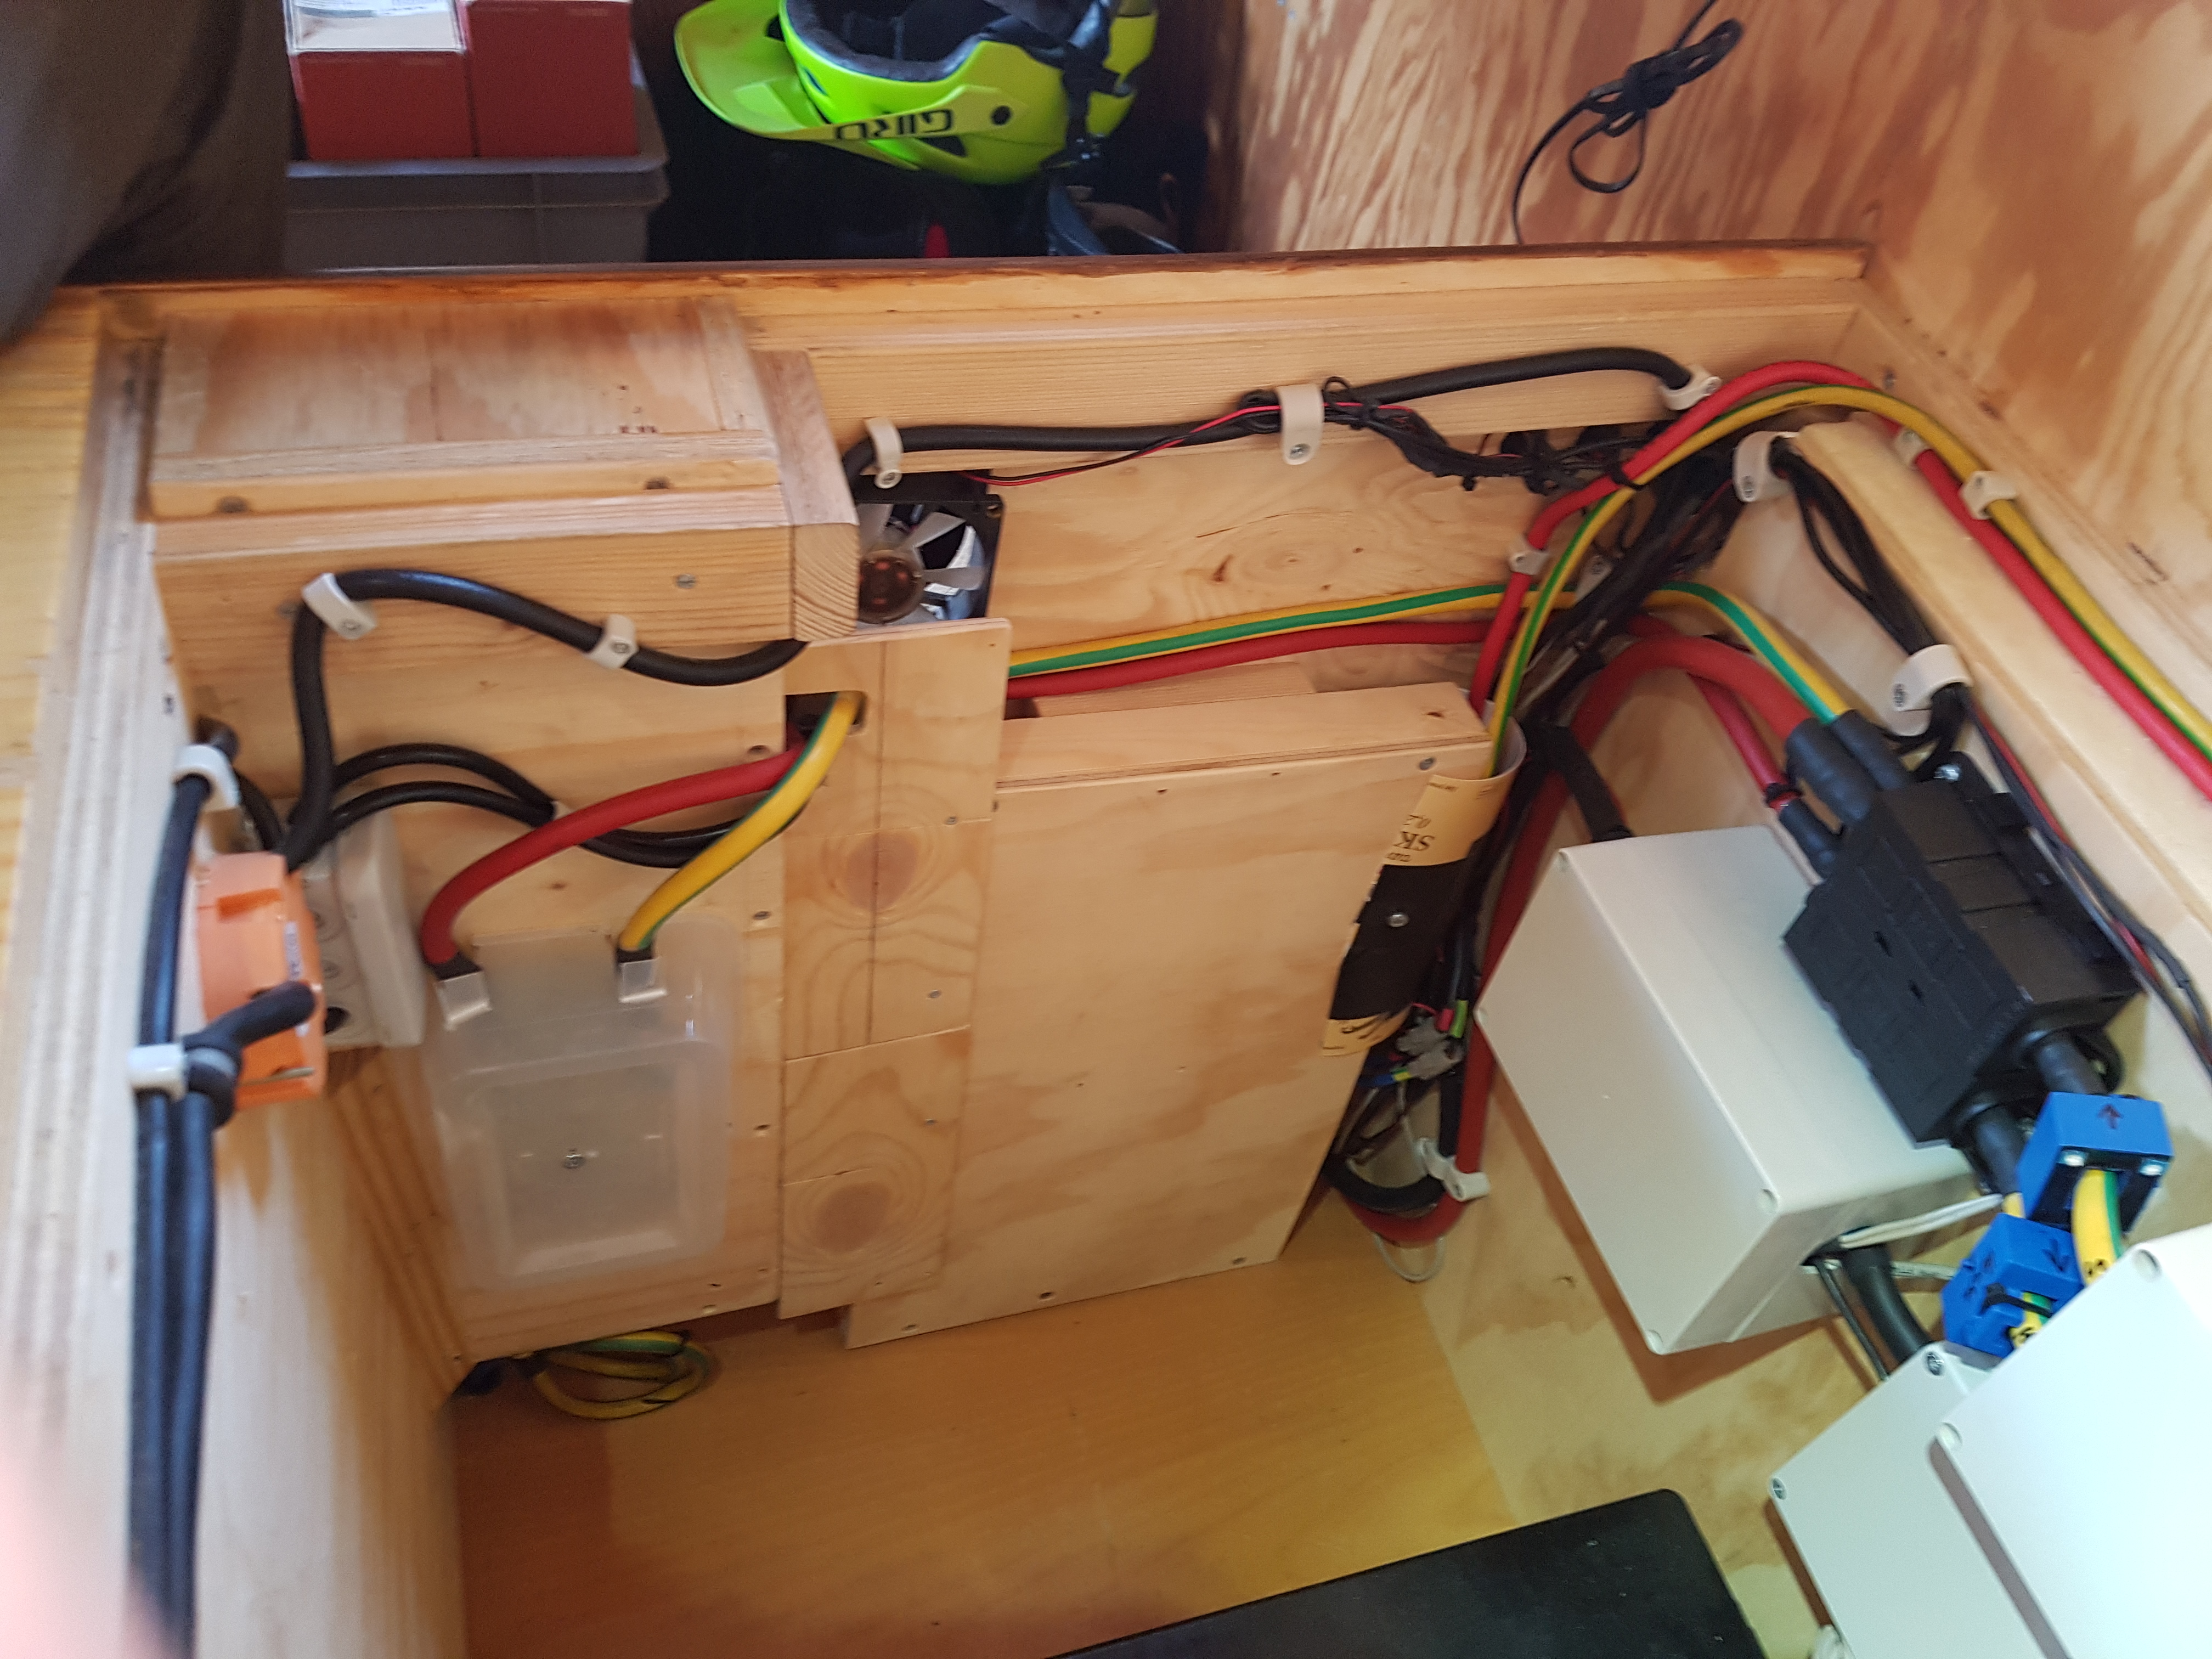
So Battery cables are now all in place and all the wiring is almost finished
I have all my House Supply going thru a Main switch, so I can turn off all consumers when I leave
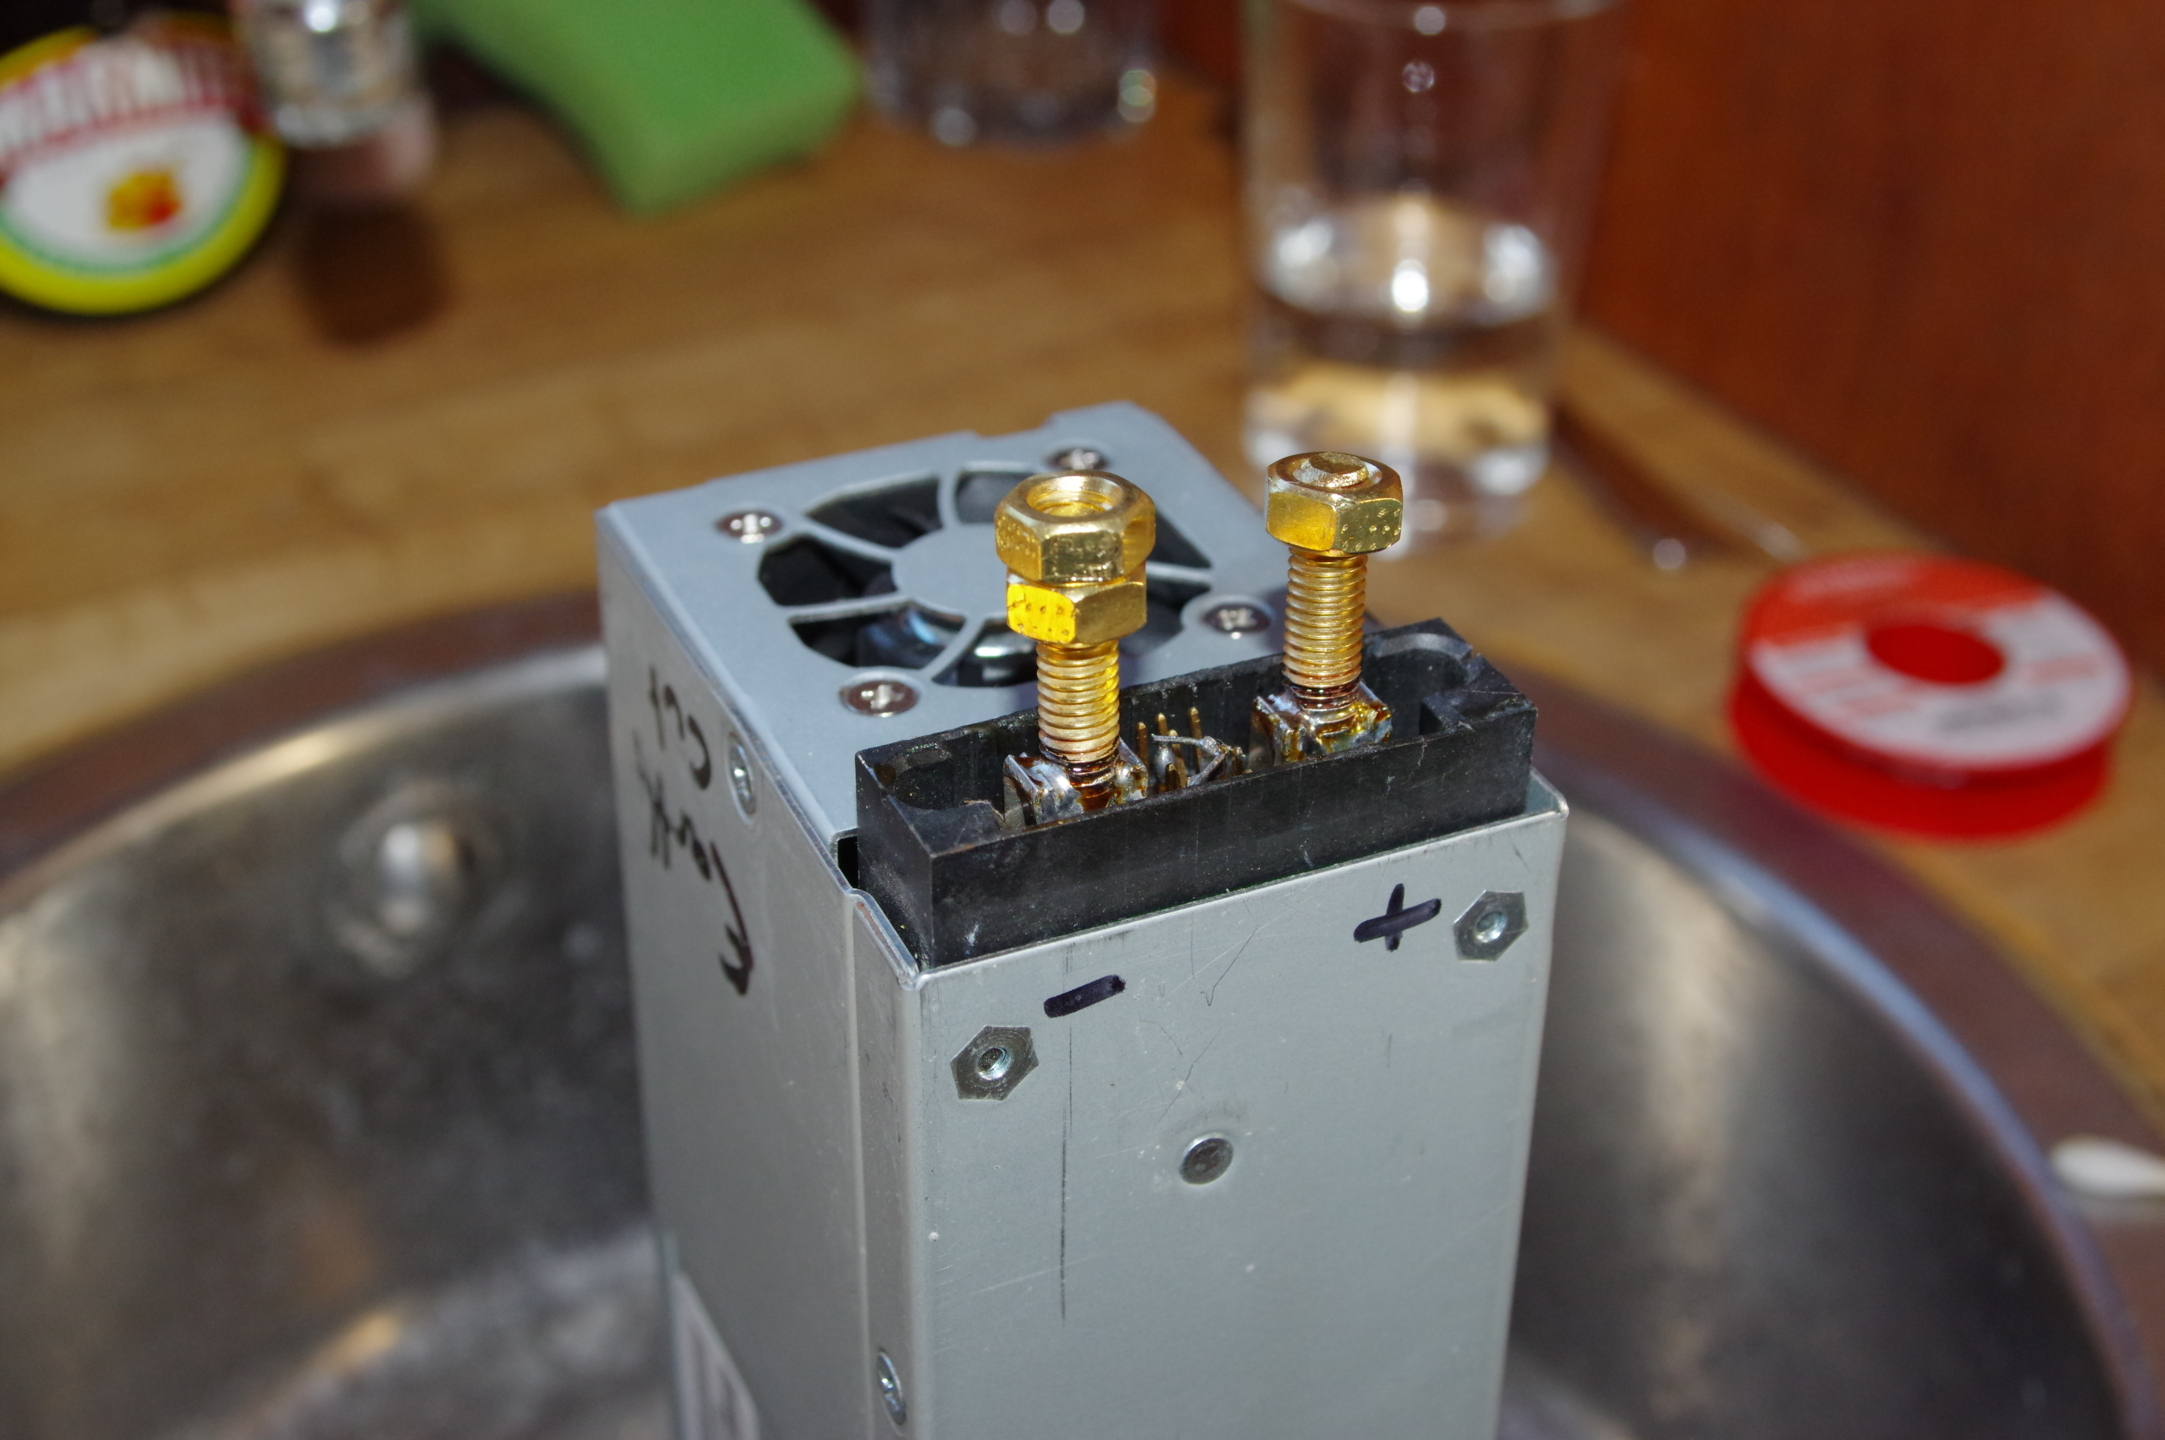
Next to make was the connections on my HP DPS-600PB Server Power Supply. I am using two of these in series to produce 24 Volt and around 47A.
I then run this into the input side of my MPPT after switching the Solar off. This is now my mains supply 230V charger!
So I cut some 8mm Brass Threaded Rod and soldered these into the plus and minus terminals.
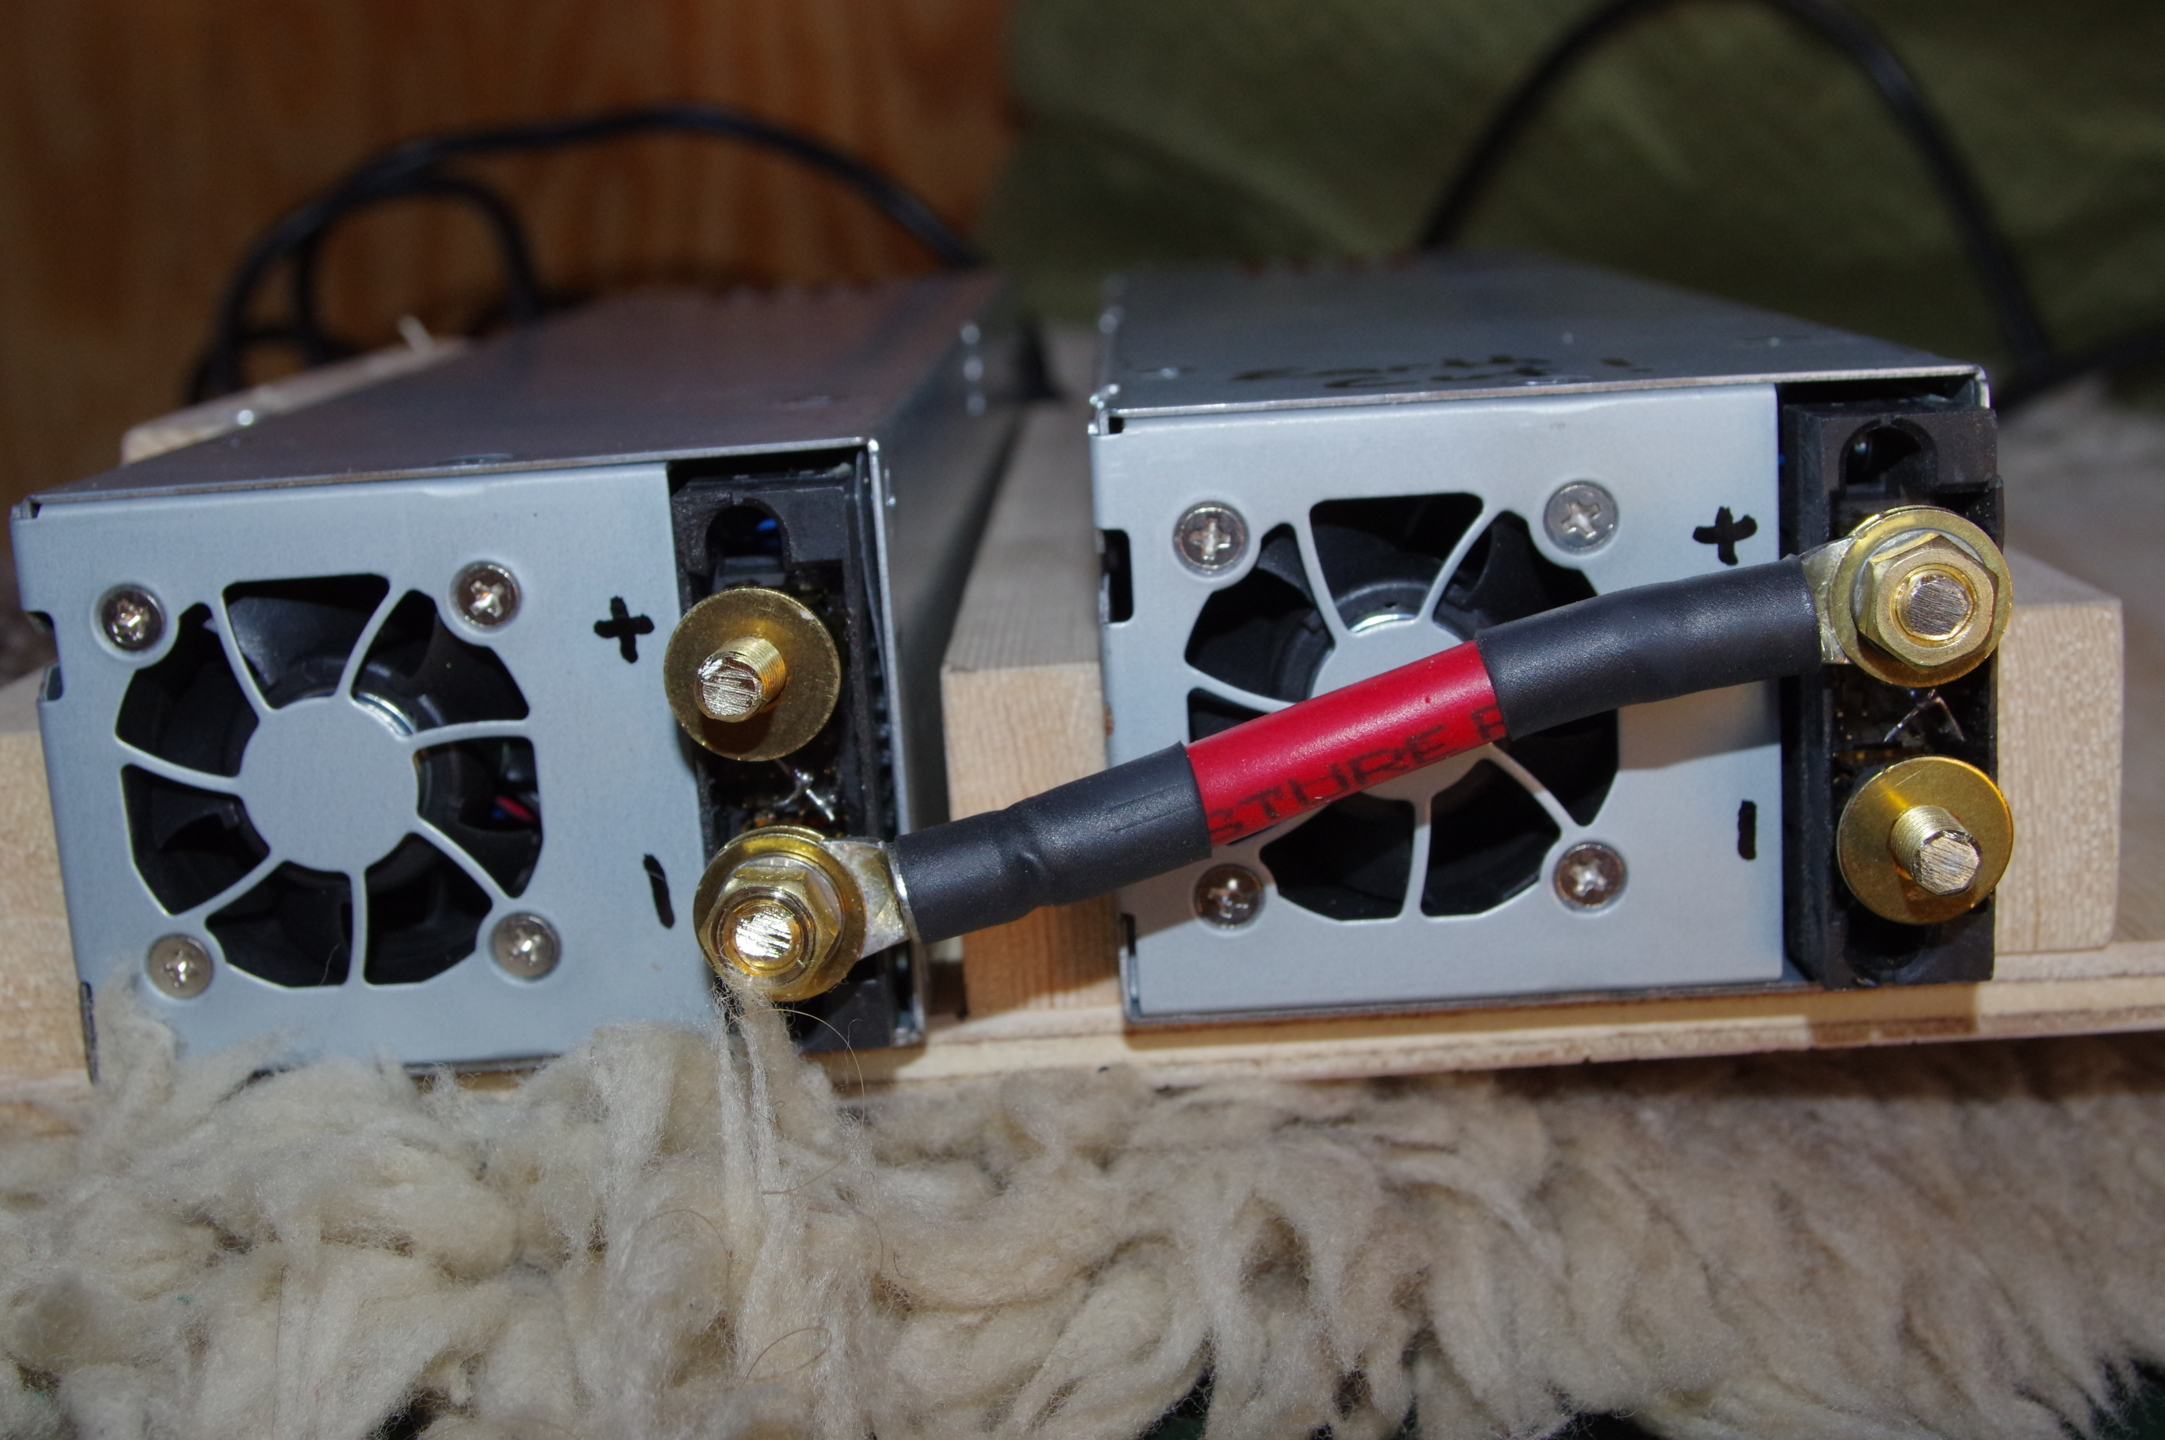
The Series bridging with the Power Supplies in their mounting frame
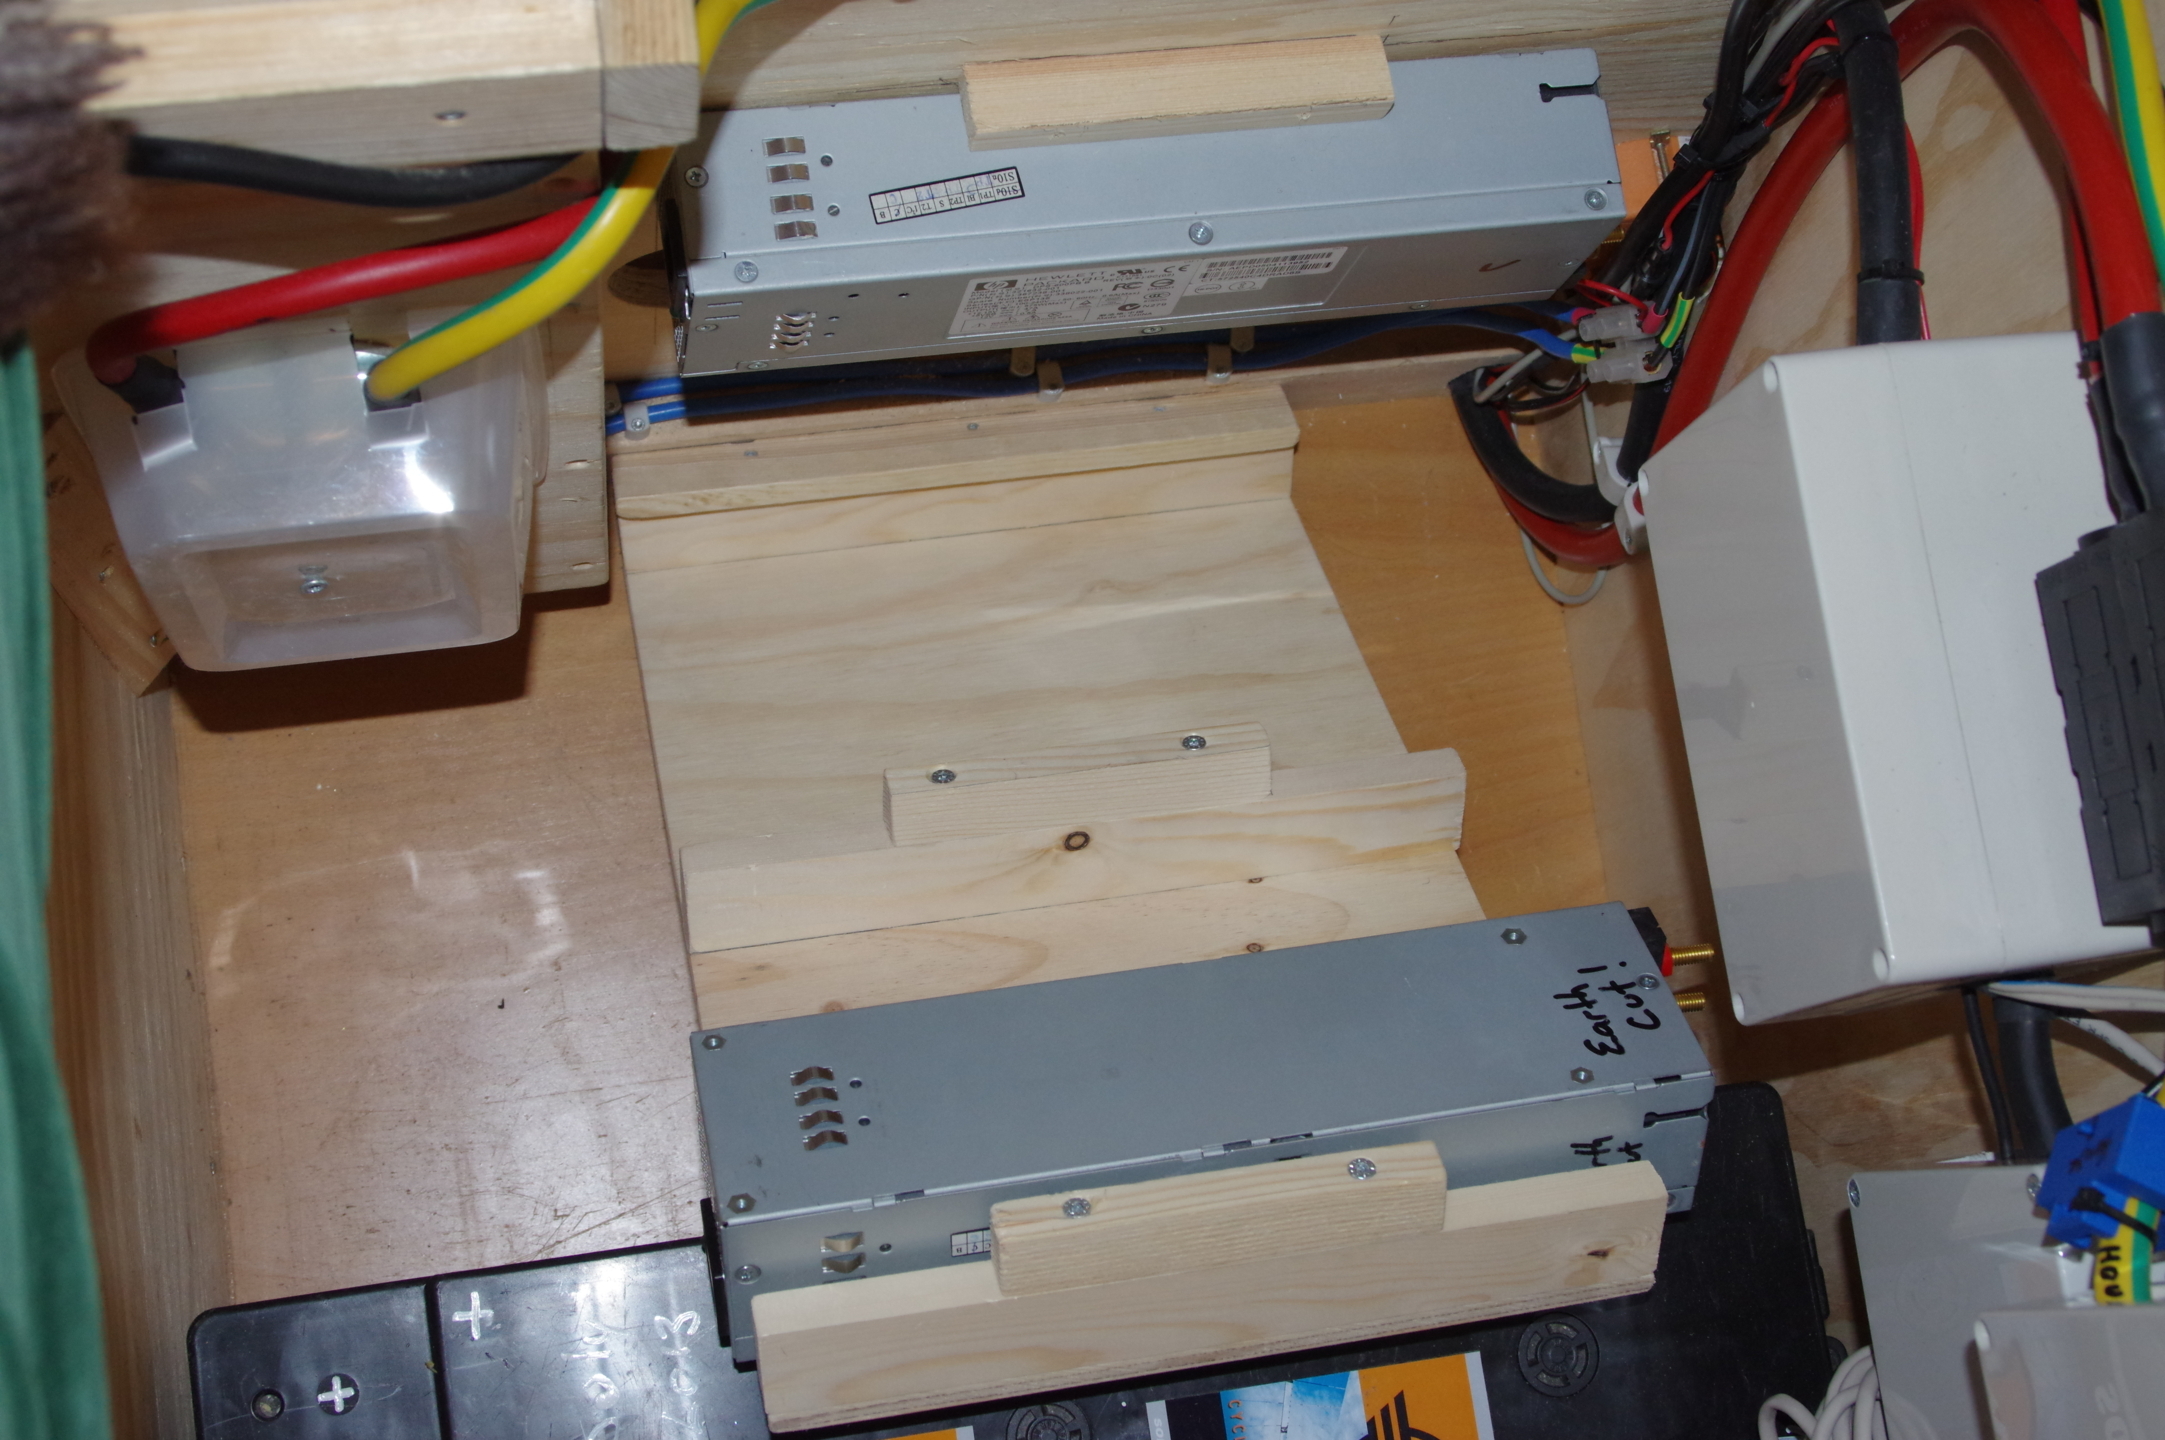
About to fix the frame and Power Supplies in place
All the wiring is finished and Ive added a box at the end of the Power Supply with a fan to extract the heat and a hole at the bottom for cool air to come in
Covers on the electric boxes and things all tidy and in order.
Boris is now happy with how tidy and organized my wiring is!
Every thing is running really well and Im super happy with the Battery and how it preforms!!!
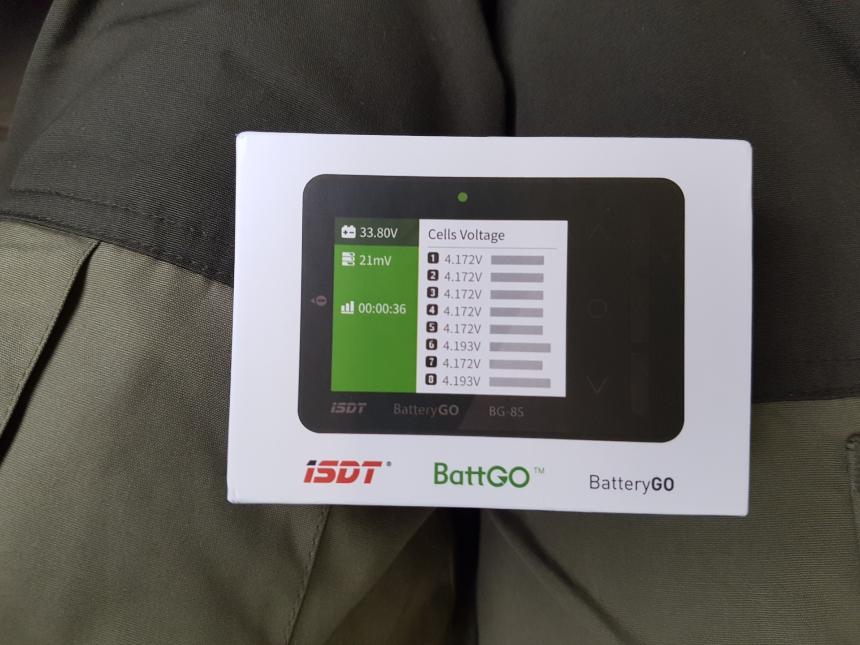
But I needed a way to monitor the Cell Voltages without having to get to the Battery every time.
So I bought an ISDT BatteryGo Cell Monitor and built this into a small fame that I mounted just behind the table seat back board.
This was because the BMS was so inaccurate with its monitoring, and was the only way to see what was really happening in the cells.
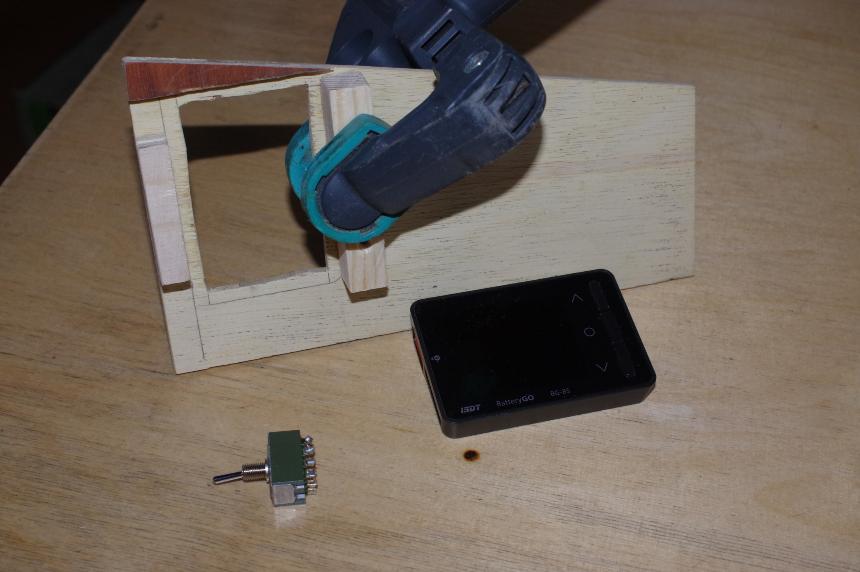
Gluing the frame that will hold the BatteryGo and the DT4P switch
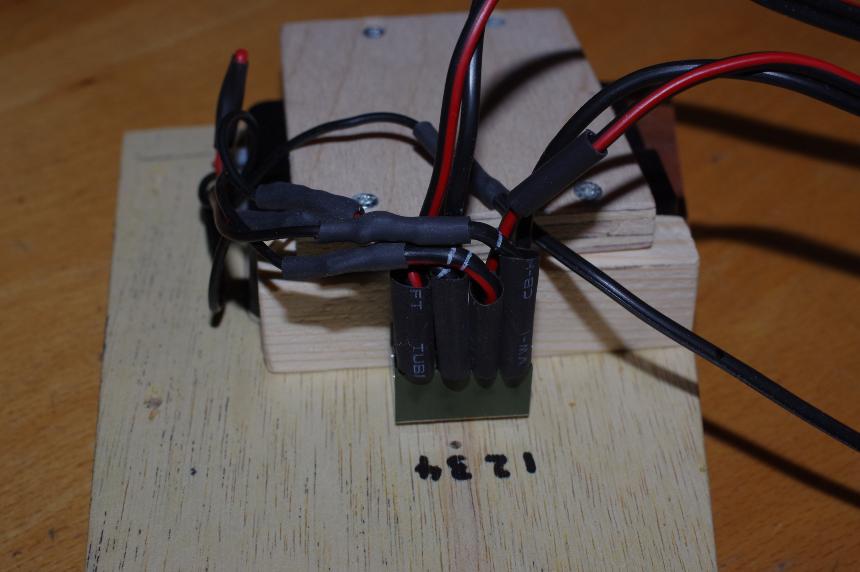
Soldering the wires from the switch to the monitor.
The wires on the middle contacts of the switch are coming from each cell positive
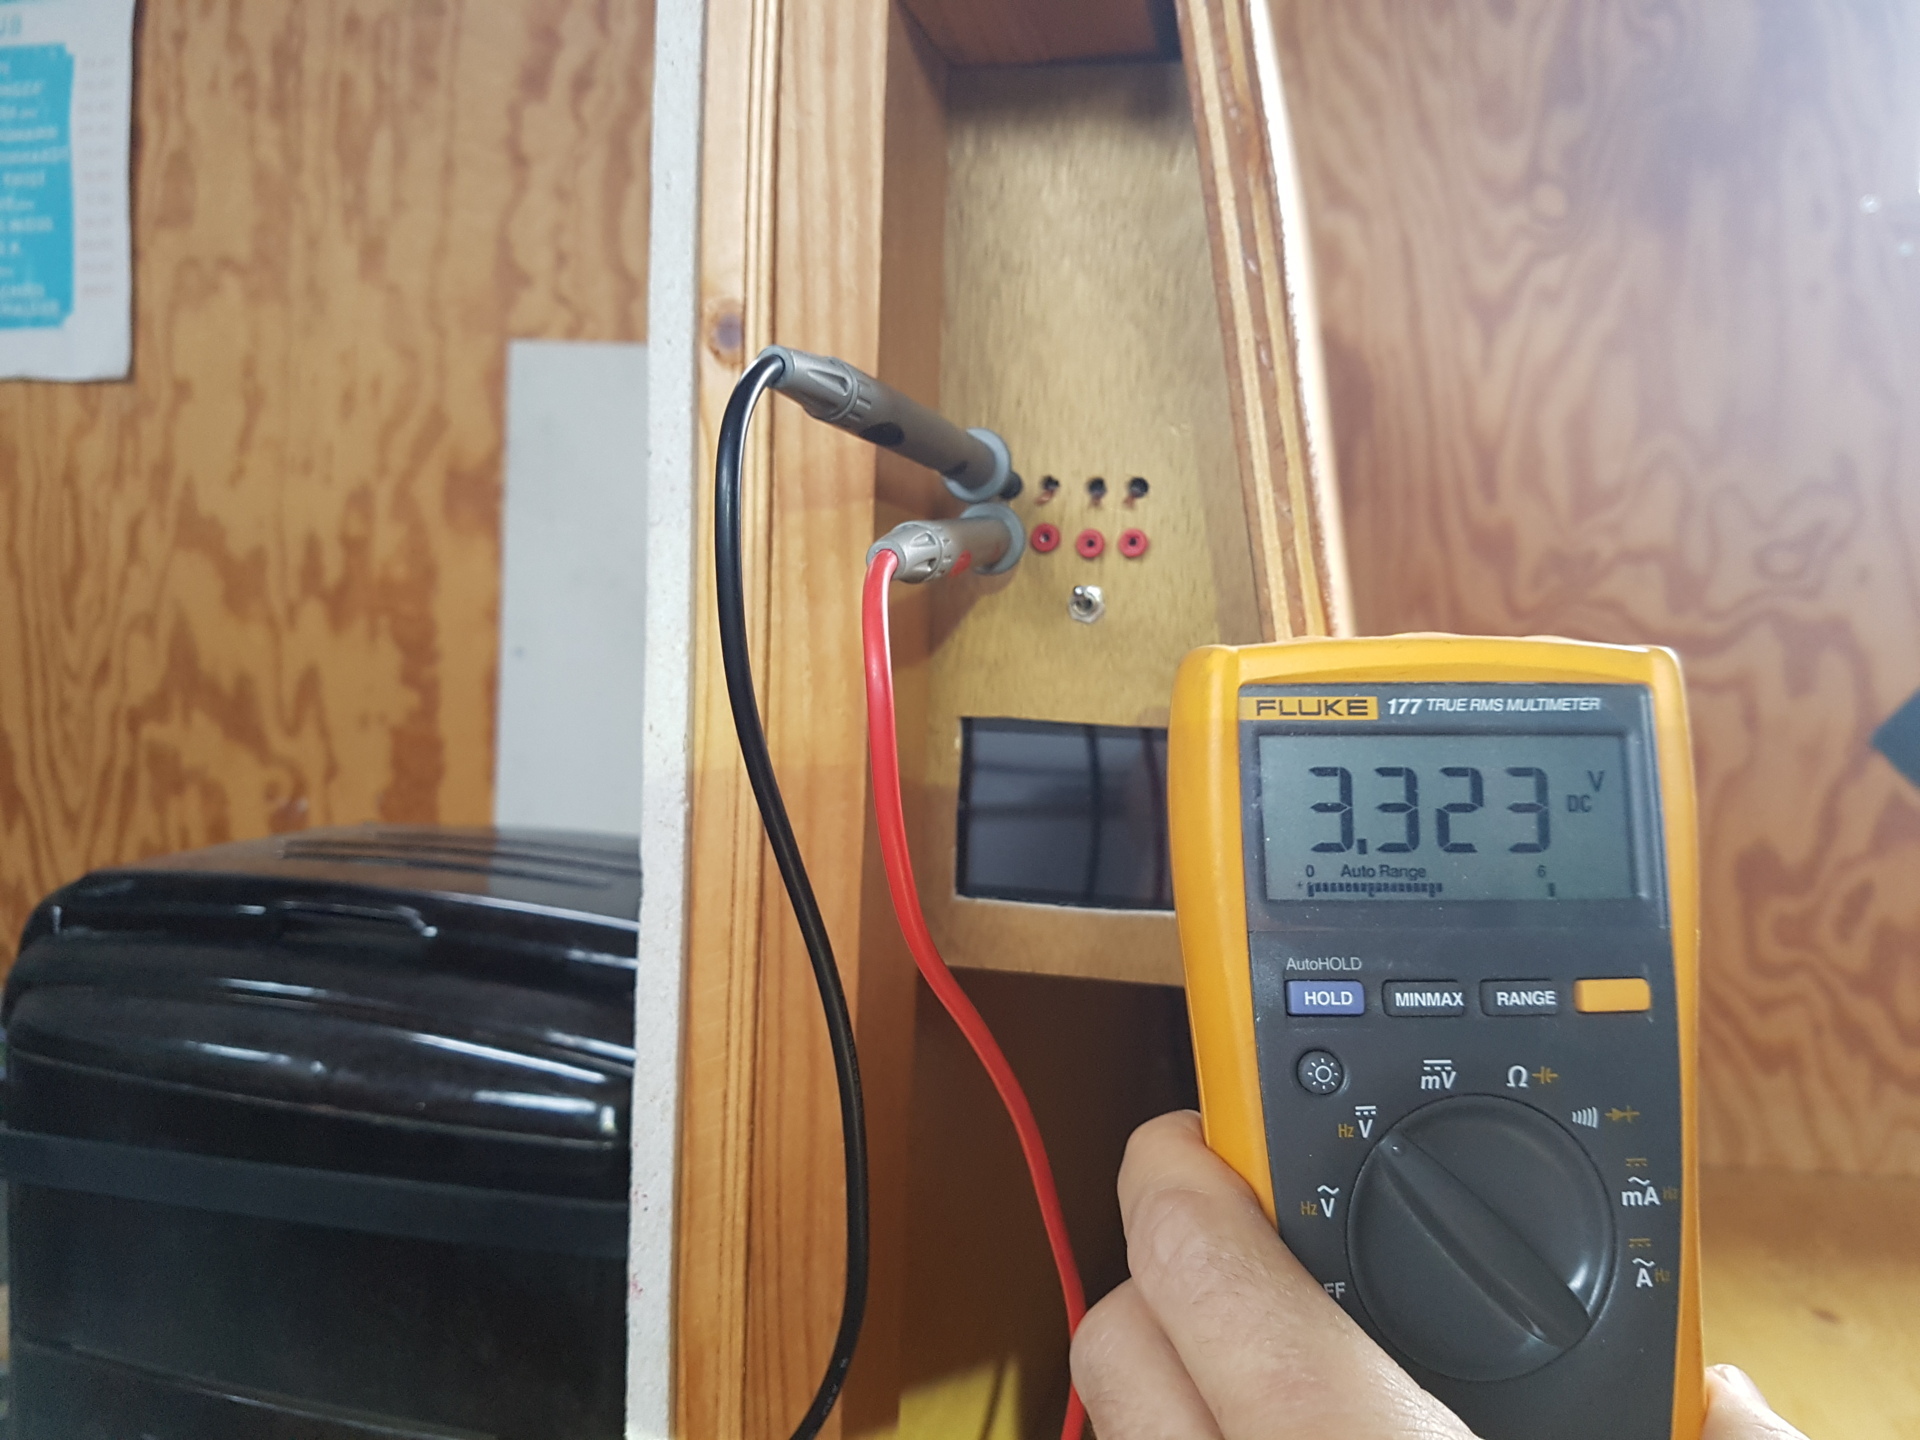
The other side of the double throw switch I wired to the red Banana Jacks, the black to the negative of each cell, so I can use my Fluke to get accurate readings as I found the BatteryGo wasnt reading exactly.
Ive got all 4 cells sitting at the same Voltage!
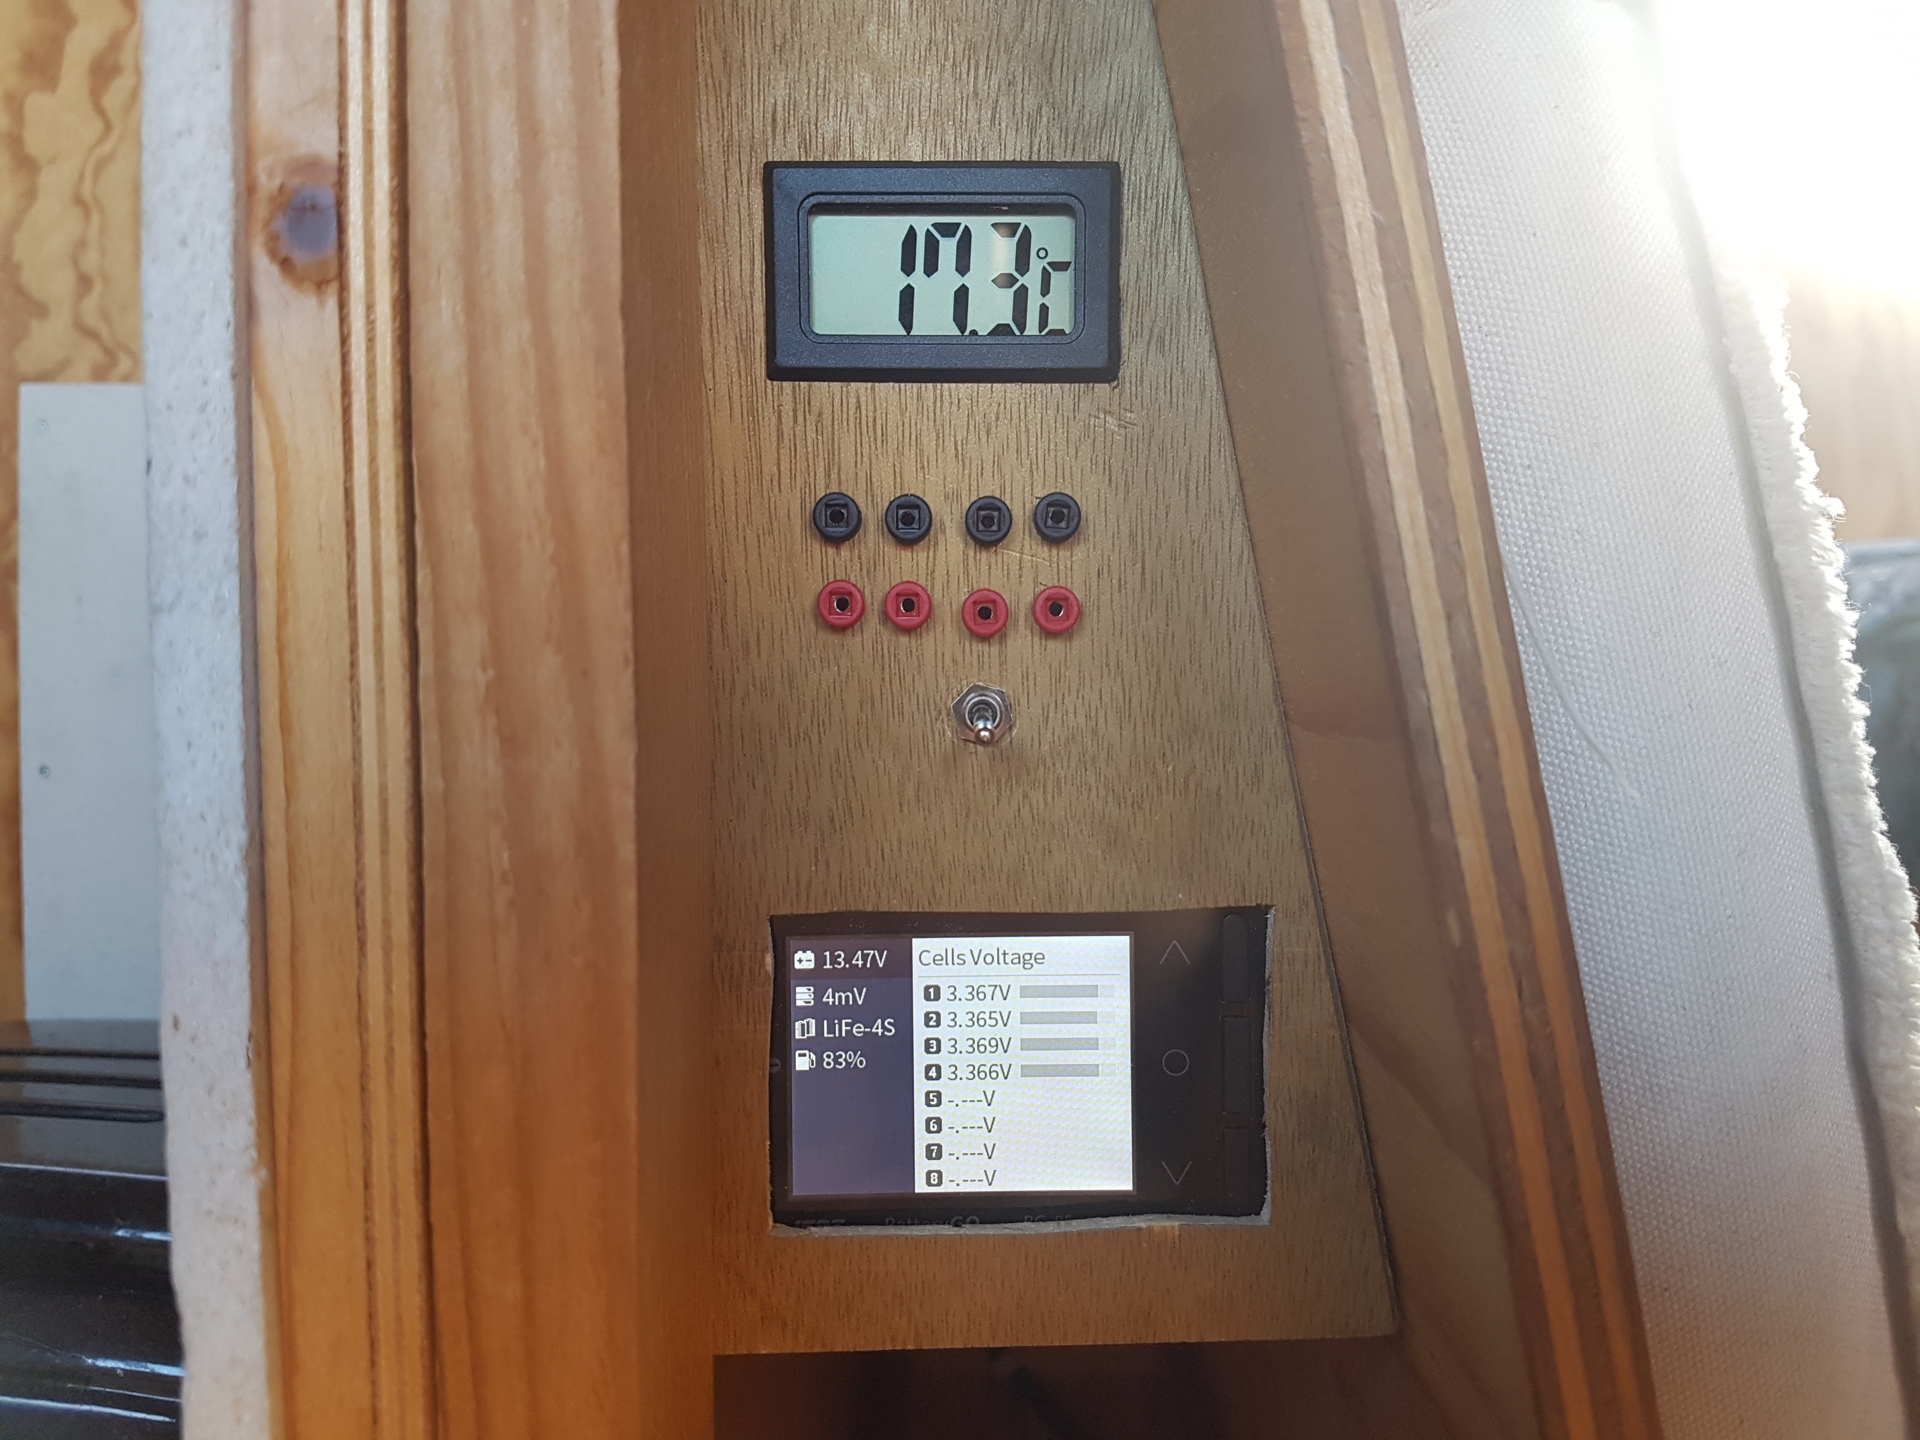
Finished it off with a thermometer that takes a reading from the middle of the battery